If you’ve been avoiding ChatGPT and all things AI, it will soon become even harder. Some might call it the rise of machines when in reality, Apple is trying to make its systems more convenient.
Apple Intelligence is a new AI feature set introduced by Apple at the Worldwide Developers Forum 2024. Let’s walk through the changes Apple Intelligence brings and learn how to integrate Apple Intelligence into existing iOS apps.
What is Apple Intelligence?
Apple Intelligence is Apple’s new intelligence system for iOS, iPadOS, and macOS. It combines artificial intelligence capabilities with personal context to offer users more convenient and relevant suggestions.
Apple Intelligence works throughout many built-in apps and can be integrated into third-party applications too. It can understand every language, generate responses and images, perform tasks across apps, and take the user's personal context into account.
Tim Cook, Apple’s CEO says: “Our unique approach combines generative AI with a user’s personal context to deliver truly helpful intelligence. And it can access that information in a completely private and secure way to help users do the things that matter most to them.”
Key Features of Apple Intelligence
Let’s look in detail at how AI will be changing Apple’s system across the apps.
Understanding and generating language
Apple Intelligence’s main feature is the ability to understand and process human language. It is based on the GPT Large Language Model (LLM), which you might know from the widely popular ChatGPT.
Apple Intelligence’s Writing Tools have three main functions:
- Rewrite: This feature allows users to generate multiple versions of their text, adjusting the tone and style to fit different contexts. Whether crafting a professional cover letter or adding a touch of humor to a party invitation, Rewrite helps users tailor their messages to suit their needs.
- Proofread: With this tool, users receive suggestions to improve grammar, word choice, and sentence structure. It not only highlights potential errors but also provides explanations for each suggestion, enabling users to make informed decisions about their edits.
- Summarize: Users can select portions of text to be condensed into a brief summary. This can be formatted as a paragraph, bulleted list, or table, making it easier to grasp essential points without sifting through lengthy content.
For example, when composing an email, users can access the Writing Tools menu to select either Proofread or Rewrite to enhance their text. In the Notes app, selecting the Summarize tool allows users to distill their notes on a topic into a more concise format.
In Mail, Priority Messages highlights the most urgent emails at the top of the inbox, ensuring that critical communications like last-minute invitations or travel documents are readily visible. The Smart Reply feature offers quick response suggestions and helps identify questions in emails for comprehensive replies.
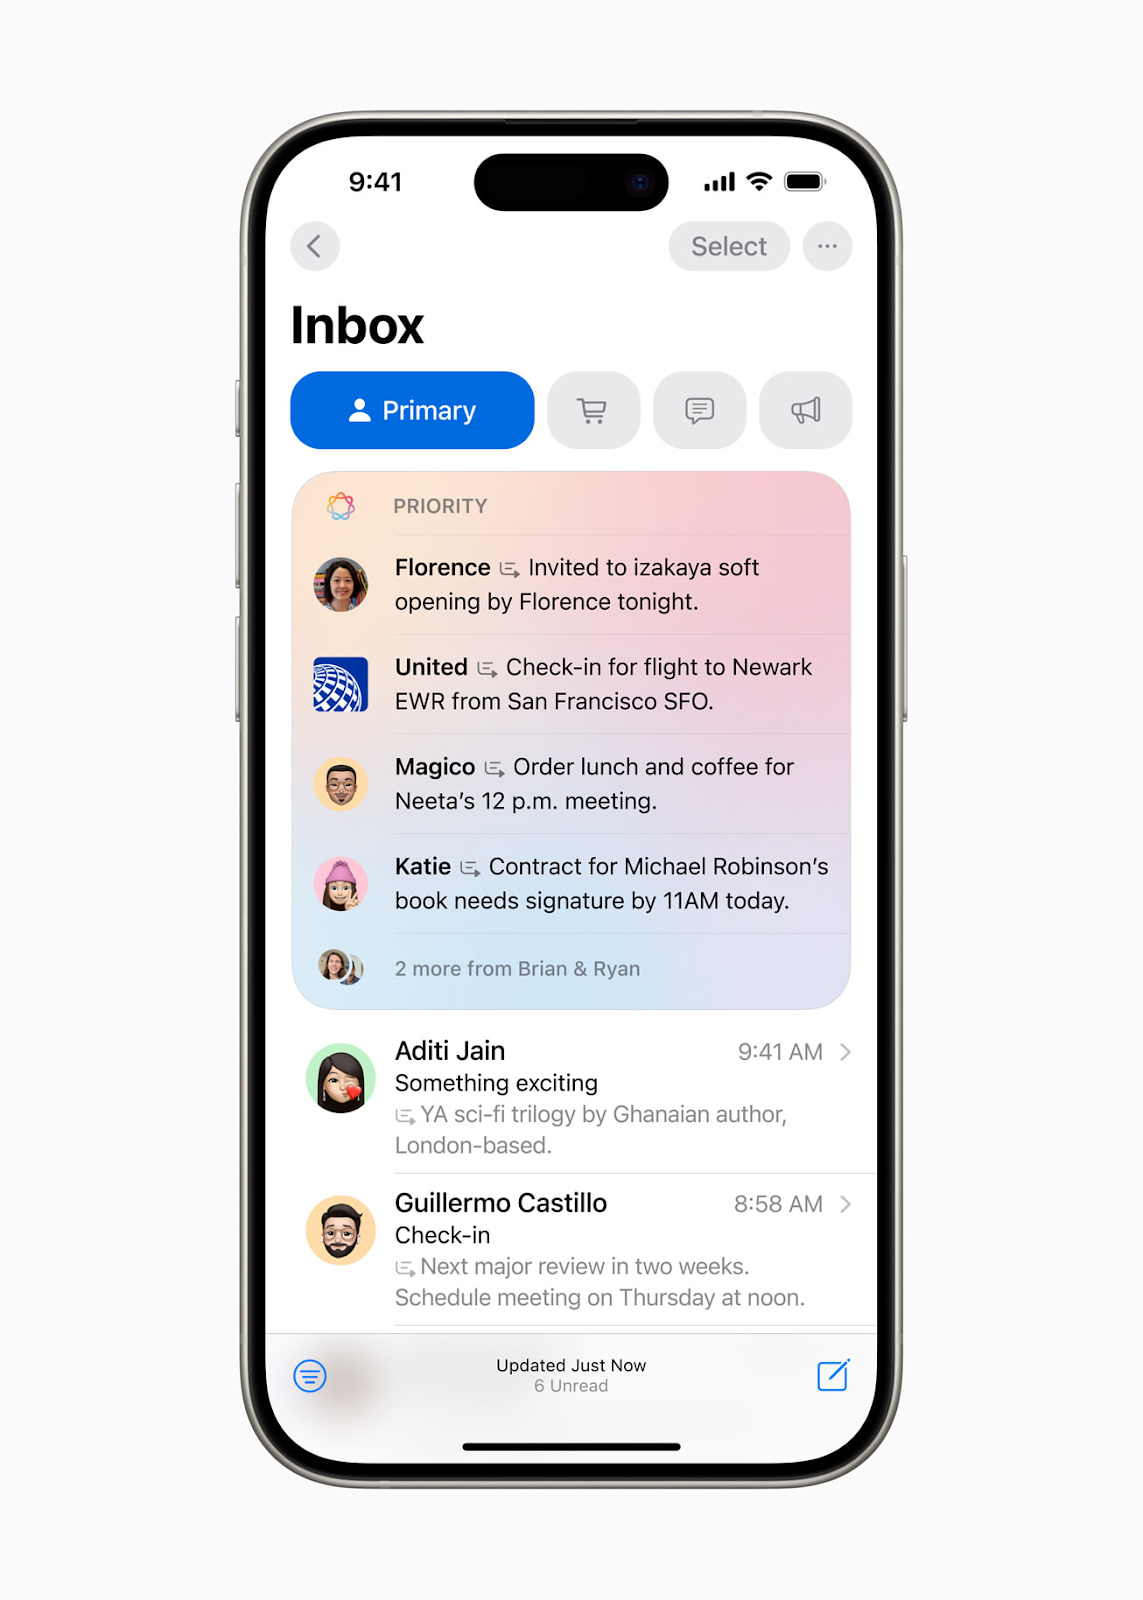

In Notifications, Priority Notifications and summaries make it easier to stay informed by surfacing key details directly on the Lock Screen. Users can also activate Reduce Interruptions, a new Focus mode that filters out non-essential notifications to help maintain concentration on current tasks.
Additionally, in the Notes and Phone apps, users can record and transcribe audio. During calls, participants are notified if recording is in progress, and once the call ends, Apple Intelligence generates a summary of the conversation to capture important points.
Image Playground
Another big update Apple Intelligence brings is a new image-creation tool called Image Playground. With Image Playground, users can quickly generate fun images using three different styles:
- Animation
- Illustration
- Sketch
Integrated into apps like Messages and available as a standalone app, Image Playground makes experimenting with visuals simple and engaging. Plus, since all image processing happens directly on the device, users can create as many images as they like without any constraints.
Here’s what Image Playground offers:
- Concept selection: Users can choose from various categories like themes, costumes, accessories, and locations to design their images. They can also type in a description or select someone from their photo library to personalize their creation.
- Style choices: Users pick their favorite style from Animation, Illustration, or Sketch to match their desired look.
In Messages, Image Playground enhances conversations by suggesting relevant image ideas based on the chat context.
In the Notes app, users can use the new Image Wand from the Apple Pencil tool palette to turn rough sketches into polished images. The tool can even generate images by interpreting the surrounding context in an empty space.
Image Playground is also accessible in other apps like Keynote, Freeform, Pages, and any third-party apps that support the new Image Playground API.
Genmoji generation
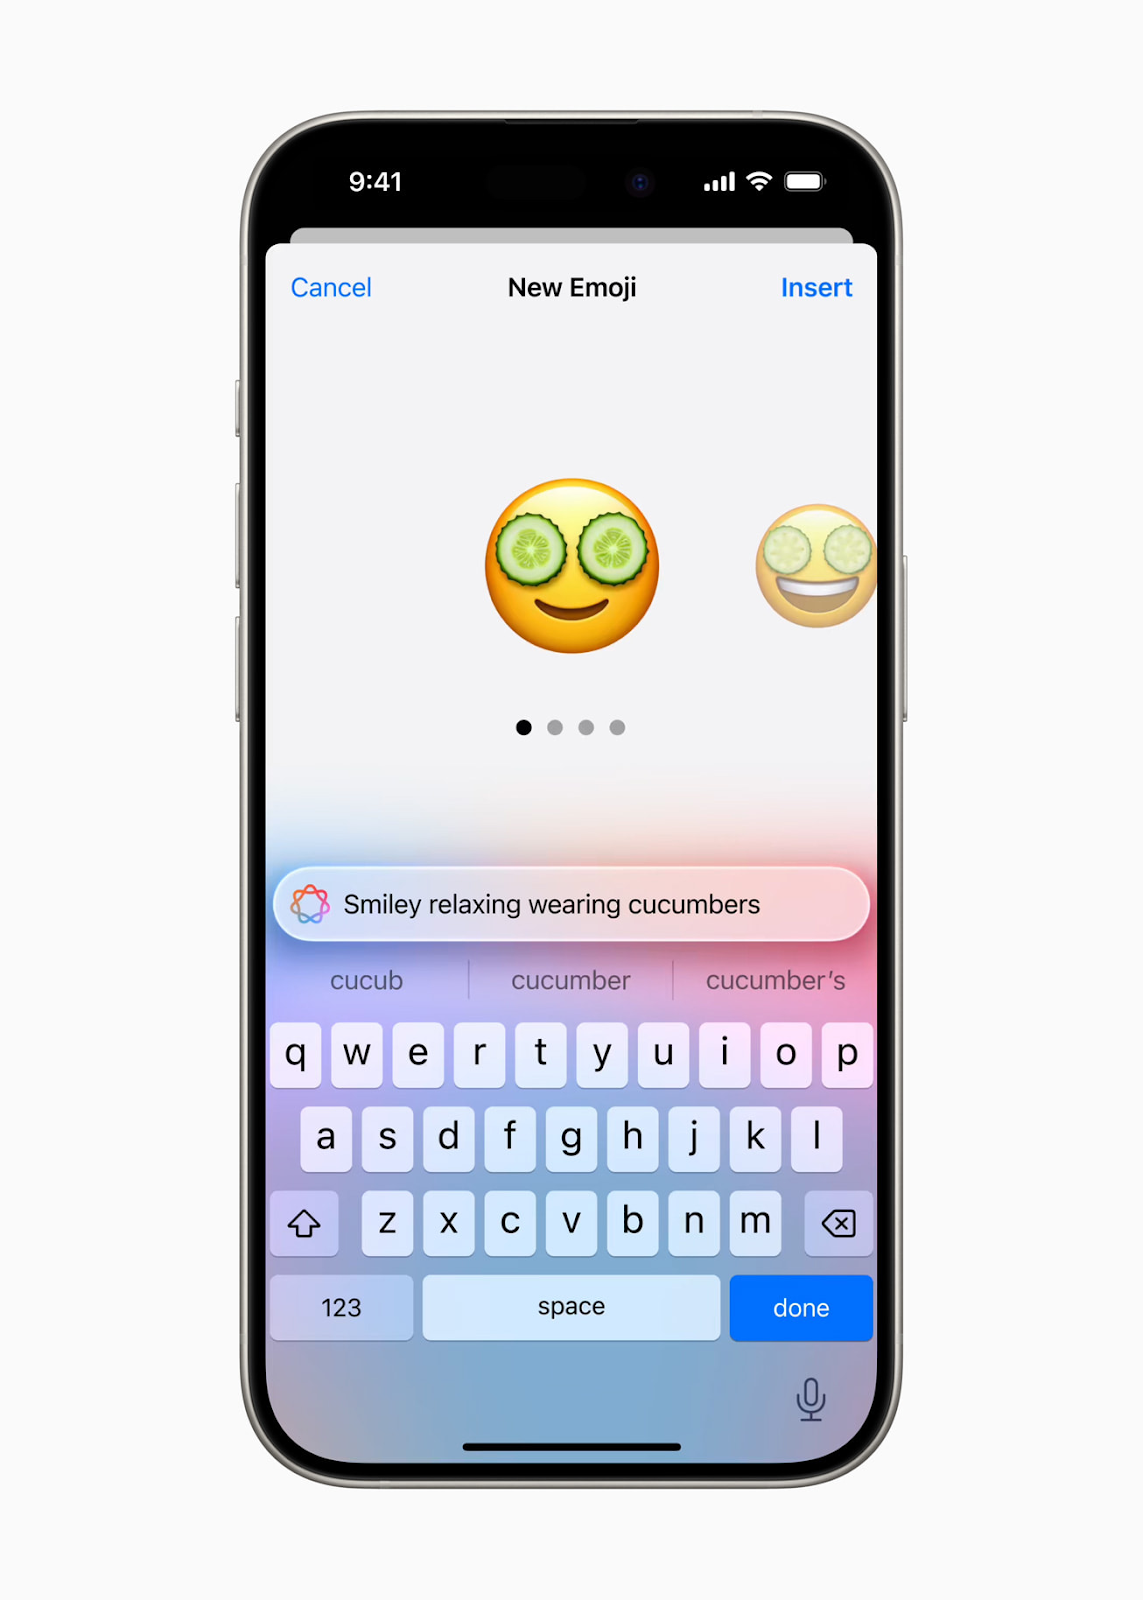
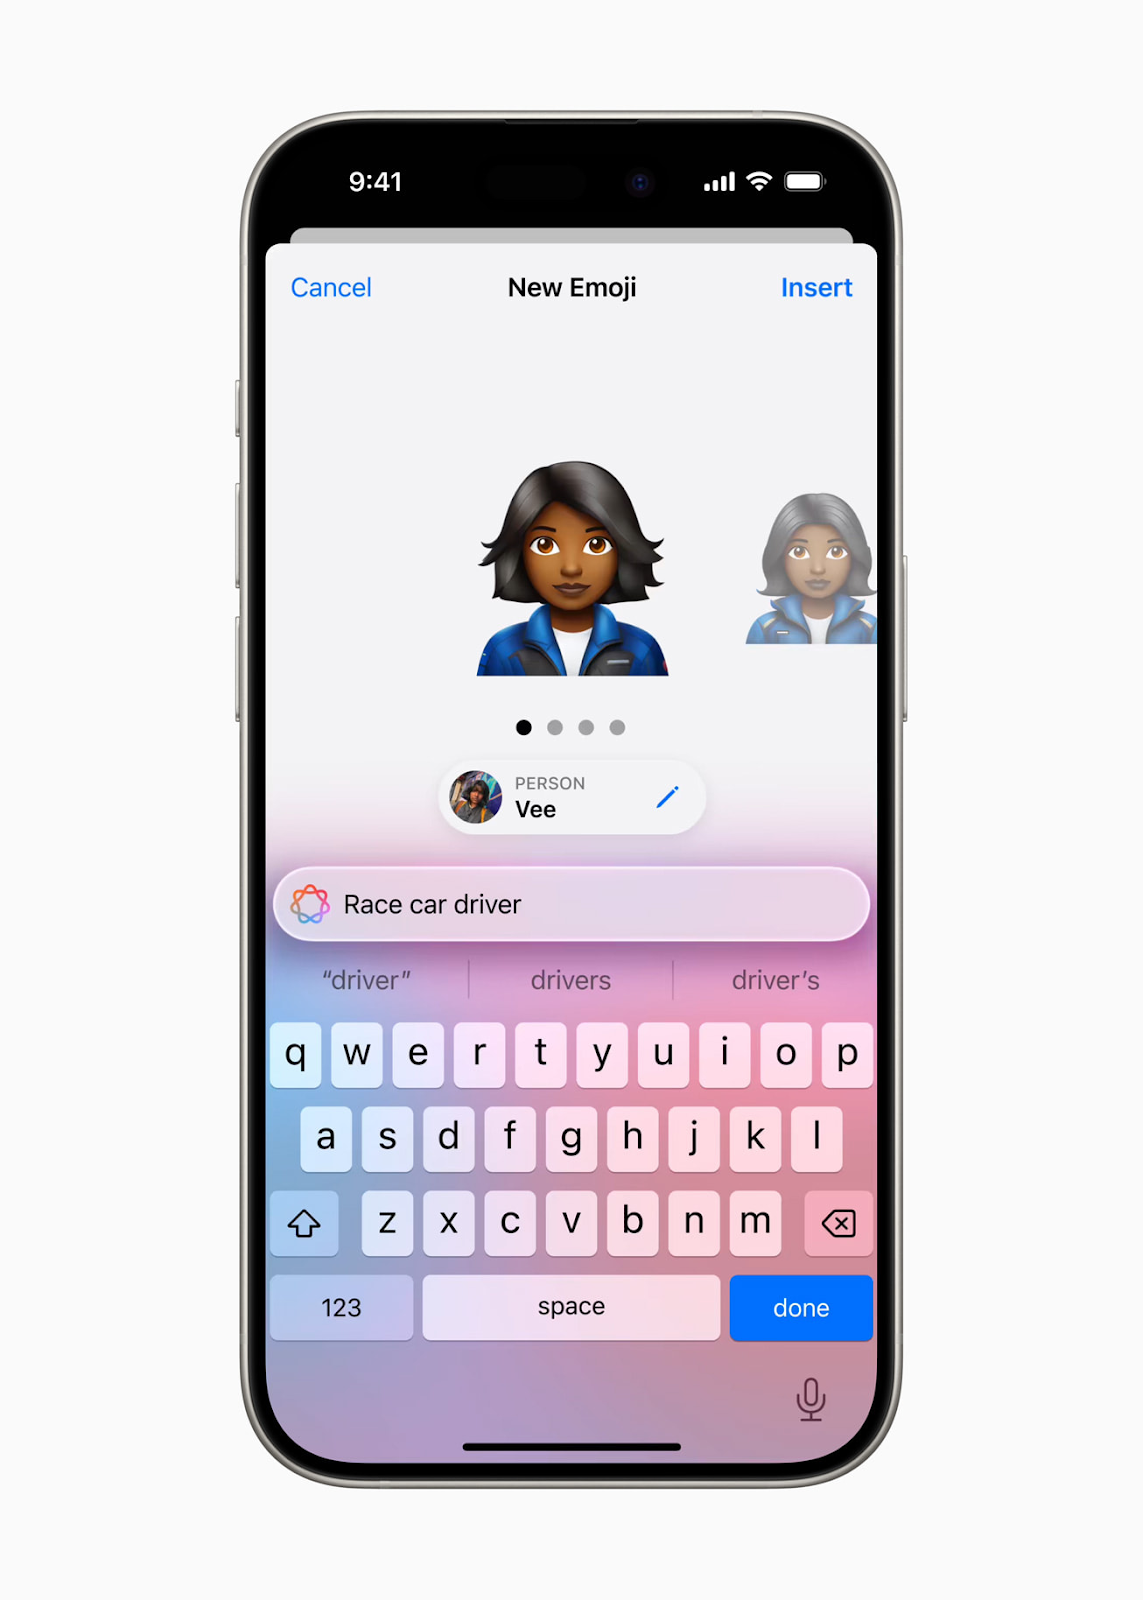
Apple is well-known for its use of personalized emojis. Apple Intelligence is taking it even further as users can now craft unique Genmojis by typing a description, instantly generating a custom emoji that fits their needs.
Additionally, users can create Genmojis of their friends and family using their photos. Just like regular emojis, these custom creations can be inserted into messages, used as stickers, or added as reactions in Tapbacks.
Intelligent photo search
Apple Intelligence makes finding photos and videos easier than ever. Users can search for images using natural language, such as “Monica walking the dog” or “birthday party with balloons.” Searching within videos is also enhanced, allowing users to locate specific moments quickly. Plus, the new Clean Up tool helps remove distracting background objects from photos without affecting the main subject.
With Memories, users can effortlessly craft their ideal story by typing in a description. Apple Intelligence uses advanced language and image recognition to select the best photos and videos that match the description. It then arranges these elements into a cohesive storyline with chapters based on themes identified from the images and assembles them into a movie complete with a narrative arc. Users also receive song suggestions from Apple Music to enhance their memory. As always, user privacy is paramount, with all data remaining private and stored solely on the device.
Siri’s new functionality
Siri, who is always on guard to help a user, became more multi-functional, too. It now takes your personal context into account and understands natural language even better. Users don’t have to worry about mispronouncing or stumbling over words because Siri can guess what you mean. It also got a redesign, too.
Siri now takes your personal context into account and understands natural language even better. Users don’t have to worry about mispronouncing or stumbling over words because Siri can guess what you mean. It also got a redesign
Siri's onscreen awareness allows it to interact with content in various apps. For instance, if a friend shares a new address via Messages, users can instruct Siri to add it to their contact list. Siri is also capable of handling hundreds of new actions across both Apple and third-party apps. For example, users can ask Siri to retrieve an article from their Reading List or send photos from yesterday to a friend, and Siri will handle the task seamlessly.
Additionally, Siri provides personalized intelligence based on the user's data. It can locate and play a podcast recommended by a friend without needing the user to remember where it was mentioned. It can also track real-time flight information to answer queries like, “When is mom’s flight landing?” making it a truly helpful companion in everyday tasks.
AI privacy guidelines
Apple Intelligence combines a deep understanding of personal context with robust privacy safeguards. Central to its design is on-device processing, where many features operate entirely within the user's device, ensuring data stays private.
For more demanding tasks that require additional computational power, Apple employs Private Cloud Compute. This method allows Apple Intelligence to scale up its capabilities by using powerful, server-based models while preserving user privacy. These models run on Apple silicon servers, which are built to ensure that user data remains secure and is not stored or exposed.
Apple also prioritizes transparency and security with Private Cloud Compute. The code on these servers is available for independent review, and the system uses cryptographic methods to ensure devices only connect to servers after their software has been publicly vetted. This approach guarantees that user data is protected while benefiting from advanced processing capabilities.
Chat-GPT across apps and platforms
Apple is bringing ChatGPT integration to iOS 18, iPadOS 18, and macOS Sequoia, allowing users to seamlessly access its advanced expertise and image and document understanding capabilities directly within their Apple devices.
Siri can now leverage ChatGPT's knowledge when it benefits the user. Before sending any questions, documents, or photos to ChatGPT, users are prompted for their approval. Siri then delivers the responses directly, making the process smooth and efficient.
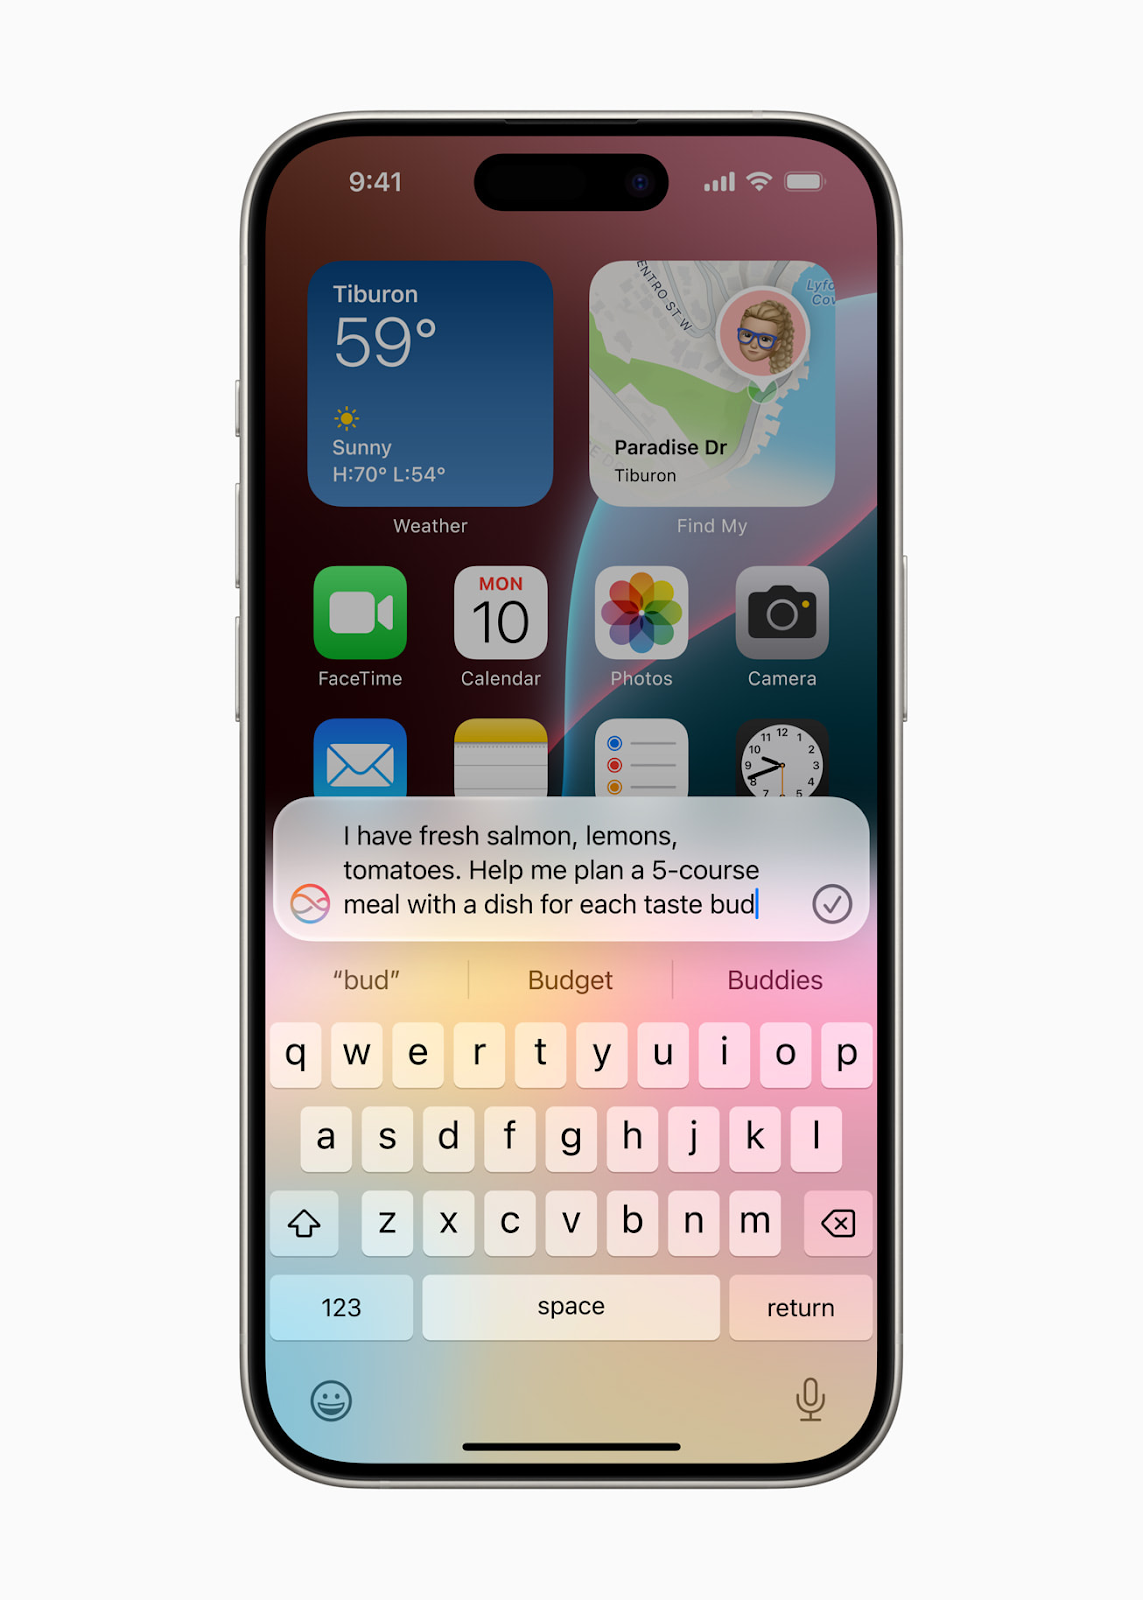
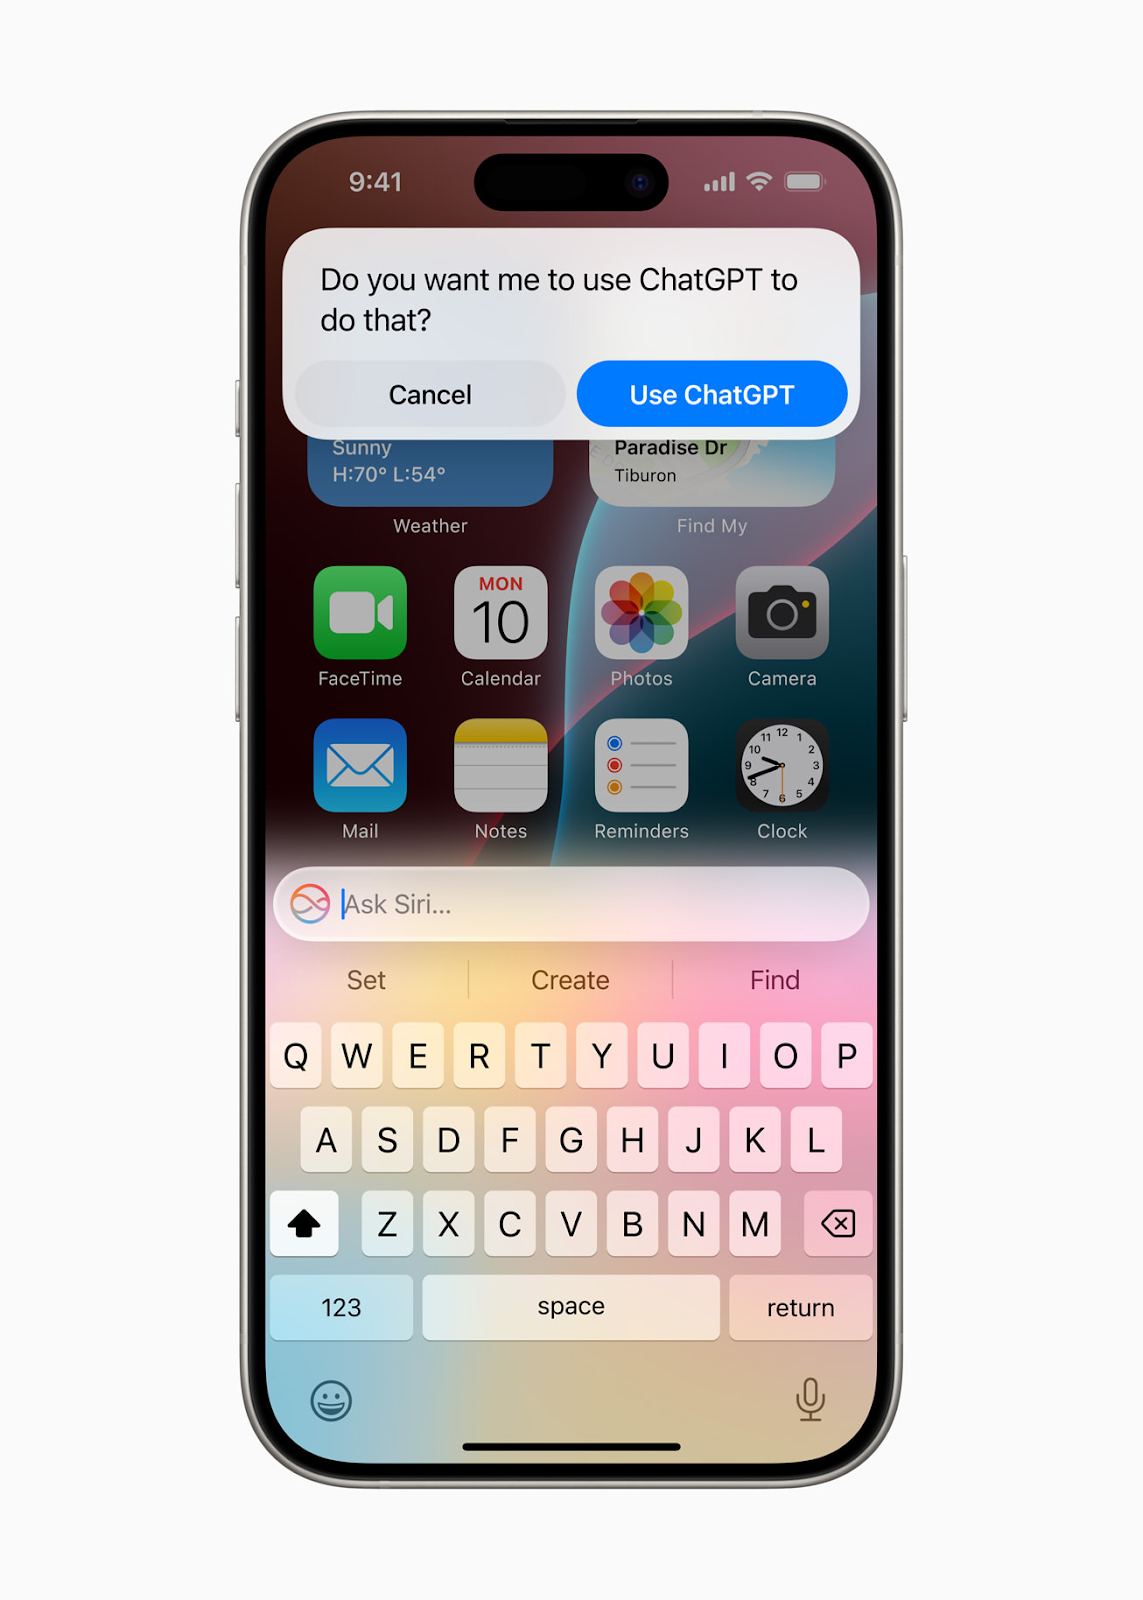
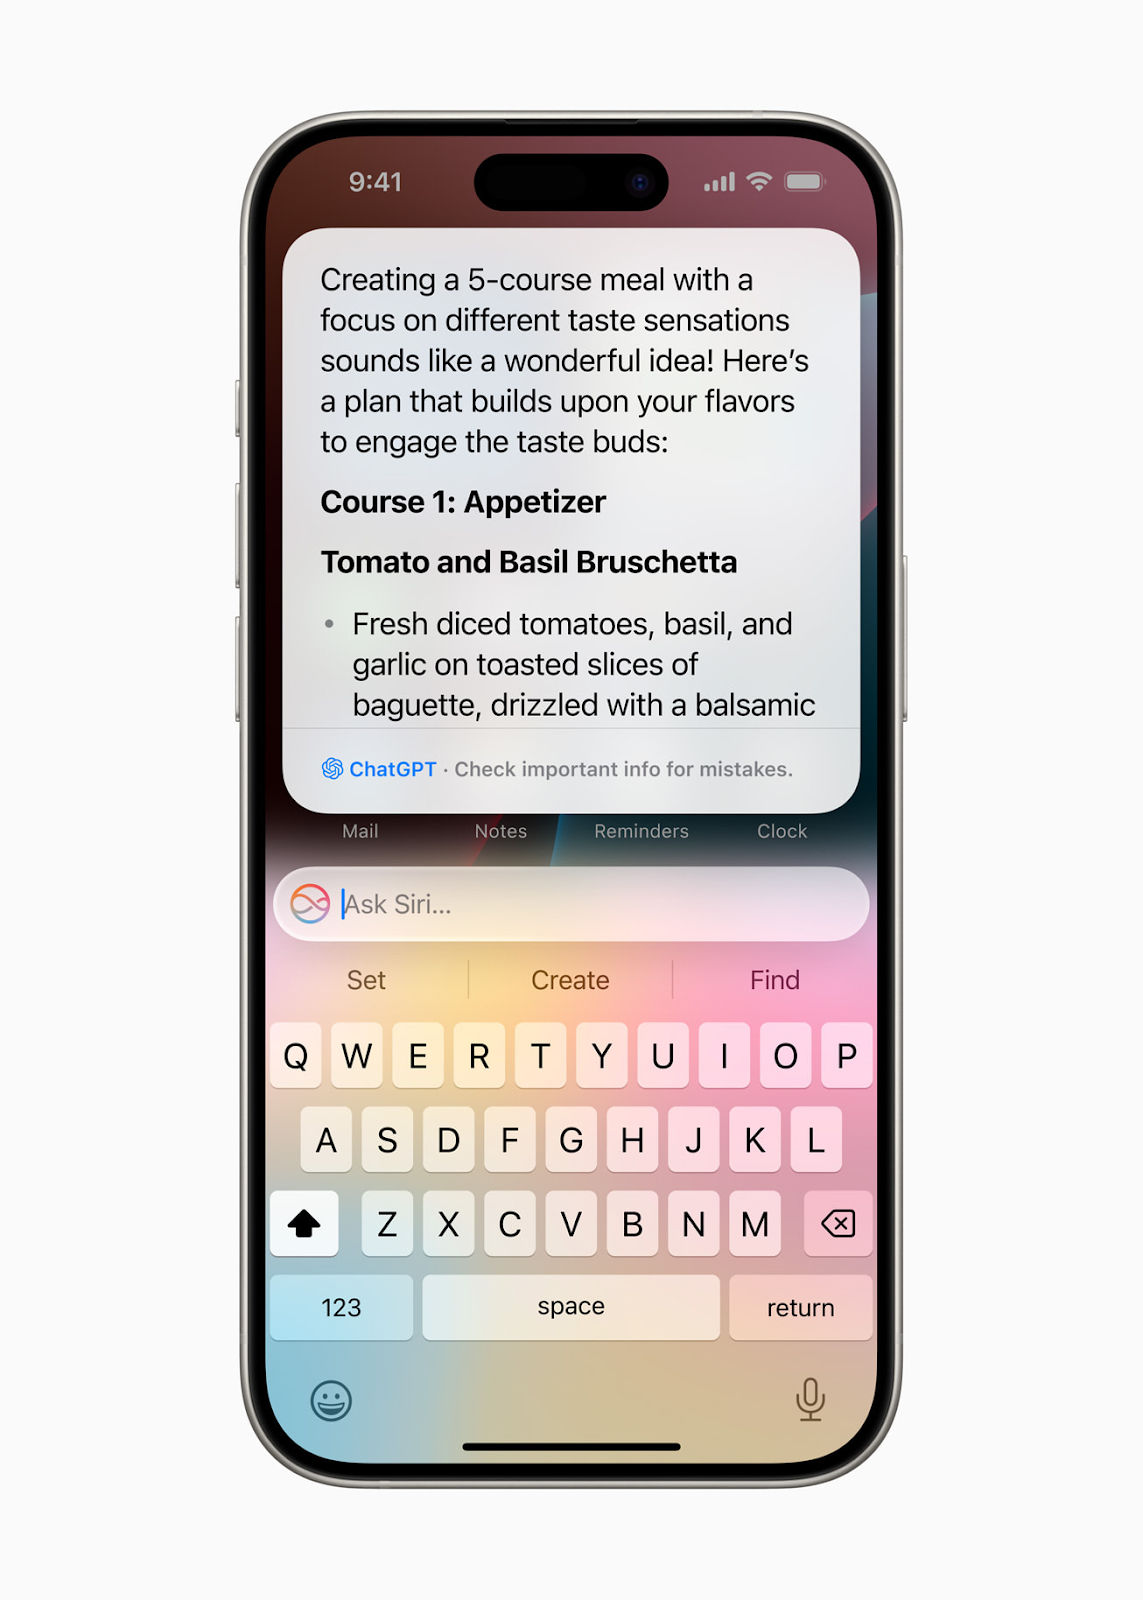
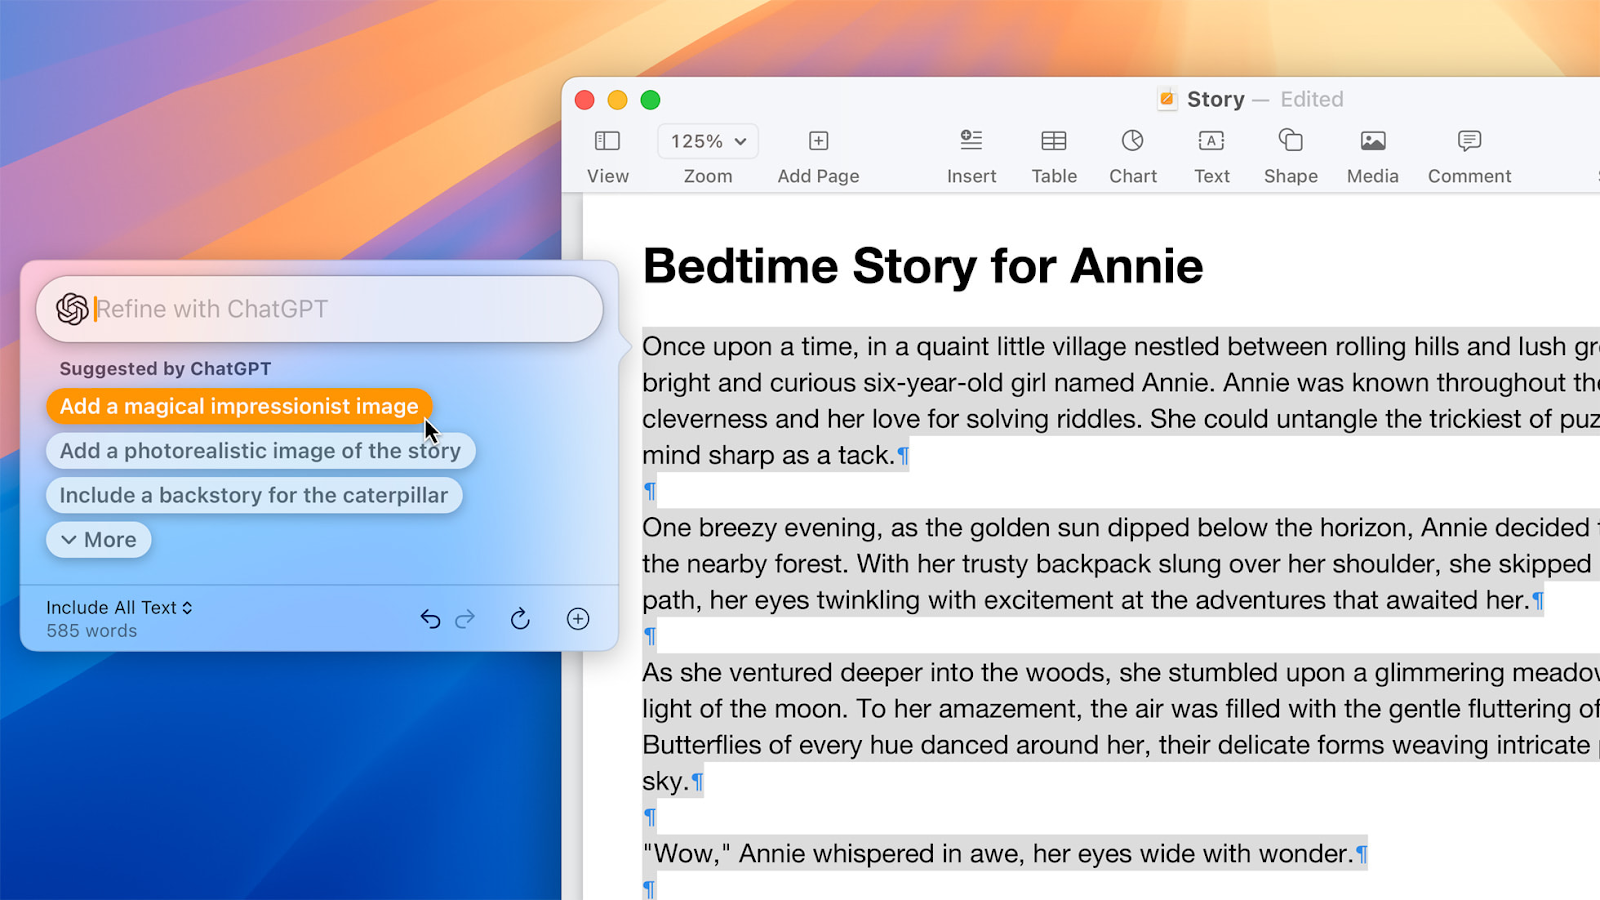
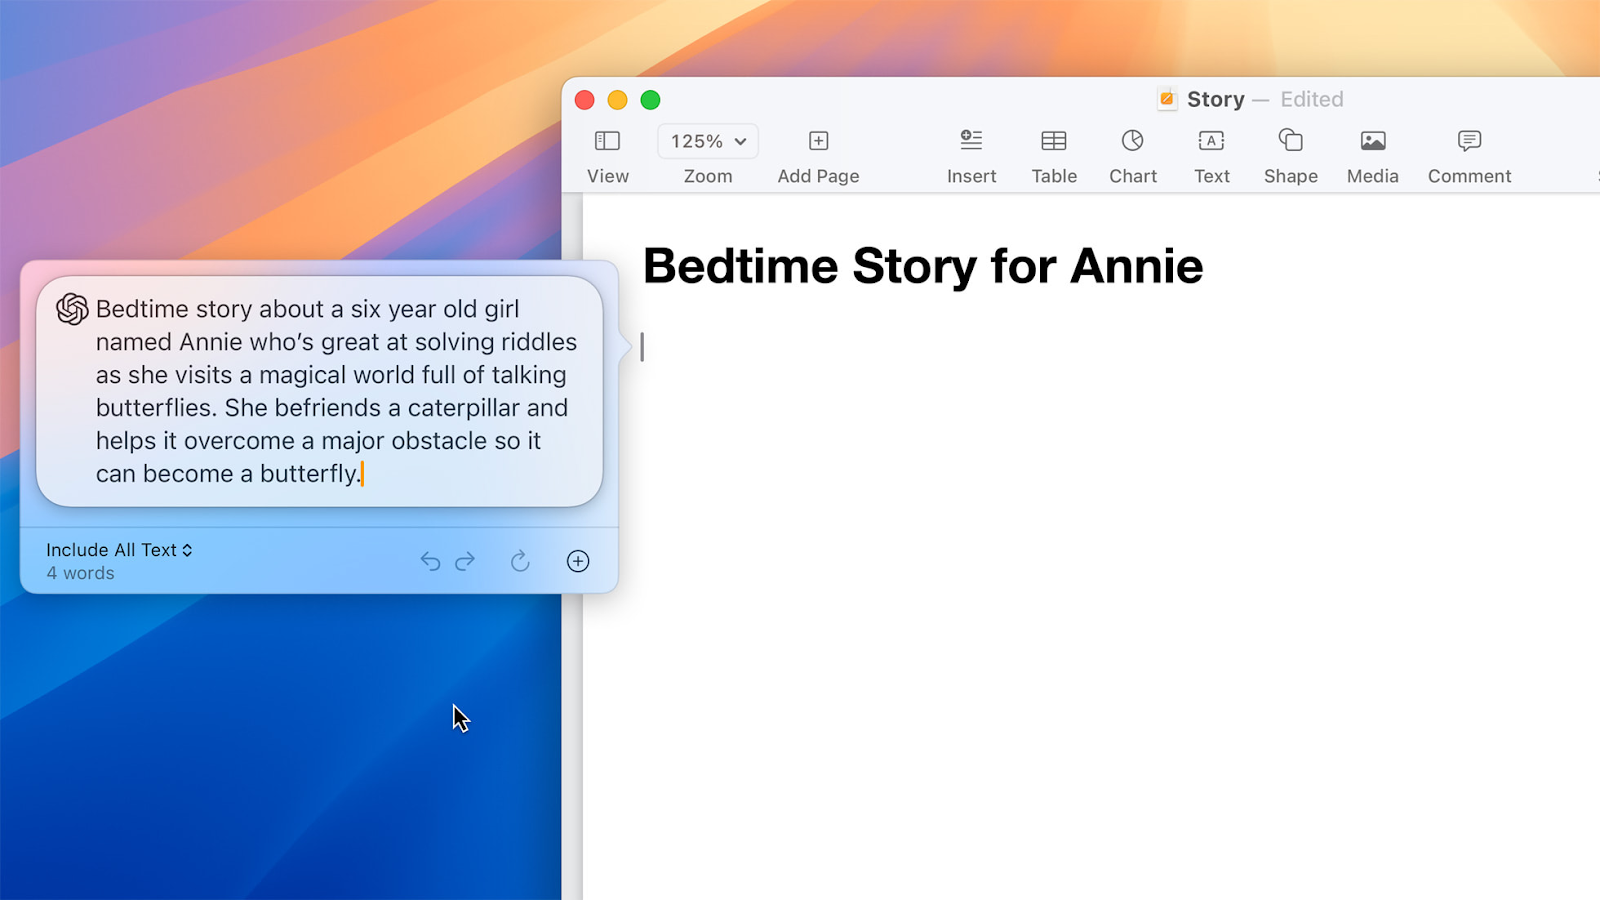
ChatGPT will also be integrated into Apple’s system-wide Writing Tools, enhancing users' ability to create content across various applications. With the Compose feature, users can not only generate text but also utilize ChatGPT’s image tools to create images in different styles that complement their writing.
How to Integrate Apple Intelligence into Your App
Now that we understand what Apple Intelligence brings to users let’s discover how it changes things for developers.
Any programmer working with iOS should be aware of how to interact with Apple Intelligence in their apps. After all, we should follow the progress and offer our clients the newest approaches, right?
Apple Intelligence will be available in an upcoming beta. Let's learn how to integrate Apple Intelligence's main features into your iOS app.
How to Integrate Apple Intelligence Writing Tools into Your App
Apple Intelligence’s Writing Tools offer advanced text editing capabilities that can significantly enhance the user experience in your iOS app. Here’s a simple guide to help you integrate these features into your application.
Writing Tools automatically integrate with apps using standard UI frameworks like UITextView, NSTextView, or WKWebView. If your app uses TextKit 2, you’ll benefit from a comprehensive Writing Tools experience. For TextKit 1, the tools will provide a more limited experience, showing results in a panel.
Here’s what happens when Writing Tools are invoked:
- Text selection and context: The tools might expand the user’s selection to include full sentences and surrounding context for better accuracy.
- Rich text support: Writing Tools handle rich text formats, preserving attributes such as styles, links, and attachments.
- List and table transformations: For text views supporting lists and tables, Writing Tools will appropriately process these elements using NSTextList and NSTextTable.You can control whether your text view supports tables using writingToolsAllowedInputOptions.
Now let’s learn how to manage Writing Tools sessions:
- Delegate methods: Use textViewWritingToolsWillBegin to prepare your app’s state before Writing Tools start, such as pausing syncing. Use textViewWritingToolsDidEnd to restore app states after processing is complete.
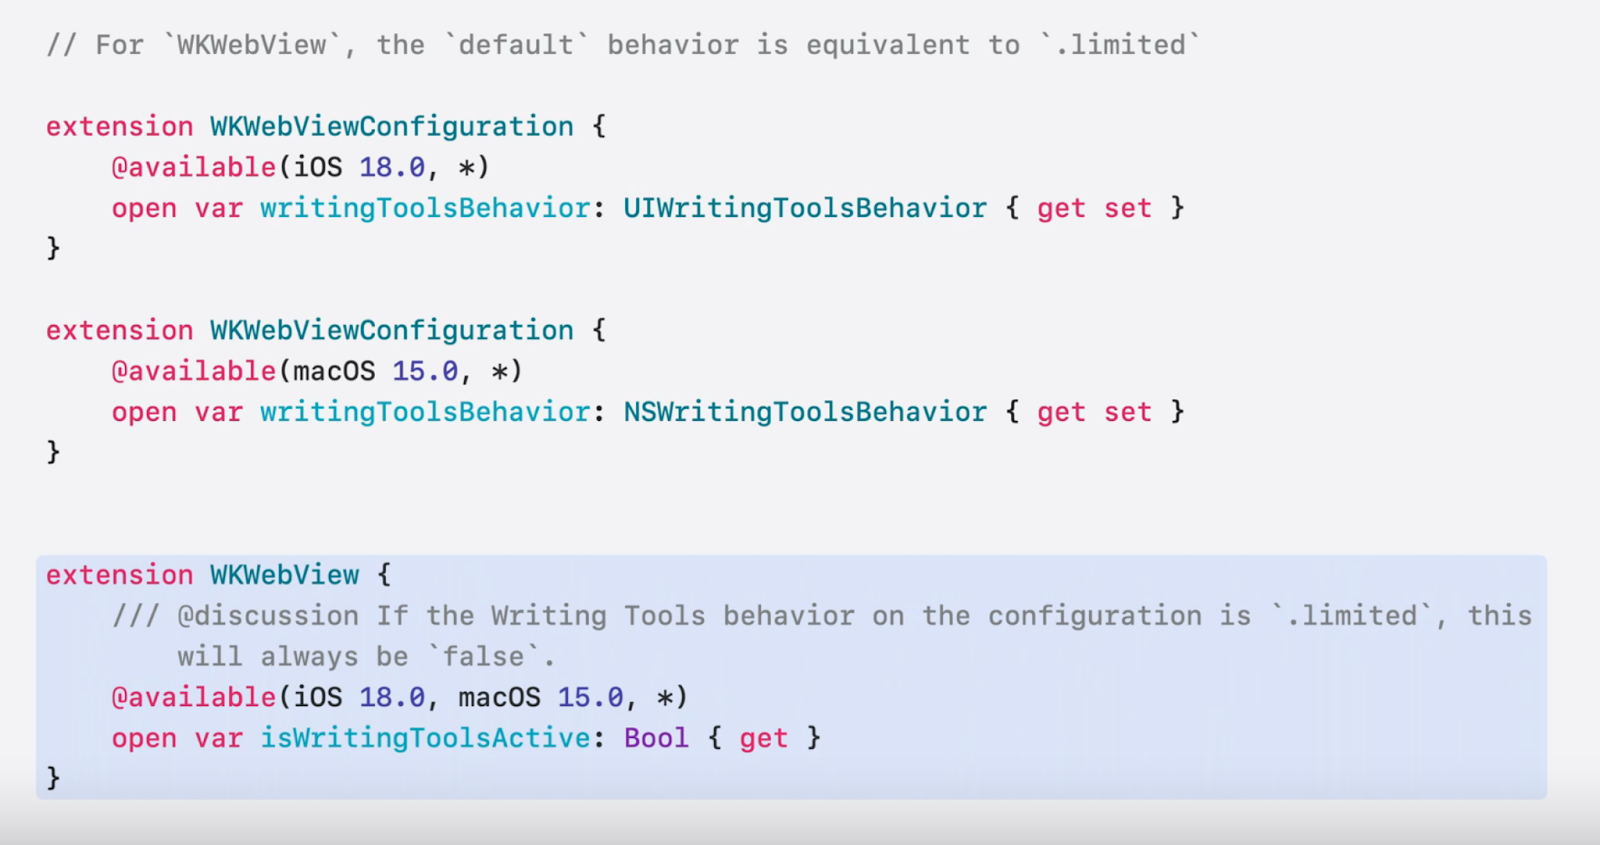
- isWritingToolsActive property: Check this property on UITextView to determine if Writing Tools are currently active, helping you manage text operations and app behavior.
Let’s look into customizing Writing Tools' behavior.
- Writing Tools behavior: By default, Writing Tools offer an in-line experience. You can change this with writingToolsBehavior settings to .limited for a panel experience or .none to disable the feature.
- Supported input options: Use writingToolsAllowedInputOptions to specify if your text view supports rich text or tables. This ensures that Writing Tools operate correctly based on your text view’s capabilities. If not specified, the default assumption is that your text view handles plain and rich text but not tables.
- WKWebView Configuration: Similar settings apply to WKWebView, where you need to specify the behavior explicitly. Note that the default setting is .limited, so explicit configuration is required for full functionality.
For scenarios where certain text ranges should not be altered (e.g., code blocks or quoted content), you can configure Writing Tools to ignore these sections using delegate methods.
For custom text views, Writing Tools can be integrated with minimal effort:
- iOS and iPadOS: Adopting UITextInteraction or UITextSelectionDisplayInteraction ensures Writing Tools are available in the callout bar or context menu.
- macOS: Implement NSServicesMenuRequestor and override validRequestor(forSendType:returnType:) to include Writing Tools in the context menu.
By following these guidelines, you can seamlessly integrate Apple Intelligence’s Writing Tools into your app, enhancing text editing functionalities and improving user experience.
Integrating Genmojis with NSAdaptiveImageGlyph
Genmojis is a new way to bring more personality and fun into your app. While traditional emojis are standardized Unicode characters rendered by your device, Genmojis are personalized images that go beyond plain text. They are unique, rasterized images that allow for custom designs and expressive content, like Stickers, Memoji, and Animoji.
NSAdaptiveImageGlyph is a new API designed to work with Genmoji and other personalized images just like regular emojis. Here’s what you need to know:
- Image format: NSAdaptiveImageGlyph uses a square image format with multiple resolutions, including unique identifiers, accessibility descriptions, and alignment metrics. This allows these images to fit seamlessly with regular text.
- Usage: You can use Genmojis alone or alongside text. They can be formatted, copied, pasted, and even sent as stickers.
Here’s how to support Genmojis in your app:
- For Rich Text Views: NSAdaptiveImageGlyph is supported by default. If your app already handles rich text, just enable supportsAdaptiveImageGlyph.
- On iOS and iPadOS: If your text view supports pasting images, Genmoji support is enabled automatically.
- On macOS: Use importsGraphics on your text view to enable Genmoji.
If the text area supports rich text, Genmoji will work right away. System frameworks now support NSAdaptiveImageGlyph, so if you use NSAttributedStrings, you just save and load it as RTFD data.
For plain text or non-RTF data stores, handle Genmoji as inline images. Store a Unicode attachment character with a reference to the image glyph’s identifier. There is no need to store the image again if it has already been saved.
If you want Genmojis to be displayed in web browsers, convert RTFD data to HTML. Compatible browsers will show the image as an emoji, while others will display a fallback image. The alt-text from the image glyph’s description ensures accessibility.
Use the UNNotificationAttributedMessageContext API to add Genmoji to push notifications. Create a Notification Service Extension to handle rich text, download assets, and update notification content.
As Genmojis is a new technology, you might face some compatibility issues across various systems. Some devices or operational systems cannot reflect Genmojis. Here’s how to handle this problem:
- Semantic meaning: Ensure important meanings of image glyphs are preserved. Provide a textual description if the glyphs aren’t supported.
- Fallback behavior: In unsupported environments, image glyphs will fall back to standard text attachments. RTFD format ensures compatibility with rich text views.
For custom text engines, CoreText supports NSAdaptiveImageGlyph for typesetting. Methods like CTFontGetTypographicBoundsForAdaptiveImageProvider help with positioning and rendering images.
Integrating new Siri’s functionality into your app
This year, Siri’s capabilities are taken to a new level with the introduction of Apple Intelligence, offering more natural interactions and personalized experiences. Developers are interested in integrating their applications with Siri as it allows users to reach the app quicker and easier without actually opening it, making interactions more seamless and engaging.
Since iOS 10, SiriKit has allowed apps to integrate with Siri through predefined intents, such as playing music or sending messages. For apps not covered by SiriKit domains, AppIntents was introduced in iOS 16, offering a flexible way to integrate with Siri, Shortcuts, and Spotlight.
With the advancement of Apple Intelligence and Large Language Models, Siri is becoming even more powerful:
- Natural conversations: Siri now speaks more naturally and understands users better.
- Contextual relevance: Siri can understand the context of what you're looking at and act accordingly.
- Enhanced understanding: Siri can handle more natural language, even if you’re not perfect with your words.
- More actions across the apps: Siri can now perform a broader range of actions across different apps thanks to enhanced integration capabilities. For example, Siri can now help with specific tasks like applying filters to photos or managing your email.
This year, Apple is introducing twelve new App Intent domains, each designed for specific functionalities like Mail, Photos, and Spreadsheets. For example, apps like Darkroom can use the "Set Filter" intent to apply a preset to a photo using Siri.
Assistant Schemas streamline how you build actions for Siri. By conforming your App Intents to predefined schemas, you align with Siri’s expectations, simplifying integration and improving reliability. This year, over 100 schemas are available, making it easier to create actions like creating a photo album or sending an email.
Assistant Schemas are predefined structures that specify the inputs and outputs needed for Siri to perform an action. They simplify the integration process by providing a clear framework for defining actions within your app.
Schemas describe the data Siri needs to complete a task, including a set of common inputs and outputs. For example, if you want Siri to handle a task like creating a photo album, you would use a schema that specifies the required information, such as the album name and photo selections.
By adopting schema macros, developers can easily align their App Intents with these predefined structures. This means you only need to focus on implementing the specific functionality of your app while the schema handles the communication between Siri and your app.
Siri’s large language models are trained to recognize these schemas, which improves Siri’s ability to process and execute commands accurately. Users can interact with Siri in a more conversational manner, even if their commands are not perfectly phrased.
For instance, if your app allows users to organize photos, using the “createAlbum” schema enables Siri to accurately perform commands such as “Add this photo to the California album.” This makes the integration smoother and more effective.
Here's how the process of integrating Assistant Schemas with your app works:
- User request: Everything starts with a user request. Siri receives this request and processes it using Apple Intelligence.
- Schema selection: Siri’s large language models predict the appropriate schema based on the user’s request. This schema defines the shape and structure of the data needed to fulfill the request.
- Toolbox integration: The request is routed to a toolbox that contains a collection of AppIntents from all the apps on the user’s device, grouped by their schema. By conforming to a schema, your app’s intents are organized and easily accessible for Siri to use.
- Action execution: Once the correct schema is identified, Siri routes the request to your app. Your app then performs the action as specified by the intent, such as opening a specific photo or creating a new album.
- Result presentation: The result is presented to the user, and Siri returns the output, completing the interaction.
To integrate your app with Siri using Assistant Schemas:
- Define your intent: Determine the actions your app can perform that users might want to control via Siri. This could include tasks like creating a new album, sending an email, or setting a reminder. Use the schema macros provided by the AppIntents framework to align your intents with predefined schemas. For example, to create a photo album, you would use the AssistantIntent macro with the “createAlbum” schema. This macro helps your intent conform to the structure expected by Siri.
- Implement the perform method: Write the logic to execute the action within your app. For instance, your perform method might handle the details of creating a new photo album.
- Expose entities: If your app uses specific entities (e.g., photos, albums), you need to expose these to Siri using the new Assistant Entity macros.
- Test with shortcuts: Use the Shortcuts app to test your schema-conforming actions.
With Apple Intelligence, Siri can now understand and act in more personal contexts and perform semantic searches. This means Siri can search for photos of "pets" and find not just the word "pet," but related images like cats and dogs.
Consider Perpetio Your Trusted Partner
Apple has once again impressed with its latest innovations at WWDC. As expected, AI has made its way into Apple's built-in systems, enhancing the convenience for users and expanding the possibilities for developers.
With new features like Writing Tools, Genmojis, and enhanced Siri search, it's crucial for developers to stay ahead of the curve by integrating these advancements into their apps. This not only keeps apps relevant but also ensures they offer the latest technology to their clients and users.
At Perpetio, we’re dedicated to keeping up with the latest Apple updates, from Apple Intelligence to visionOS. With experience in visionOS apps and a keen interest in Apple Intelligence, we're excited to explore these new capabilities.
Reach out to us to leverage the newest technologies and ensure your app stands out in the ever-evolving tech landscape.
