Welcome back to the third and final part of Perpetio’s Flutter fitness app tutorial! In parts one and two, we accomplished everything from creating a new Flutter project to making crucial elements like the Home screen and local database. Now, it’s time to wrap up our efforts and add the last few screens.
Our to-do list for today includes four screens: Settings, Edit account, Change password, and Reminder. Ready to start? Let’s begin with the first task: the Settings screen.
Settings screen
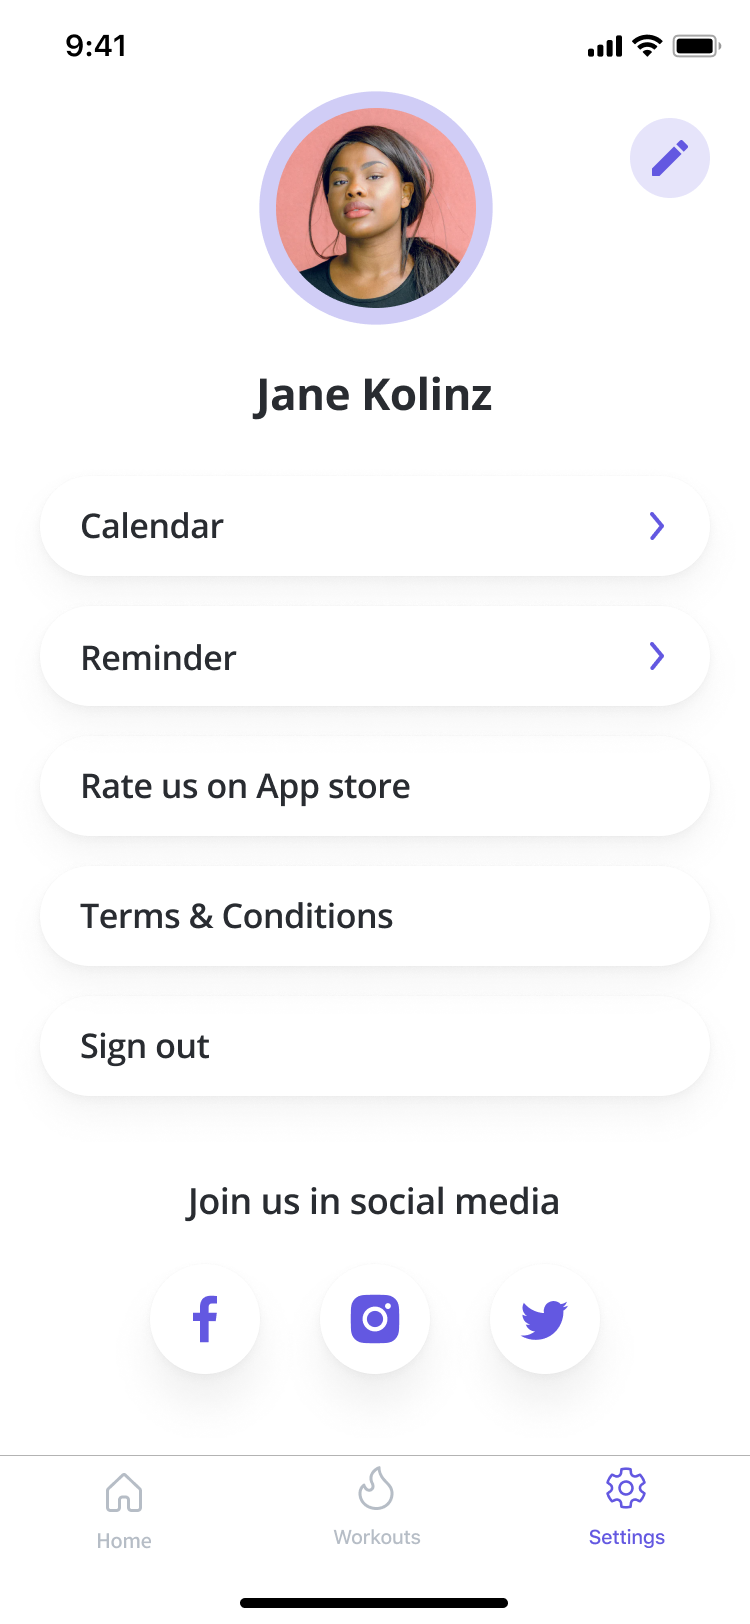
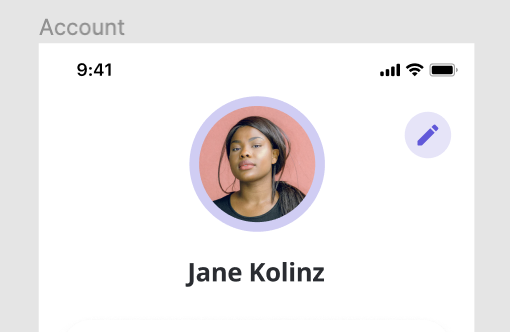
The Settings screen allows users to perform a set of additional actions, such as adding a workout reminder, rating the app, reading terms & conditions, signing out of their profile, and accessing the app’s social media.
The screen looks like this:
Now, let’s see how to create it step by step.
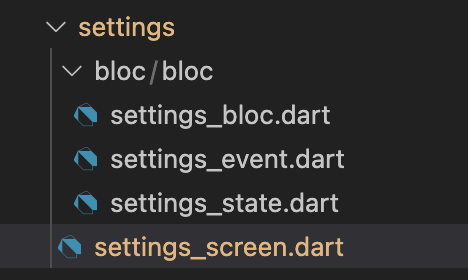
1. From our previous tutorials, you may remember the first step for every screen. Inside the screens folder, we create a folder called settings. In the settings folder, we add a bloc one with the settings_screen.dart file in it.
1.1. settings_bloc.dart
class SettingsBloc extends Bloc {
  SettingsBloc() : super(SettingsInitial());

  @override
  Stream mapEventToState(
    SettingsEvent event,
  ) async* {
    if (event is SettingsReloadImageEvent) {
      String? photoURL = await UserStorageService.readSecureData('image');
      if (photoURL == null) {
        photoURL = AuthService.auth.currentUser?.photoURL;
        photoURL != null
            ? await UserStorageService.writeSecureData('image', photoURL)
            : print('no image');
        yield SettingsReloadImageState(photoURL: photoURL);
      }
    } else if (event is SettingsReloadDisplayNameEvent) {
      final displayName = await UserStorageService.readSecureData('name');
      yield SettingsReloadDisplayNameState(displayName: displayName);
    }
  }
}
1.2. settings_event.dart
part of 'settings_bloc.dart';

@immutable
abstract class SettingsEvent {}

class SettingsReloadImageEvent extends SettingsEvent {}

class SettingsReloadDisplayNameEvent extends SettingsEvent {}
1.3. settings_state.dart
part of 'settings_bloc.dart';

@immutable
abstract class SettingsState {}

class SettingsInitial extends SettingsState {}

class SettingsReloadImageState extends SettingsState {
  final String? photoURL;

  SettingsReloadImageState({required this.photoURL});
}

class SettingsReloadDisplayNameState extends SettingsState {
  final String? displayName;

  SettingsReloadDisplayNameState({required this.displayName});
}
2. This time, we decided not to separate page and content but arrange it all in one file. We will also make a StatefulWidget class to make the changes inside.
class SettingsScreen extends StatefulWidget {
  const SettingsScreen({Key? key}) : super(key: key);

  @override
  _SettingsScreenState createState() => _SettingsScreenState();
}

class _SettingsScreenState extends State {
  String? photoUrl;
  @override
  Widget build(BuildContext context) {
    return Scaffold(body: _buildContext(context));
  }

  BlocProvider _buildContext(BuildContext context) {
    return BlocProvider(
      create: (context) => SettingsBloc(),
      child: BlocConsumer(
        buildWhen: (_, currState) => currState is SettingsInitial,
        builder: (context, state) {
          final bloc = BlocProvider.of(context);
          if (state is SettingsInitial) {
            bloc.add(SettingsReloadDisplayNameEvent());
            bloc.add(SettingsReloadImageEvent());
          }
          return _settingsContent(context);
        },
        listenWhen: (_, currState) => true,
        listener: (context, state) {},
      ),
    );
  }
3. Like before, we create a bloc provider and once the state is marked as “initial,” it will show the content.
4. Now, we need to create the _settingsContent() widget.
4.1. When pressing the icon in the upper right corner, we will be redirected to the EditAccountScreen() screen where we can edit personal data.
4.2. We have to call the SettingsReloadImageState to update the image for when it changes in the future.
Widget _settingsContent(BuildContext context) {
final User? user = FirebaseAuth.instance.currentUser;
// final displayName = user?.displayName ?? "No Username";
photoUrl = user?.photoURL ?? null;
return SafeArea(
child: SingleChildScrollView(
child: Padding(
padding: EdgeInsets.only(top: 20.0, left: 20.0, right: 20.0),
child: Column(children: [
Stack(alignment: Alignment.topRight, children: [
BlocBuilder(
buildWhen: (_, currState) =>
currState is SettingsReloadImageState,
builder: (context, state) {
final photoURL =
state is SettingsReloadImageState ? state.photoURL : null;
return Center(
child: photoURL == null
? CircleAvatar(
backgroundImage: AssetImage(PathConstants.profile),
radius: 60)
: CircleAvatar(
child: ClipOval(
child: FadeInImage.assetNetwork(
placeholder: PathConstants.profile,
image: photoURL,
fit: BoxFit.cover,
width: 200,
height: 120,
)),
radius: 60,
),
);
},
),
TextButton(
onPressed: () async {
await Navigator.push(
context,
MaterialPageRoute(
builder: (context) => EditAccountScreen()));
setState(() {
photoUrl = user?.photoURL ?? null;
});
},
style: TextButton.styleFrom(
shape: CircleBorder(),
backgroundColor:
ColorConstants.primaryColor.withOpacity(0.16)),
child: Icon(Icons.edit, color: ColorConstants.primaryColor)),
]),
SizedBox(height: 15),
BlocBuilder(
buildWhen: (_, currState) =>
currState is SettingsReloadDisplayNameState,
builder: (context, state) {
final displayName = state is SettingsReloadDisplayNameState
? state.displayName
: null;
return Text(
'$displayName',
style: TextStyle(fontSize: 24, fontWeight: FontWeight.bold),
);
},
),
SizedBox(height: 15),
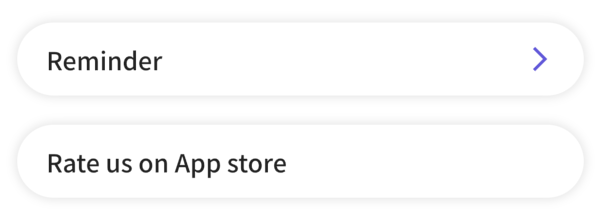
SettingsContainer(
child: Text(TextConstants.reminder,
style: TextStyle(fontSize: 17, fontWeight: FontWeight.w500)),
withArrow: true,
onTap: () {
Navigator.push(
context, MaterialPageRoute(builder: (_) => ReminderPage()));
},
),
if (!kIsWeb)
SettingsContainer(
child: Text(
TextConstants.rateUsOn +
'${Platform.isIOS ? 'App store' : 'Play market'}',
style:
TextStyle(fontSize: 17, fontWeight: FontWeight.w500)),
onTap: () {
return launch(Platform.isIOS
? 'https://www.apple.com/app-store/'
: 'https://play.google.com/store');
},
),
SettingsContainer(
onTap: () => launch('https://perpet.io/'),
child: Text(TextConstants.terms,
style:
TextStyle(fontSize: 17, fontWeight: FontWeight.w500))),
SettingsContainer(
child: Text(TextConstants.signOut,
style:
TextStyle(fontSize: 17, fontWeight: FontWeight.w500)),
onTap: () {
AuthService.signOut();
Navigator.pushReplacement(
context, MaterialPageRoute(builder: (_) => SignInPage()));
}),
SizedBox(height: 15),
Text(TextConstants.joinUs,
style: TextStyle(fontSize: 18, fontWeight: FontWeight.w600)),
SizedBox(height: 15),
Row(
mainAxisAlignment: MainAxisAlignment.center,
children: [
TextButton(
onPressed: () =>
launch('https://www.facebook.com/perpetio/'),
style: TextButton.styleFrom(
shape: CircleBorder(),
backgroundColor: Colors.white,
elevation: 1),
child: Image.asset(PathConstants.facebook)),
TextButton(
onPressed: () =>
launch('https://www.instagram.com/perpetio/'),
style: TextButton.styleFrom(
shape: CircleBorder(),
backgroundColor: Colors.white,
elevation: 1),
child: Image.asset(PathConstants.instagram)),
TextButton(
onPressed: () => launch('https://twitter.com/perpetio'),
style: TextButton.styleFrom(
shape: CircleBorder(),
backgroundColor: Colors.white,
elevation: 1),
child: Image.asset(PathConstants.twitter)),
],
)
]),
),
),
);
}
}
4.3. Then, we make a SettingsContainer for our buttons in the common widgets. This creates a long, rounded white button outlined with a shadow. There is a child inside, which will be sent to this widget when clicked.
class SettingsContainer extends StatelessWidget {
  final bool withArrow;
  final Widget child;
  final Function()? onTap;

  SettingsContainer({Key? key, this.withArrow = false, required this.child, this.onTap}) : super(key: key);

  @override
  Widget build(BuildContext context) {
    return Padding(
      padding: EdgeInsets.symmetric(vertical: 10.0),
      child: Container(
        child: Material(
          color: Colors.transparent,
          child: InkWell(
            borderRadius: BorderRadius.circular(40),
            onTap: onTap,
            child: Padding(
              padding: EdgeInsets.symmetric(horizontal: 20),
              child: Row(
                children: [Expanded(child: child), if (withArrow) Icon(Icons.arrow_forward_ios, color: ColorConstants.primaryColor, size: 20)],
              ),
            ),
          ),
        ),
        width: double.infinity,
        height: 50,
        decoration: BoxDecoration(
          borderRadius: BorderRadius.circular(40),
          color: ColorConstants.white,
          boxShadow: [BoxShadow(color: ColorConstants.textBlack.withOpacity(0.12), blurRadius: 5.0, spreadRadius: 1.1)],
        ),
      ),
    );
  }
}
4.4. Let’s take a look at what else we have in the _settingsContent() function:
SettingsContainer(
              child: Text(TextConstants.reminder,
                  style: TextStyle(fontSize: 17, fontWeight: FontWeight.w500)),
              withArrow: true,
              onTap: () {
                Navigator.push(
                    context, MaterialPageRoute(builder: (_) => ReminderPage()));
              },
            ),
            if (!kIsWeb)
              SettingsContainer(
                child: Text(
                    TextConstants.rateUsOn +
                        '${Platform.isIOS ? 'App store' : 'Play market'}',
                    style:
                        TextStyle(fontSize: 17, fontWeight: FontWeight.w500)),
                onTap: () {
                  return launch(Platform.isIOS
                      ? 'https://www.apple.com/app-store/'
                      : 'https://play.google.com/store');
                },
              ),
            SettingsContainer(
                onTap: () => launch('https://perpet.io/'),
                child: Text(TextConstants.terms,
                    style:
                        TextStyle(fontSize: 17, fontWeight: FontWeight.w500))),
            SettingsContainer(
                child: Text(TextConstants.signOut,
                    style:
                        TextStyle(fontSize: 17, fontWeight: FontWeight.w500)),
                onTap: () {
                  AuthService.signOut();
                  Navigator.pushReplacement(
                      context, MaterialPageRoute(builder: (_) => SignInPage()));
                }),
            SizedBox(height: 15),
            Text(TextConstants.joinUs,
                style: TextStyle(fontSize: 18, fontWeight: FontWeight.w600)),
            SizedBox(height: 15),
            _createJoinSocialMedia()
            )
          ]),
        ),
      ),
    );
  }
}
4.4.1. The first container is a Reminder. When tapping it, the user will be redirected to the ReminderPage screen where they can set up workout notifications.

4.4.2. The second container will take the user to the App Store or Play Market, depending on the device.

4.4.3. The third container redirects the user to our website.

4.4.4. The fourth container will call the signOut() function from the database, sign out of the account, and redirect the user to the Sign In screen.

4.4.5. After these buttons are in place, we will move to the Join us ones. These are simple TextButtons styled for our design, housing an asset image inside. We use the url_launcher: any library to redirect users to our social media profiles.
Widget _createJoinSocialMedia() {
    return Row(
      mainAxisAlignment: MainAxisAlignment.center,
      children: [
        TextButton(
            onPressed: () => launch(‘https://www.facebook.com/perpetio/’),
            style: TextButton.styleFrom(
                shape: CircleBorder(),
                backgroundColor: Colors.white,
                elevation: 1),
            child: Image.asset(PathConstants.facebook)),
        TextButton(
            onPressed: () => launch(‘https://www.instagram.com/perpetio/’),
            style: TextButton.styleFrom(
                shape: CircleBorder(),
                backgroundColor: Colors.white,
                elevation: 1),
            child: Image.asset(PathConstants.instagram)),
        TextButton(
            onPressed: () => launch(‘https://twitter.com/perpetio’),
            style: TextButton.styleFrom(
                shape: CircleBorder(),
                backgroundColor: Colors.white,
                elevation: 1),
            child: Image.asset(PathConstants.twitter)),
      ],
    );
  }
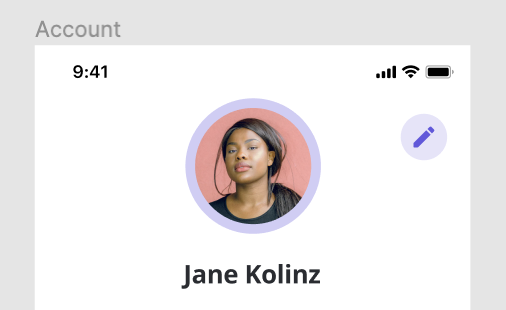
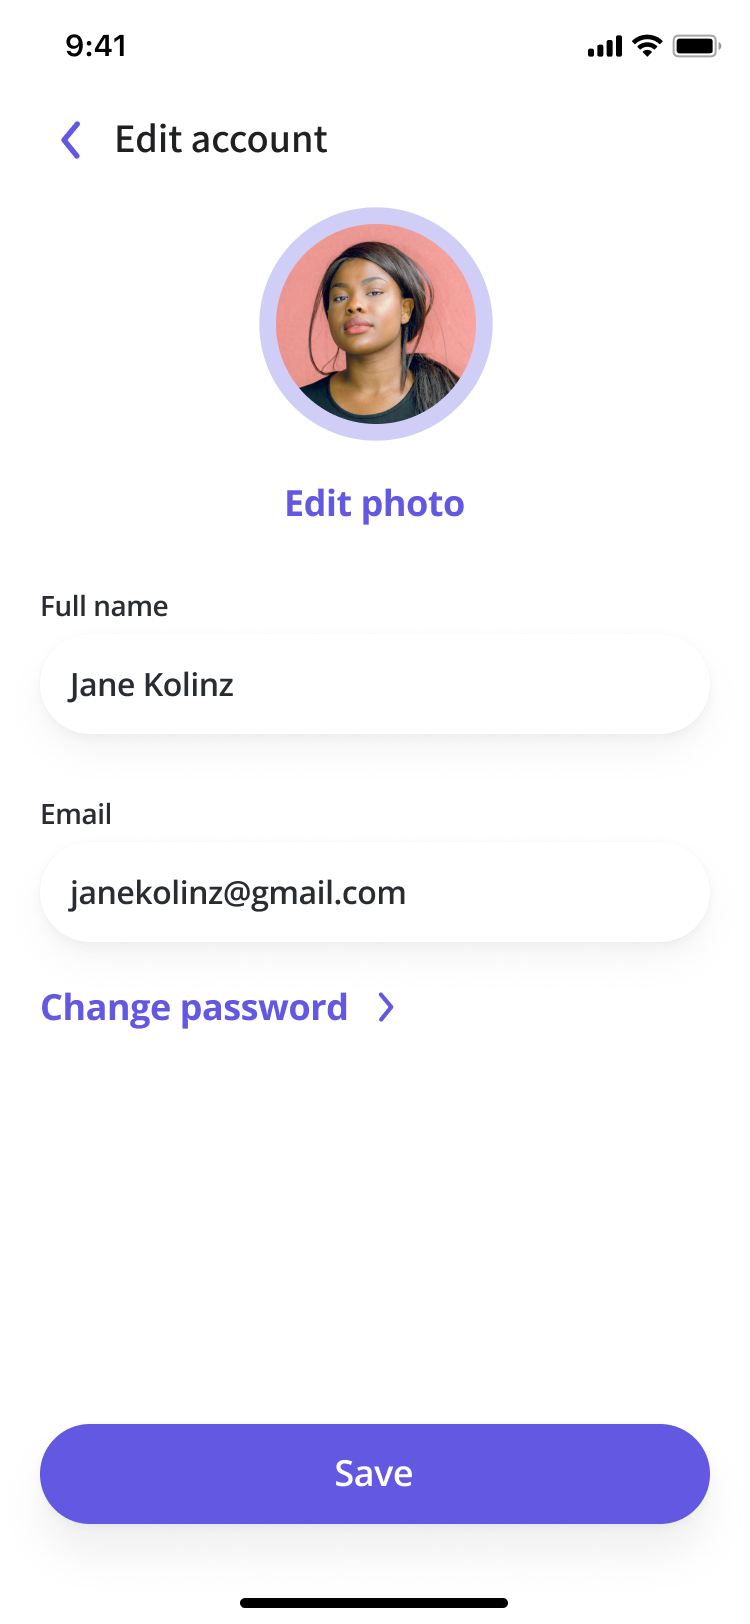
Edit account screen
The next screen on our agenda is the Edit account. We access it by clicking the button in the upper right corner of the Settings screen:

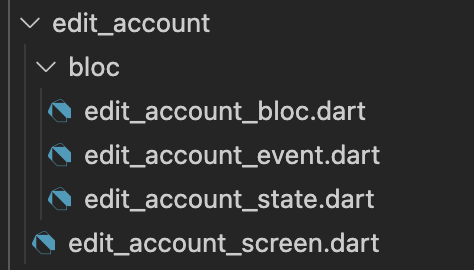
1. As always, let’s start with creating a new folder called edit_account in the screens folder. Of course, we will also add bloc, event, and state files.
2. In the BLoC file, we will be changing the user’s name, email, and profile image.
2.1. edit_account_bloc.dart
class EditAccountBloc extends Bloc {
  EditAccountBloc() : super(EditAccountInitial());

  @override
  Stream mapEventToState(
    EditAccountEvent event,
  ) async* {
    if (event is UploadImage) {
      try {
        final XFile? image =
            await ImagePicker().pickImage(source: ImageSource.gallery);
        if (image != null) {
          yield EditAccountProgress();
          await FirebaseStorageService.uploadImage(filePath: image.path);
          await UserStorageService.writeSecureData('image', image.path);
          yield EditPhotoSuccess(image);
        }
      } catch (e) {
        yield EditAccountError(e.toString());
        await Future.delayed(Duration(seconds: 1));
        yield EditAccountInitial();
      }
    }
    if (event is ChangeUserData) {
      yield EditAccountProgress();
      try {
        await UserService.changeUserData(
            displayName: event.displayName, email: event.email);
        await UserStorageService.writeSecureData('name', event.displayName);
        await UserStorageService.writeSecureData('email', event.email);
        yield EditAccountInitial();
      } catch (e) {
        yield EditAccountError(e.toString());
        await Future.delayed(Duration(seconds: 1));
        yield EditAccountInitial();
      }
    }
  }
}
2.2. edit_account_event.dart
part of 'edit_account_bloc.dart';

@immutable
abstract class EditAccountEvent {}

class UploadImage extends EditAccountEvent {}

class ChangeUserData extends EditAccountEvent {
  final String displayName;
  final String email;

  ChangeUserData({required this.displayName, required this.email});
}
2.3. edit_account_state.dart
part of 'edit_account_bloc.dart';

@immutable
abstract class EditAccountState {}

class EditAccountInitial extends EditAccountState {}

class EditAccountProgress extends EditAccountState {}

class EditAccountError extends EditAccountState {
  final String error;
  EditAccountError(this.error);
}

class EditPhotoSuccess extends EditAccountState {
  final XFile image;
  EditPhotoSuccess(this.image);
}
3. The EditAccountScreen class is a stateful widget because our UI will change. Both page and content are incorporated in this screen.
class EditAccountScreen extends StatefulWidget {
  EditAccountScreen({Key? key}) : super(key: key);

  @override
  _EditAccountScreenState createState() => _EditAccountScreenState();
}

class _EditAccountScreenState extends State {
  final TextEditingController _nameController = TextEditingController();
  final TextEditingController _emailController = TextEditingController();
  final User? user = FirebaseAuth.instance.currentUser;
  String? photoUrl;
  bool isNameInvalid = false;
  bool isEmailInvalid = false;
  late String userName;
  late String userEmail;

  @override
  void initState() {
    userName = user?.displayName ?? "No Username";
    userEmail = user?.email ?? 'No email';
    photoUrl = user?.photoURL ?? null;
    _nameController.text = userName;
    _emailController.text = userEmail;
    super.initState();
  }

  @override
  Widget build(BuildContext context) {
    return Scaffold(
      body: _buildContext(context),
      appBar: AppBar(
        title: Text(TextConstants.editAccount,
            style: TextStyle(color: Colors.black, fontSize: 18)),
        backgroundColor: Colors.transparent,
        elevation: 0,
        leading: IconButton(
            icon: Icon(Icons.arrow_back_ios_new),
            onPressed: () => Navigator.of(context).pop()),
        iconTheme: IconThemeData(
          color: ColorConstants.primaryColor,
        ),
      ),
    );
  }
For the app navigation, we also have to work on the AppBar(). When tapping the button, the user is redirected to the previous screen — Settings.
4. In _buildContext() we will connect the bloc and UI.
BlocProvider _buildContext(BuildContext context) {
    return BlocProvider(
      create: (context) => EditAccountBloc(),
      child: BlocConsumer(
        buildWhen: (_, currState) =>
            currState is EditAccountInitial ||
            currState is EditAccountProgress ||
            currState is EditAccountError ||
            currState is EditPhotoSuccess,
        builder: (context, state) {
          if (state is EditAccountProgress)
            return Stack(
              children: [_editAccountContent(context), FitnessLoading()],
            );
          if (state is EditAccountError) {
            WidgetsBinding.instance!.addPostFrameCallback((_) async {
              _showOpenSettingsPopUp();
            });
          }
          if (state is EditPhotoSuccess) photoUrl = state.image.path;
          return _editAccountContent(context);
        },
        listenWhen: (_, currState) => true,
        listener: (context, state) {},
      ),
    );
  }
5. If the user did not grant the gallery access, the _showOpenSettingsPopUp() method helps open the device settings when changing the photo.
void _showOpenSettingsPopUp() {
    showDialog(
      context: context,
      builder: (BuildContext context) => CupertinoAlertDialog(
        title: Text(TextConstants.cameraPermission),
        content: Text(TextConstants.cameAccess),
        actions: [
          CupertinoDialogAction(
            child: Text(TextConstants.deny),
            onPressed: () => Navigator.of(context).pop(),
          ),
          CupertinoDialogAction(
            child: Text(TextConstants.settings),
            onPressed: () => openAppSettings(),
          ),
        ],
      ),
    );
  }
}
6. The _editAccountContent() method is responsible for the UI part.
Widget _editAccountContent(BuildContext context) {
    EditAccountBloc _bloc = BlocProvider.of(context);
    double height = MediaQuery.of(context).size.height;
    return SafeArea(
      child: SingleChildScrollView(
        child: Padding(
          padding: EdgeInsets.only(top: 20.0, left: 20.0, right: 20.0),
          child: SizedBox(
            height: height - 140 - MediaQuery.of(context).padding.bottom,
            child: Column(
              crossAxisAlignment: CrossAxisAlignment.start,
              children: [
                Center(child: _getImageWidget()),
                SizedBox(height: 15),
                Center(
                  child: TextButton(
                    onPressed: () {
                      _bloc.add(UploadImage());
                    },
                    child: Text(
                      TextConstants.editPhoto,
                      style: TextStyle(
                        fontSize: 18,
                        fontWeight: FontWeight.bold,
                        color: ColorConstants.primaryColor,
                      ),
                    ),
                  ),
                ),
                SizedBox(height: 15),
                Text(
                  TextConstants.fullName,
                  style: TextStyle(fontWeight: FontWeight.w600),
                ),
                SettingsContainer(
                    child: SettingsTextField(
                  controller: _nameController,
                  placeHolder: TextConstants.fullNamePlaceholder,
                )),
                if (isNameInvalid)
                  Text(TextConstants.nameShouldContain2Char,
                      style: TextStyle(color: ColorConstants.errorColor)),
                Text(TextConstants.email,
                    style: TextStyle(fontWeight: FontWeight.w600)),
                SettingsContainer(
                    child: SettingsTextField(
                  controller: _emailController,
                  placeHolder: TextConstants.emailPlaceholder,
                )),
                if (isEmailInvalid)
                  Text(TextConstants.emailErrorText,
                      style: TextStyle(color: ColorConstants.errorColor)),
                SizedBox(height: 15),
                InkWell(
                  onTap: () {
                    Navigator.push(
                        context,
                        MaterialPageRoute(
                            builder: (context) => ChangePasswordScreen()));
                  },
                  child: Row(
                    mainAxisSize: MainAxisSize.min,
                    children: [
                      Text(
                        TextConstants.changePassword,
                        style: TextStyle(
                          fontWeight: FontWeight.w600,
                          color: ColorConstants.primaryColor,
                          fontSize: 18,
                        ),
                      ),
                      SizedBox(width: 10),
                      Icon(
                        Icons.arrow_forward_ios,
                        color: ColorConstants.primaryColor,
                      )
                    ],
                  ),
                ),
                Spacer(),
                FitnessButton(
                  title: TextConstants.save,
                  isEnabled: true,
                  onTap: () {
                    FocusScope.of(context).unfocus();
                    setState(() async {
                      isNameInvalid = !(_nameController.text.length > 1);
                      isEmailInvalid =
                          !ValidationService.email(_emailController.text);
                    });

                    if (!(isNameInvalid || isEmailInvalid)) {
                      if (userName != _nameController.text ||
                          userEmail != _emailController.text) {
                        _bloc.add(ChangeUserData(
                            displayName: _nameController.text,
                            email: _emailController.text));
                        userName = _nameController.text;
                        userEmail = _emailController.text;
                      }
                    }
                    Navigator.pop(context);
                  },
                ),
              ],
            ),
          ),
        ),
      ),
    );
  }
Let’s review and separate the _editAccountContent() method.
6.1. When pressing the Edit photo button, the UploadImage() event is called.

child: Column(
              crossAxisAlignment: CrossAxisAlignment.start,
              children: [
                Center(child: _getImageWidget()),
                SizedBox(height: 15),
                Center(
                  child: TextButton(
                    onPressed: () {
                      _bloc.add(UploadImage());
                    },
                    child: Text(
                      TextConstants.editPhoto,
                      style: TextStyle(
                        fontSize: 18,
                        fontWeight: FontWeight.bold,
                        color: ColorConstants.primaryColor,
                      ),
                    ),
                  ),
                ),
6.2. This is _getImageWidget() for formatting the user’s profile photo:
Widget _getImageWidget() {
    if (photoUrl != null) {
      if (photoUrl!.startsWith('https://')) {
        return CircleAvatar(
          radius: 60,
          child: ClipOval(
            child: FadeInImage.assetNetwork(
              placeholder: PathConstants.profile,
              image: photoUrl!,
              fit: BoxFit.cover,
              width: 200,
              height: 120,
            ),
          ),
        );
      } else {
        return CircleAvatar(
            backgroundImage: FileImage(File(photoUrl!)), radius: 60);
      }
    } else
      return CircleAvatar(
          backgroundImage: AssetImage(PathConstants.profile), radius: 60);
  }
6.3. TextFields changes the user’s full name or email and saves the data in the local storage.

Text(
  TextConstants.fullName,
  style: TextStyle(fontWeight: FontWeight.w600),
),
SettingsContainer(
    child: SettingsTextField(
  controller: _nameController,
  placeHolder: TextConstants.fullNamePlaceholder,
)),
if (isNameInvalid)
  Text(TextConstants.nameShouldContain2Char,
      style: TextStyle(color: ColorConstants.errorColor)),
Text(TextConstants.email,
    style: TextStyle(fontWeight: FontWeight.w600)),
SettingsContainer(
    child: SettingsTextField(
  controller: _emailController,
  placeHolder: TextConstants.emailPlaceholder,
)),
if (isEmailInvalid)
  Text(TextConstants.emailErrorText,
      style: TextStyle(color: ColorConstants.errorColor)),
6.4. Tapping on this button takes the user to the ChangePasswordScreen() and lets them change their password.
child: Row(
  mainAxisSize: MainAxisSize.min,
  children: [
    Text(TextConstants.changePassword,
        style: TextStyle(
            fontWeight: FontWeight.w600,
            color: ColorConstants.primaryColor,
            fontSize: 18)),
    SizedBox(width: 10),
    Icon(Icons.arrow_forward_ios,
        color: ColorConstants.primaryColor)
  ],
),
6.5. When pressing the Save button, an event will be called. It will save the updated information in the local database.

FitnessButton(
  title: TextConstants.save,
  isEnabled: true,
  onTap: () {
    FocusScope.of(context).unfocus();
    setState(() {
      isNameInvalid = !(_nameController.text.length > 1);
      isEmailInvalid =
          !ValidationService.email(_emailController.text);
    });
    if (!(isNameInvalid || isEmailInvalid)) {
      if (userName != _nameController.text ||
          userEmail != _emailController.text) {
        _bloc.add(ChangeUserData(
            displayName: _nameController.text,
            email: _emailController.text));
        userName = _nameController.text;
        userEmail = _emailController.text;
      }
    }
    Navigator.pop(context, true);
  },
),
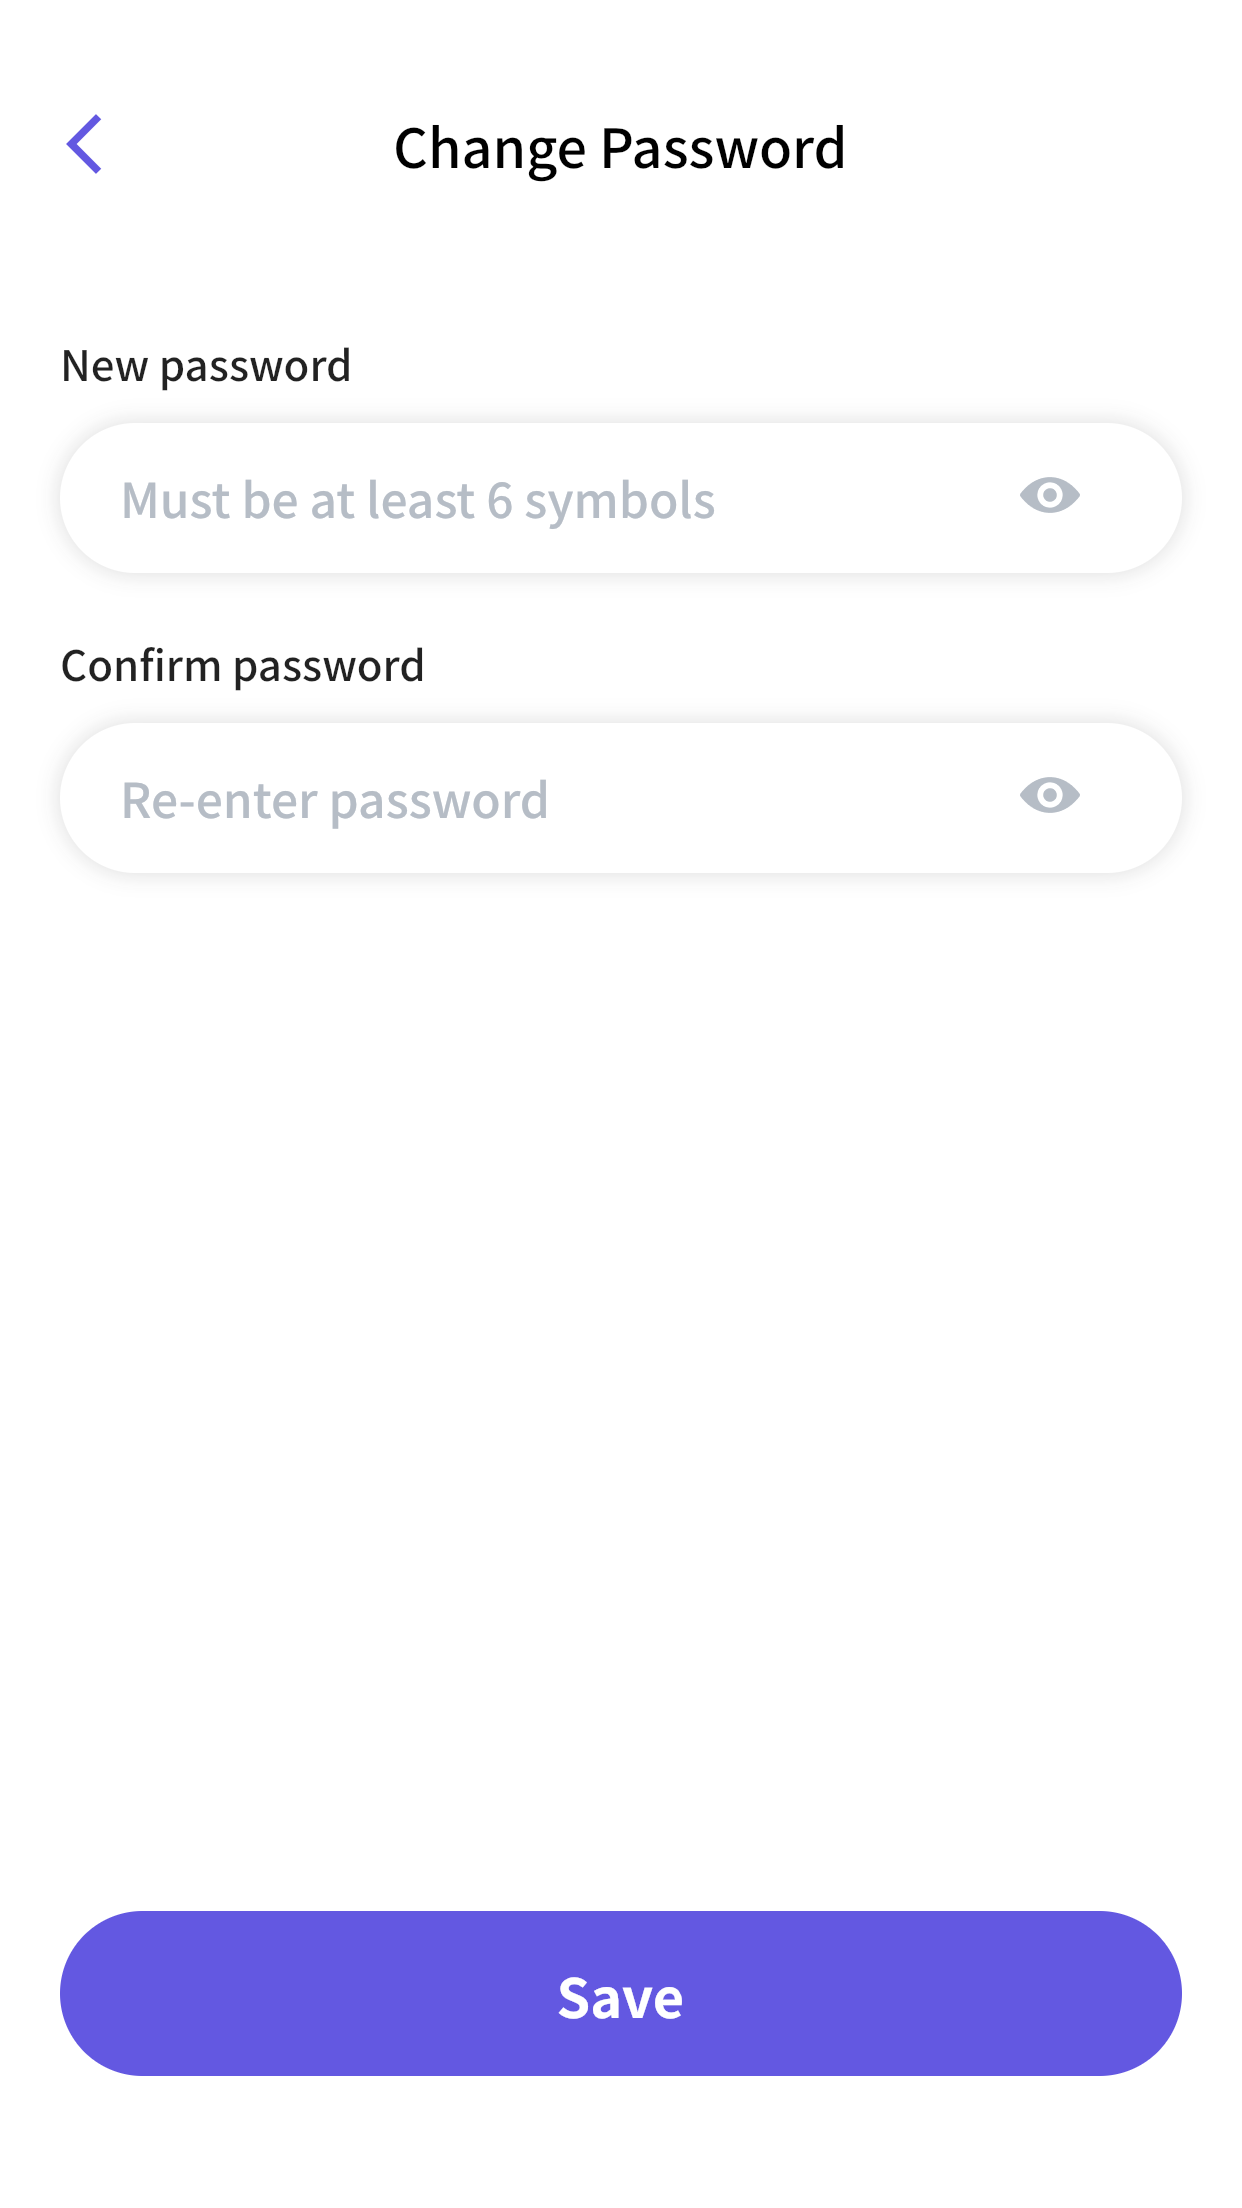
Change password screen
Phew, half of the work is already done. Two screens are finished, and two are yet to be created – continuing with the Change password one.
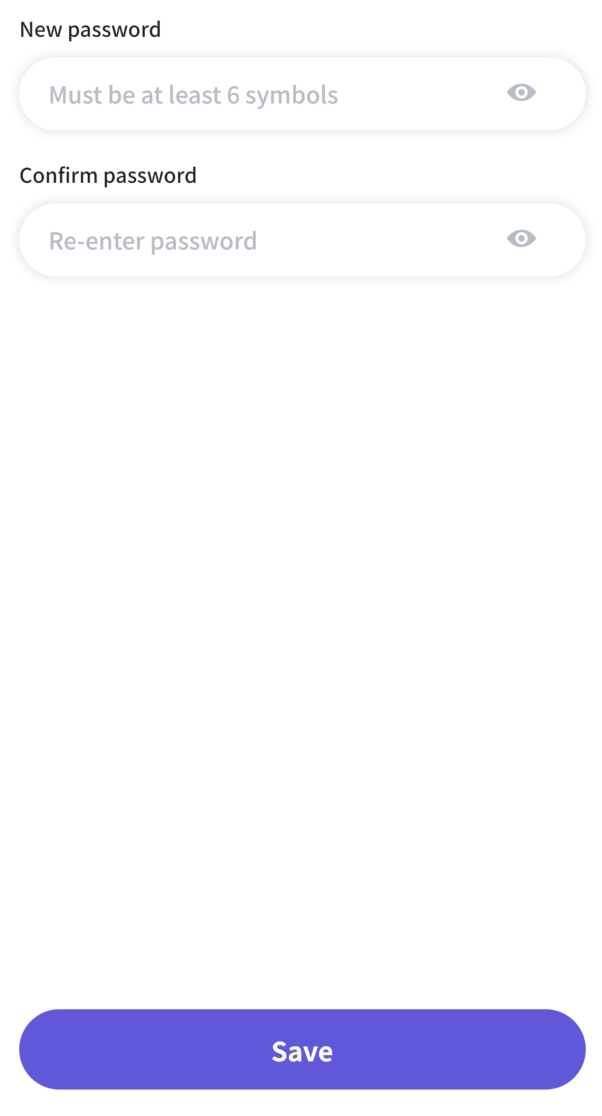
We worked on getting to this screen in the previous section, let’s focus on its content now. This is how the Change password screen will look when it is completed:
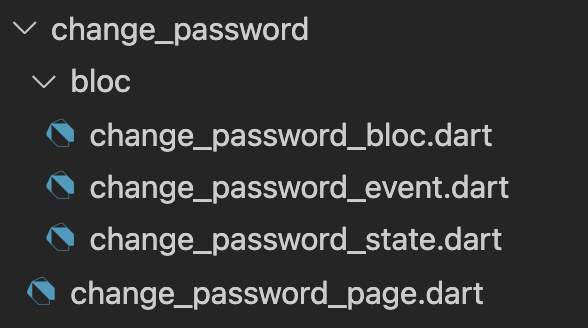
1. First, we need a new folder: change_password. Then, we add the bloc, event, and state files.
2. Here, you can examine the BLoC code:
class ChangePasswordBloc extends Bloc {
  ChangePasswordBloc() : super(ChangePasswordInitial());

  @override
  Stream mapEventToState(
    ChangePasswordEvent event,
  ) async* {
    if (event is ChangePassword) {
      yield ChangePasswordProgress();
      try {
        await UserService.changePassword(newPass: event.newPass);
        yield ChangePasswordSuccess(message: TextConstants.passwordUpdated);
        await Future.delayed(Duration(seconds: 1));
        yield ChangePasswordInitial();
      } catch (e) {
        yield ChangePasswordError(e.toString());
        await Future.delayed(Duration(seconds: 1));
        yield ChangePasswordInitial();
      }
    }
  }
}
part of 'change_password_bloc.dart';

@immutable
abstract class ChangePasswordEvent {}

class ChangePassword extends ChangePasswordEvent {
  final String newPass;
  ChangePassword({required this.newPass});
}
part of 'change_password_bloc.dart';

@immutable
abstract class ChangePasswordState {}

class ChangePasswordInitial extends ChangePasswordState {}

class ChangePasswordProgress extends ChangePasswordState {}

class ChangePasswordError extends ChangePasswordState {
  final String error;
  ChangePasswordError(this.error);
}

class ChangePasswordSuccess extends ChangePasswordState {
  final String message;
  ChangePasswordSuccess({required this.message});
}
3. The ChangePasswordScreen class is a stateful widget so the UI can change. Let’s create the necessary variables:
class ChangePasswordScreen extends StatefulWidget {
  ChangePasswordScreen({Key? key}) : super(key: key);

  @override
  _ChangePasswordScreenState createState() => _ChangePasswordScreenState();
}

class _ChangePasswordScreenState extends State {
  final TextEditingController _newPassController = TextEditingController();
  final TextEditingController _confirmPassController = TextEditingController();
  final User? user = FirebaseAuth.instance.currentUser;
  bool isNewPassInvalid = false;
  bool isConfirmPassInvalid = false;
  late String userName;

  @override
  void initState() {
    userName = user?.displayName ?? "No Username";
    super.initState();
  }
4. Now, let’s move on to the AppBar. When pressing this button, we can go back to the Edit account screen.

@override
  Widget build(BuildContext context) {
    return Scaffold(
        body: _buildContext(context),
        appBar: AppBar(
            title: Text(TextConstants.changePassword, style: TextStyle(color: Colors.black, fontSize: 18)),
            backgroundColor: Colors.transparent,
            elevation: 0,
            leading: IconButton(
              icon: Icon(Icons.arrow_back_ios_new),
              onPressed: () => Navigator.of(context).pop(),
            ),
            iconTheme: IconThemeData(
              color: ColorConstants.primaryColor,
            )));
  }
5. This is how we connect bloc to the UI:
BlocProvider _buildContext(BuildContext context) {
    return BlocProvider(
      create: (context) => ChangePasswordBloc(),
      child: BlocConsumer(
        buildWhen: (_, currState) =>
            currState is ChangePasswordInitial || currState is ChangePasswordError || currState is ChangePasswordProgress || currState is ChangePasswordSuccess,
        builder: (context, state) {
          if (state is ChangePasswordProgress) return Stack(children: [_editAccountContent(context), FitnessLoading()]);
          if (state is ChangePasswordError) {
            WidgetsBinding.instance!.addPostFrameCallback((_) {
              ScaffoldMessenger.of(context).showSnackBar(SnackBar(content: Text(state.error)));
            });
          }
          if (state is ChangePasswordSuccess) {
            WidgetsBinding.instance!.addPostFrameCallback((_) {
              ScaffoldMessenger.of(context).showSnackBar(SnackBar(content: Text(state.message)));
            });
          }
          return _editAccountContent(context);
        },
        listenWhen: (_, currState) => true,
        listener: (context, state) {},
      ),
    );
  }
6. We are at the final steps for this screen. Basically, we need to repeat the same actions we did for the SignInPage() and SignUpPage(), but now for the _editAccountContent().


Widget _editAccountContent(BuildContext context) {
    ChangePasswordBloc _bloc = BlocProvider.of(context);
    double height = MediaQuery.of(context).size.height;
    return SafeArea(
      child: SingleChildScrollView(
        child: Padding(
          padding: EdgeInsets.only(top: 20.0, left: 20.0, right: 20.0),
          child: SizedBox(
            height: height - 140 - MediaQuery.of(context).padding.bottom,
            child: Column(crossAxisAlignment: CrossAxisAlignment.start, children: [
              SizedBox(height: 15),
              Text(TextConstants.newPassword, style: TextStyle(fontWeight: FontWeight.w600)),
              SettingsContainer(
                child: SettingsTextField(
                  controller: _newPassController,
                  obscureText: true,
                  placeHolder: TextConstants.passwordPlaceholder,
                ),
              ),
              if (isNewPassInvalid) Text(TextConstants.passwordErrorText, style: TextStyle(color: ColorConstants.errorColor)),
              SizedBox(height: 10),
              Text(TextConstants.confirmPassword, style: TextStyle(fontWeight: FontWeight.w600)),
              SettingsContainer(
                child: SettingsTextField(
                  controller: _confirmPassController,
                  obscureText: true,
                  placeHolder: TextConstants.confirmPasswordPlaceholder,
                ),
              ),
              if (isConfirmPassInvalid) Text(TextConstants.confirmPasswordErrorText, style: TextStyle(color: ColorConstants.errorColor)),
              Spacer(),
              FitnessButton(
                title: TextConstants.save,
                isEnabled: true,
                onTap: () {
                  FocusScope.of(context).unfocus();
                  setState(() {
                    isNewPassInvalid = !ValidationService.password(_newPassController.text);
                    isConfirmPassInvalid = _newPassController.text != _confirmPassController.text;
                  });
                  if (!(isNewPassInvalid || isConfirmPassInvalid)) {
                    _bloc.add(ChangePassword(newPass: _newPassController.text));
                  }
                },
              ),
            ]),
          ),
        ),
      ),
    );
  }
}
Reminder screen
When tapping the Reminder button in the Settings screen, the user gets to the Reminder screen. Here, they can create a workout notification for a particular date and time. For this, we are going to use the flutter_local_notifications: ^8.0.0 (*current version*) and flutter_native_timezone: ^2.0.0 (*current version*) libraries.

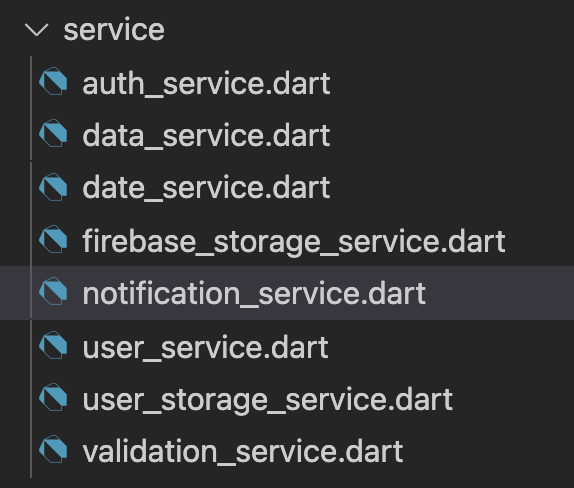
1. First things first, we create a new folder in screens. We also need to add a file in the service folder.

import 'package:flutter_local_notifications/flutter_local_notifications.dart';

class NotificationService {
  static final NotificationService notificationService =
      NotificationService._internal();
  static final FlutterLocalNotificationsPlugin flutterLocalNotificationsPlugin =
      FlutterLocalNotificationsPlugin();

  factory NotificationService() {
    return notificationService;
  }

  NotificationService._internal();

  init() {}
}
2. And then we need to work on the logic. Our bloc is called reminder_bloc.dart. It has all the methods for enabling notifications. We will pay more attention to this bloc a few steps later.
class ReminderBloc extends Bloc {
  ReminderBloc() : super(ReminderInitial());

  int? selectedRepeatDayIndex;
  late DateTime reminderTime;
  int? dayTime;

  @override
  Stream mapEventToState(
    ReminderEvent event,
  ) async* {
    if (event is RepeatDaySelectedEvent) {
      selectedRepeatDayIndex = event.index;
      dayTime = event.dayTime;
      yield RepeatDaySelectedState(index: selectedRepeatDayIndex);
    } else if (event is ReminderNotificationTimeEvent) {
      reminderTime = event.dateTime;
      yield ReminderNotificationState();
    } else if (event is OnSaveTappedEvent) {
      _scheuleAtParticularTimeAndDate(reminderTime, dayTime);
      yield OnSaveTappedState();
    }
  }
- reminder_event.dart
part of 'reminder_bloc.dart';

@immutable
abstract class ReminderEvent {}

class RepeatDaySelectedEvent extends ReminderEvent {
  final int index;
  final int dayTime;

  RepeatDaySelectedEvent({required this.index, required this.dayTime});
}

class ReminderNotificationTimeEvent extends ReminderEvent {
  final DateTime dateTime;

  ReminderNotificationTimeEvent({required this.dateTime});
}

class OnSaveTappedEvent extends ReminderEvent {}
- reminder_state.dart
part of 'reminder_bloc.dart';

@immutable
abstract class ReminderState {}

class ReminderInitial extends ReminderState {}

class RepeatDaySelectedState extends ReminderState {
  final int? index;

  RepeatDaySelectedState({
    required this.index,
  });
}

class ReminderNotificationState extends ReminderState {}

class OnSaveTappedState extends ReminderState {}
3. Now, let’s focus on the ReminderPage() class. We need to add the AppBar to navigate to the previous page, and the floatingActionButton for saving the reminder.
class ReminderPage extends StatelessWidget {
  const ReminderPage({Key? key}) : super(key: key);

  @override
  Widget build(BuildContext context) {
    return BlocProvider(
      create: (context) => ReminderBloc(),
      child: BlocBuilder(
        buildWhen: (_, currState) => currState is ReminderInitial,
        builder: (context, state) {
          return Scaffold(
            body: _buildContext(context),
            appBar: AppBar(
              centerTitle: false,
              titleSpacing: 0,
              title: Text(
                TextConstants.reminder,
                style: TextStyle(color: Colors.black, fontSize: 18),
              ),
              backgroundColor: Colors.transparent,
              elevation: 0,
              leading: IconButton(
                icon: Icon(
                  Icons.arrow_back_ios_new,
                  color: ColorConstants.primaryColor,
                ),
                onPressed: () => Navigator.of(context).pop(),
              ),
            ),
            floatingActionButtonLocation:
                FloatingActionButtonLocation.centerFloat,
            floatingActionButton: Padding(
              padding: EdgeInsets.symmetric(horizontal: 20),
              child: FitnessButton(
                title: TextConstants.save,
                onTap: () {
                  final bloc = BlocProvider.of(context);
                  bloc.add(OnSaveTappedEvent());
                },
              ),
            ),
          );
        },
      ),
    );
  }
4. In the _buildContext() we attach the bloc to the ReminderContent() widget tree.
BlocConsumer _buildContext(
      BuildContext context) {
    return BlocConsumer(
      buildWhen: (_, currState) => currState is ReminderInitial,
      builder: (context, state) {
        if (state is ReminderInitial) {
          BlocProvider.of(context).add(
            ReminderNotificationTimeEvent(dateTime: DateTime.now()),
          );
        }
        return ReminderContent();
      },
      listenWhen: (_, currState) => currState is OnSaveTappedState,
      listener: (context, state) {
        Navigator.of(context).pop();
      },
    );
  }
}
5. The ReminderContent() class contains a _createDetailedReminder() child. Here, we create a ListView and add the widgets, such as _CreateSelectTime() and _CreateTimePicker().

class ReminderContent extends StatelessWidget {
  const ReminderContent({Key? key}) : super(key: key);

  @override
  Widget build(BuildContext context) {
    return Container(
      width: double.infinity,
      height: double.infinity,
      color: ColorConstants.white,
      child: _createDetailedReminder(context),
    );
  }

  Widget _createDetailedReminder(BuildContext context) {
    return Container(
      padding: const EdgeInsets.symmetric(horizontal: 20, vertical: 20),
      child: ListView(
        children: [
          Column(
            crossAxisAlignment: CrossAxisAlignment.start,
            children: [
              _createSelectTime(),
              const SizedBox(height: 20),
              _createTimePicker(context),
              const SizedBox(height: 20),
              _createRepeating(),
              const SizedBox(height: 15),
              _createDayRepeating(context),
            ],
          ),
        ],
      ),
    );
  }
5.1. The first widget is _createSelectTime(). It allows users to choose a reminder time.

Widget _createSelectTime() {
    return Text(
      TextConstants.selectTime,
      style: TextStyle(
        fontSize: 18,
        fontWeight: FontWeight.w600,
      ),
    );
  }
5.2. The next one is _createTimePicker(). Here, users can choose the exact reminder time. We add the event to the bloc. This event will pass the time for calling the notifications.

Widget _createTimePicker(BuildContext context) {
    final bloc = BlocProvider.of(context);
    return Container(
      height: 250,
      child: CupertinoDatePicker(
        mode: CupertinoDatePickerMode.time,
        onDateTimeChanged: (DateTime value) {
          bloc.add(ReminderNotificationTimeEvent(dateTime: value));
        },
      ),
    );
  }
5.3. The _createRepeating() widget will ask the user how often the reminder should be repeated.
Widget _createRepeating() {
    return Text(TextConstants.repeating,
        style: TextStyle(fontSize: 18, fontWeight: FontWeight.w600));
}
5.4. The _createDayRepeating() widget is here to let users choose the reminder’s frequency.
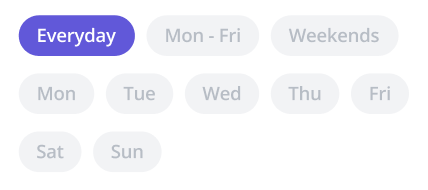
Widget _createDayRepeating(BuildContext context) {
    final bloc = BlocProvider.of(context);
    return BlocBuilder(
      buildWhen: (_, currState) => currState is RepeatDaySelectedState,
      builder: (context, state) {
        return Wrap(
          spacing: 10,
          runSpacing: 15,
          children: [
            for (int i = 0; i < DataConstants.reminderDays.length; i++) ...[
              RepeatingDay(
                title: DataConstants.reminderDays[i],
                isSelected: bloc.selectedRepeatDayIndex == i,
                onTap: () {
                  bloc.add(RepeatDaySelectedEvent(
                      index: i, dayTime: bloc.dayTime = i));
                },
              ),
            ],
          ],
        );
      },
    );
  }
}
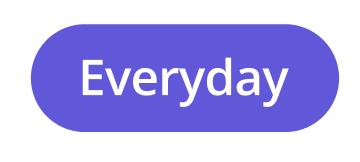
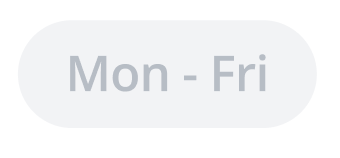
6. Now, we will create the RepeatingDay() model in the ReminderContent() class.
We add the modifiable variables for the container. If the user selects a particular container, it will change colors.

class RepeatingDay extends StatelessWidget {
  final String title;
  final bool isSelected;
  final VoidCallback onTap;

  RepeatingDay({
    required this.title,
    required this.isSelected,
    required this.onTap,
  });

  @override
  Widget build(BuildContext context) {
    return GestureDetector(
      onTap: () {
        onTap();
      },
      child: Container(
        padding: const EdgeInsets.symmetric(horizontal: 15, vertical: 7),
        decoration: BoxDecoration(
          color: isSelected
              ? ColorConstants.primaryColor
              : ColorConstants.grey.withOpacity(0.18),
          borderRadius: BorderRadius.circular(20),
        ),
        child: Text(
          title,
          style: TextStyle(
            fontSize: 16,
            fontWeight: FontWeight.w600,
            color: isSelected ? ColorConstants.white : ColorConstants.grey,
          ),
        ),
      ),
    );
  }
}
6.1. We are going to use the for loop in this function. You can read about what loops are here.
We will go through the list of days in the DataConstants. We will be using the index to add the list to the bloc for passing the exact time and date to the function.
Widget _createDayRepeating(BuildContext context) {
    final bloc = BlocProvider.of(context);
    return BlocBuilder(
      buildWhen: (_, currState) => currState is RepeatDaySelectedState,
      builder: (context, state) {
        return Wrap(
          spacing: 10,
          runSpacing: 15,
          children: [
            for (int i = 0; i < DataConstants.reminderDays.length; i++) ...[
              RepeatingDay(
                title: DataConstants.reminderDays[i],
                isSelected: bloc.selectedRepeatDayIndex == i,
                onTap: () {
                  bloc.add(RepeatDaySelectedEvent(
                      index: i, dayTime: bloc.dayTime = i));
                },
              ),
            ],
          ],
        );
      },
    );
  }
}
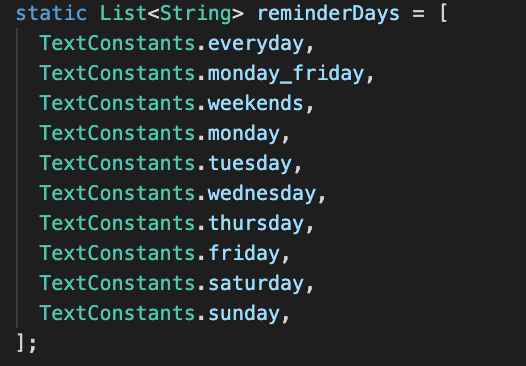
6.2. DataConstants.reminderDays list contains the TextConstants for any possible reminder option.
7. We are now getting to the most important part of our Notification screen – modifying the main.dart file and decoding the functions in the Reminder bloc.
7.1. This is how the main.dart file looked before:

And this is how it should look now:
void main() async {
  WidgetsFlutterBinding.ensureInitialized();
  SystemChrome.setPreferredOrientations(
      [DeviceOrientation.portraitUp, DeviceOrientation.portraitDown]);
  await Firebase.initializeApp();

  runApp(MyApp());
}

class MyApp extends StatefulWidget {
  @override
  _MyAppState createState() => new _MyAppState();
}

class _MyAppState extends State {
  static late FlutterLocalNotificationsPlugin flutterLocalNotificationsPlugin =
      NotificationService.flutterLocalNotificationsPlugin;

  @override
  initState() {
    super.initState();
    const AndroidInitializationSettings initializationSettingsAndroid =
        AndroidInitializationSettings('app_icon');
    final IOSInitializationSettings initializationSettingsIOS =
        IOSInitializationSettings();
    final InitializationSettings initializationSettings =
        InitializationSettings(
            android: initializationSettingsAndroid,
            iOS: initializationSettingsIOS);

    tz.initializeTimeZones();

    flutterLocalNotificationsPlugin.initialize(initializationSettings,
        onSelectNotification: selectNotification);
  }

  @override
  Widget build(BuildContext context) {
    final currUser = FirebaseAuth.instance.currentUser;
    final isLoggedIn = currUser != null;
    if (isLoggedIn) {
      GlobalConstants.currentUser = UserData.fromFirebase(currUser);
    }
    return MaterialApp(
      debugShowCheckedModeBanner: false,
      title: 'Fitness',
      theme: ThemeData(
        textTheme:
            TextTheme(bodyText1: TextStyle(color: ColorConstants.textColor)),
        fontFamily: 'NotoSansKR',
        scaffoldBackgroundColor: Colors.white,
        visualDensity: VisualDensity.adaptivePlatformDensity,
      ),
      home: isLoggedIn ? TabBarPage() : OnboardingPage(),
    );
  }

  Future selectNotification(String? payload) async {
    showDialog(
      context: context,
      builder: (_) {
        return new AlertDialog(
          title: Text("PayLoad"),
          content: Text("Payload : $payload"),
        );
      },
    );
  }
}
We turned the Stateless widget into a Stateful one because we have a good bit of initiations to complete for our notifications. Check out this piece for more information.
8. Now, let’s go back to the Reminder bloc function.
class ReminderBloc extends Bloc {
  ReminderBloc() : super(ReminderInitial());

  int? selectedRepeatDayIndex;
  late DateTime reminderTime;
  int? dayTime;

  @override
  Stream mapEventToState(
    ReminderEvent event,
  ) async* {
    if (event is RepeatDaySelectedEvent) {
      selectedRepeatDayIndex = event.index;
      dayTime = event.dayTime;
      yield RepeatDaySelectedState(index: selectedRepeatDayIndex);
    } else if (event is ReminderNotificationTimeEvent) {
      reminderTime = event.dateTime;
      yield ReminderNotificationState();
    } else if (event is OnSaveTappedEvent) {
      _scheuleAtParticularTimeAndDate(reminderTime, dayTime);
      yield OnSaveTappedState();
    }
  }
8.1. The most important event here is OnsaveTappedEvent().
- In _scheduleAtParticularTimeAndDate() we are passing the exact time and date we have set in ReminderContent().
- In await flutterNotificationsPlugin.zonedSchedule() we record the details of the notification the user will receive.
  Future _scheuleAtParticularTimeAndDate(
      DateTime dateTime, int? dayTime) async {
    final flutterNotificationsPlugin = FlutterLocalNotificationsPlugin();
    final androidPlatformChannelSpecifics = AndroidNotificationDetails(
        'your other channel id',
        'your other channel name',
        'your other channel description');
    final iOSPlatformChannelSpecifics = IOSNotificationDetails();
    NotificationDetails platformChannelSpecifics = NotificationDetails(
        android: androidPlatformChannelSpecifics,
        iOS: iOSPlatformChannelSpecifics);

    await flutterNotificationsPlugin.zonedSchedule(
      1,
      "Fitness",
      "Hey, it's time to start your exercises!",
      _scheduleWeekly(dateTime, days: _createNotificationDayOfTheWeek(dayTime)),
      platformChannelSpecifics,
      uiLocalNotificationDateInterpretation:
          UILocalNotificationDateInterpretation.absoluteTime,
      androidAllowWhileIdle: true,
      matchDateTimeComponents: DateTimeComponents.dayOfWeekAndTime,
    );
  }
8.2. How can we find the required data? We navigate to the project documentation via cmd + click, and zonedSchedule() will display the data to enter.

9. This is how our notification will look:
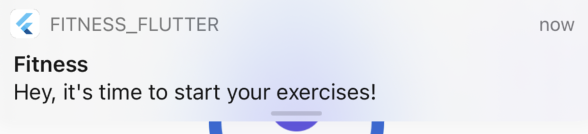
Moreover, the user will get the message at the right time even if the app is closed.
10. Let’s explore the _scheduleWeekly() function. Here, we are using one more function, _scheduleDaily(), where we determine the current time with the help of the flutter_native_timezone library.
tz.TZDateTime _scheduleDaily(DateTime dateTime) {
    final now = tz.TZDateTime.now(tz.local);
    var timezoneOffset = DateTime.now().timeZoneOffset;
    final scheduleDate = tz.TZDateTime.utc(now.year, now.month, now.day)
        .add(Duration(hours: dateTime.hour, minutes: dateTime.minute))
        .subtract(Duration(hours: timezoneOffset.inHours));

    return scheduleDate.isBefore(now)
        ? scheduleDate.add(Duration(days: 1))
        : scheduleDate;
  }

  tz.TZDateTime _scheduleWeekly(DateTime dateTime, {required List? days}) {
    tz.TZDateTime scheduleDate = _scheduleDaily(dateTime);

    for (final int day in days ?? []) {
      scheduleDate = scheduleDate.add(Duration(days: day));
    }

    return scheduleDate;
  }
11. In the _createNotificationDayOfTheWeek() function, we will be using a switch case where the index can help us understand which container is responsible for a particular day.
List _createNotificationDayOfTheWeek(int? dayTime) {
    switch (dayTime) {
      case 0:
        return [
          DateTime.monday,
          DateTime.tuesday,
          DateTime.wednesday,
          DateTime.thursday,
          DateTime.friday,
          DateTime.saturday,
          DateTime.sunday
        ];
      case 1:
        return [
          DateTime.monday,
          DateTime.tuesday,
          DateTime.wednesday,
          DateTime.thursday,
          DateTime.friday
        ];
      case 2:
        return [DateTime.saturday, DateTime.sunday];
      case 3:
        return [DateTime.monday];
      case 4:
        return [DateTime.tuesday];
      case 5:
        return [DateTime.wednesday];
      case 6:
        return [DateTime.thursday];
      case 7:
        return [DateTime.friday];
      case 8:
        return [DateTime.saturday];
      case 9:
        return [DateTime.sunday];
      default:
        return [];
    }
  }
}
For example, we can have a case 0: return everyday, because that’s what the container is called — “Everyday.”
If we have a case 1: return mon-fri, we are retrieving all the days from Monday to Friday, and so on.
Congrats: your Flutter fitness app is complete!
Can you believe we are finished? That was our last screen for this fitness app. Let’s recap everything we accomplished in this part:
- Settings screen
- Edit account screen
- Change password screen
- and Reminder screen.
And just like that, you made your very own fitness app — from creating a new project and adding the first folders, to writing code for the Reminder screen. It definitely took some effort but hey, now you know how to utilize Flutter and have an app made from scratch. Congrats, again, what a great job!
Feel free to check out our project on Github. If you have any questions concerning this project or would like our help in implementing your own ideas, contact us! We will be glad to talk with you.