Cross-platform development has been the new, hot trend for the last couple of years. Who wouldn’t want to get an app that runs on multiple platforms with a native look and feel? It beats working on two different solutions at the same time.
At Perpetio, we have worked on full-cycle mobile app development of many fitness applications and have learned a thing or two along the way. It’s high time to share our approach and show you how to develop a cross-platform fitness app with Flutter, step by step. Interested? Let’s go!
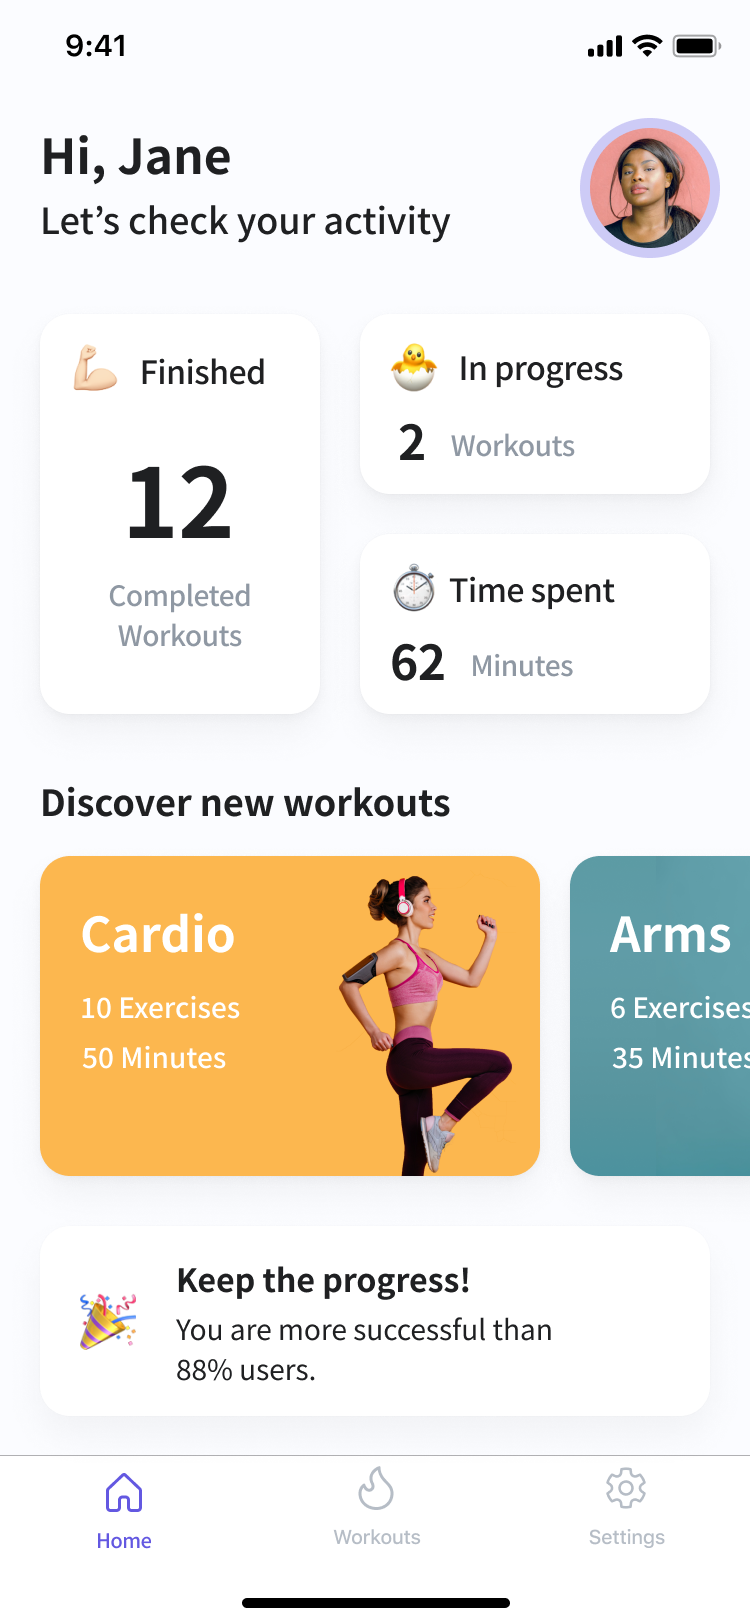
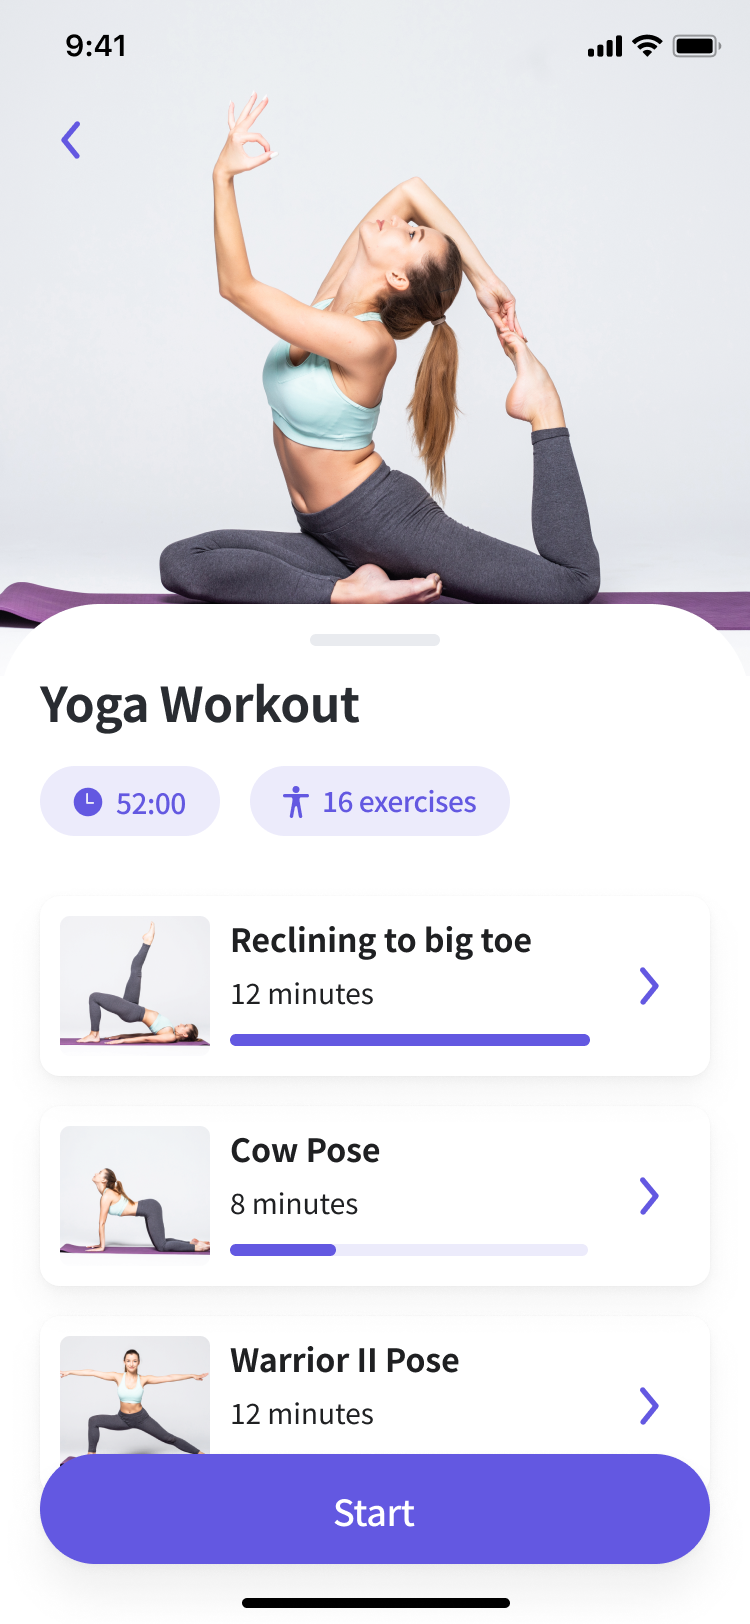
We will be creating a fitness app today, more precisely, a workout app. By the way, we discussed the different types of fitness apps in a recent post. But, for now, we want to build a fitness app to help users choose and complete workout routines. It will be a one-stop shop focused on making exercise more convenient for users. Simply choose a workout, be it cardio or yoga, receive a video and text instructions, and keep track of progress. An all-in-one app. Here’s a little spoiler of the final result of our efforts to develop a fitness app with Flutter:
Why build your own fitness app
Making a fitness app is an excellent way to both scale up your existing wellness business or enter the market from scratch. Let’s discuss the main advantages of building a fitness app for both scenarios.
For a business owner who runs a health&fitness company, let’s say a gym or a sports clothing brand, a decision to create a fitness app means
- Attracting a new pool of customers online
- Developing your brand exposure and becoming a well-known name. For example, Nike’s running app is now one of the most popular fitness apps out there
- Offering a more convenient and universal experience for your existing customers. For example, a gym facility can offer some home workouts in their branded app for current members along with gym scheduling functionality
When it comes to a choice to make a fitness app for your startup, it is an excellent idea too! Think about it: after the pandemic, many of us learned that working out in the comfort of one’s home is a way to go. As a result, the number of fitness app users skyrocketed and the market is more than welcoming to new solutions. Consider this: the mobile fitness industry is expected to grow by around 17% annually from 2021 to 2028.
Top features to include in your fitness application
Now that it’s clear why to make a fitness app, let’s move on to the question of how to create a fitness app. First of all, you need to decide on what app type you will be building. When it comes to developing a fitness app, the most common choices are:
- Workout apps (tutorials, calendars, or all-in-one)
- Activity tracking apps (e.g. for running, cycling, etc.)
- Diet and nutrition apps (calorie tracking, recipes, diet guides etc.)
- Mental wellbeing and meditation apps
Let’s now discuss your feature set. There are certain features that are simply a must to build a fitness app, no matter its type. These include
- User authentication
- User profile with detailed health information and personal goals
- Payment gateways
- Push notifications
- Customer support
- Onboarding
- Settings
Then, to build a custom fitness app, you will be adding type-specific features than are forming your user experience. Which ones?
Audio or video player
If you are considering how to make a fitness app and which features to include to make a universal solution, an audio or video player is a way to go. This functionality is a must for workout apps, activity tracking, and meditation apps. Clear visual instruction is a basis for any online workout for it to be safe and effective. At the same time, meditation and activity-tracking solutions only require audio guidance.
Database
Most fitness apps need a database containing workouts, recipes, calendars, and whatnot. Mostly, these are cloud databases so users can access the content at any point and there is enough space for larger scopes of information. For example, in this fitness app tutorial, we are using the Firebase cloud database.
Calendar
Help your users keep track of their schedule with an in-app calendar. If you are building a solution for your gym, your clients will be more than happy to have a training calendar on their smartphones and the possibility to sign up for a session from the app.
Additionally, a calendar is a great motivational tool for any workout app. For example, in our recent fitness app Burn, the calendar helps users stay on top of their workout plans and keep their motivation up.
Activity tracking APIs
If your fitness application is an activity-tracking one, then, well, activity tracking APIs are something you can’t go without. These APIs are a shortcut for developers to get access to the device’s hardware collecting navigation data.
Wearables integration
Many fitness app users prefer to enjoy the convenience of wearable devices instead of taking their smartphones for a workout or a run. That’s why it’s best to adapt your application to run on smartwatches too.
Maps integration
Maps integration is required for activity-tracking apps. Whether it’s running, walking, cycling, or swimming, your users will be happy to check out their results not only as a number but as a visualized route on a map. Many love sharing their routes on social media too.
Social media plugins
Speaking of social media, don’t forget to include the necessary plugins in your solution. In this way, users can easily share the content from the app with their friends. And, of course, encourage them to use your application too.
How to develop a fitness app from scratch
Before we begin with the development process, which services will we need to build a fitness app with Flutter apart from Flutter itself?
BLoC
This package makes it easy to implement the BLoC Design Pattern (Business Logic Component).
This design pattern helps to separate the presentation from the business logic. Following the BLoC pattern facilitates testability and reusability. This package abstracts reactive aspects of the pattern, allowing developers to focus on writing the business logic.
Firebase
Firebase is a Backend-as-a-Service (BaaS) app development platform that provides hosted backend services, such as a real-time database, cloud storage, authentication, crash reporting, machine learning, remote configuration, and hosting for your static files.
Notification service
Notifications are an important tool used on the majority of applications to improve user experience and engage users with your application.
Flutter Secure Storage
Flutter Secure Storage provides an API to store data in secure storage. Keychain is used in iOS, and KeyStore based solution is used in Android.
Validation service
The validation service checks whether the user’s information is valid to make the apps secure and easy to use. If the user has correctly filled out the form, the information is processed. If the user submits incorrect information, a friendly error message is displayed, letting them know what went wrong.
This first part of the tutorial will show you how to set up your Flutter project, add some of the mentioned tools, such as Firebase and BLoC, and create three important screens — Onboarding, Sign up, and Log in.
This first part of the tutorial on how to create a fitness app with Flutter will show you how to set up your Flutter project, add some of the mentioned tools, such as Firebase and BLoC, and create three important screens — Onboarding, Sign up, and Log in.
Creating the Flutter project
Let’s start from the very beginning. Clearly, we need to start by creating our project.
1. Open Visual Studio Core and make sure you have the Flutter extension there. In case you don’t, you can download it here. We like to use Visual Studio Core, but if you are more familiar with Android Studio or IntelliJ IDEA, you can go for those as well.
2. Now, when you are all set, click cmd + shift + p to see create Flutter: New Application Project.

3. Let’s name our project. We decided to go as simple as using “fitness.” Similar to the Firebase setup, it is the name we will be using throughout our work on the app. You should now select the folder “Projects”: this is where the app will be stored.

4. Open the main.dart file, delete everything from there, and type this:
void main() async {
 WidgetsFlutterBinding.ensureInitialized();
 SystemChrome.setPreferredOrientations([
   DeviceOrientation.portraitUp,
   DeviceOrientation.portraitDown,
 ]);
 await Firebase.initializeApp();
 runApp(MyApp());
}

class MyApp extends StatelessWidget {
 @override
 Widget build(BuildContext context) {
   final isLoggedIn = FirebaseAuth.instance.currentUser != null;

   return MaterialApp(
     debugShowCheckedModeBanner: false,
     title: 'Fitness',
     theme: ThemeData(
       textTheme:
           TextTheme(bodyText1: TextStyle(color: ColorConstants.textColor)),
       fontFamily: 'NotoSansKR',
       scaffoldBackgroundColor: Colors.white,
       visualDensity: VisualDensity.adaptivePlatformDensity,
     ),
     home: isLoggedIn ? TabBarPage() : OnboardingPage(),
   );
 }
}
In such a way, we check whether the account is logged into our Flutter fitness app. We will do this using Firebase authentication and the ternary operator. Login and authentication require a bit more actions, which we will discuss later.
SystemChrome is there to make sure the entire UI won’t turn around when the user rotates their phone 90 degrees. We are also setting the app’s colors, theme, fonts, and so on.
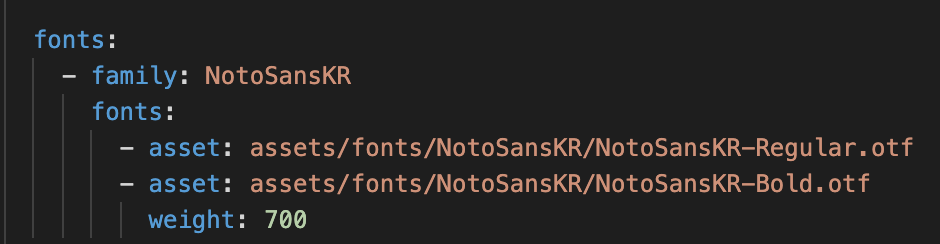
5. Add the FontFamily in our pubspec.yaml file and create a folder called fonts inside the assets folder. As you can guess, this folder will contain all the fonts we will need for our app. You can download the FontFamily of your choice online.

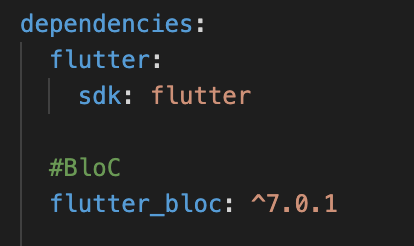
6. We should add the bloc to create the logic inside our project. To install it, simply click on this page, copy a package called flutter_bloc: ^7.1.0, and insert it in the pubspec.yaml file in dependencies like shown below. Save it in this file (by pressing cmd + S) to run the extension. Now you can use the bloc inside your code!
7. And those are our first steps in making the fitness app. The foundation of the app is done as we created its logic and the basic visual assets. Now, we can add screens like building blocks. But before that, one more stop — Firebase setup.
Firebase setup
Let’s move on to the essential step of the process: integrating Firebase. What is Firebase and why do we need it? It is Google’s tool for tracking, analytics, and taking care of your app as a whole. So, registering your app in Firebase is basically ensuring that you have overall control.
1. Starting out with Firebase
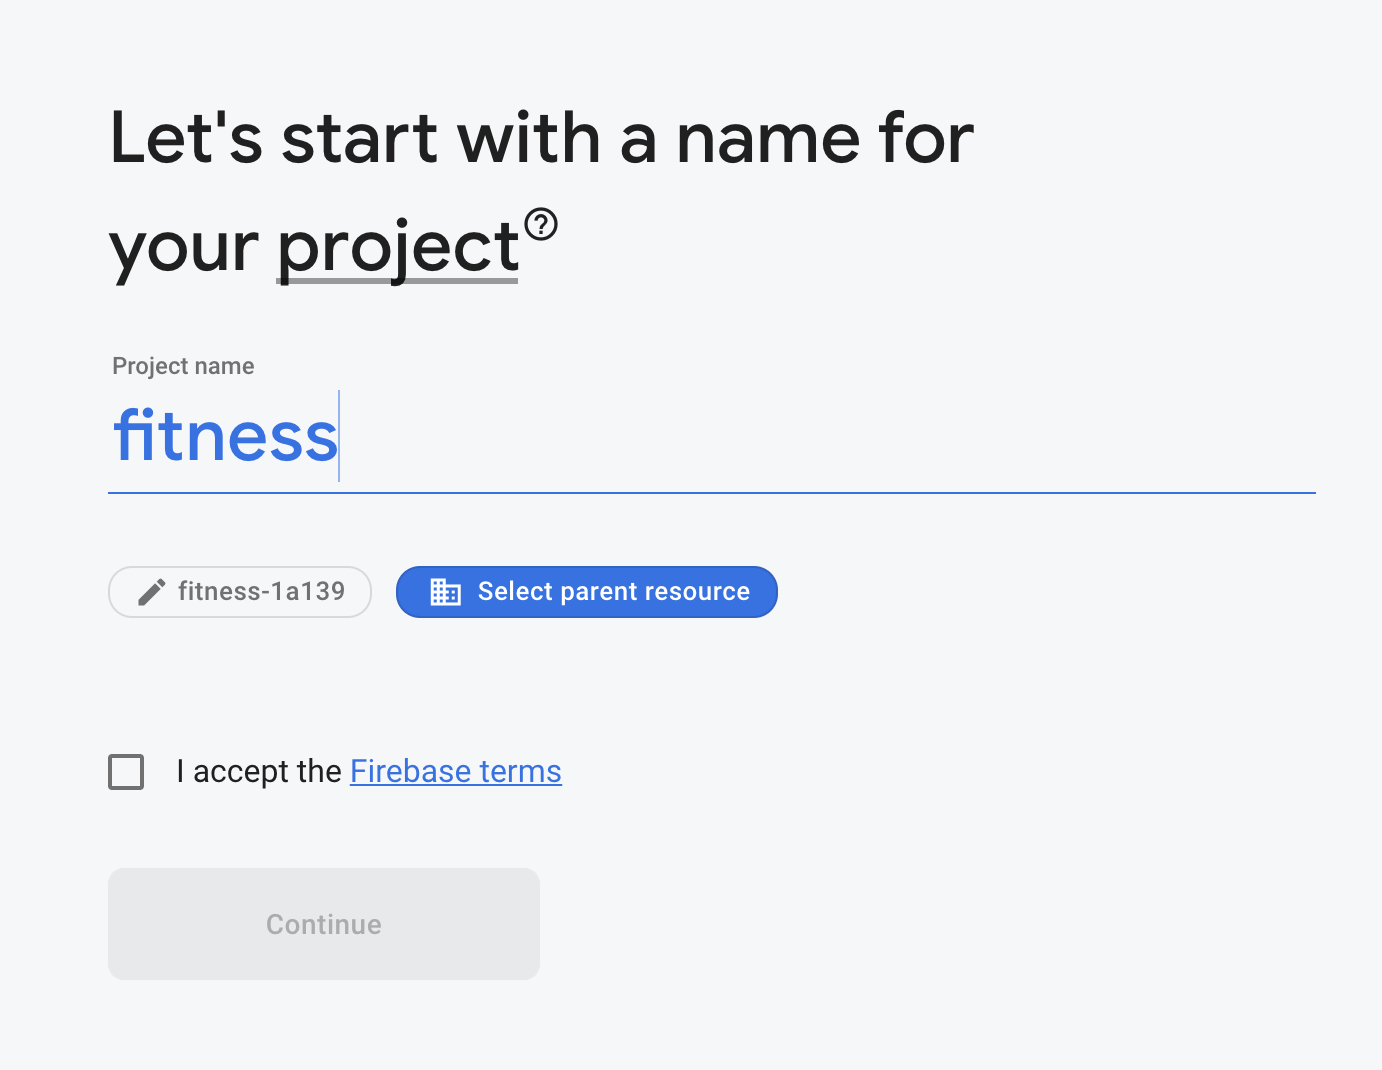
1.1. First things first, you need to open Firebase’s website and click on Add project.
1.2. Then, you have to choose a suitable name, set the Analytics location, and click on Create project. Our project, for example, is simply called “fitness.”
1.3. If you did everything right, this is the message you should get:

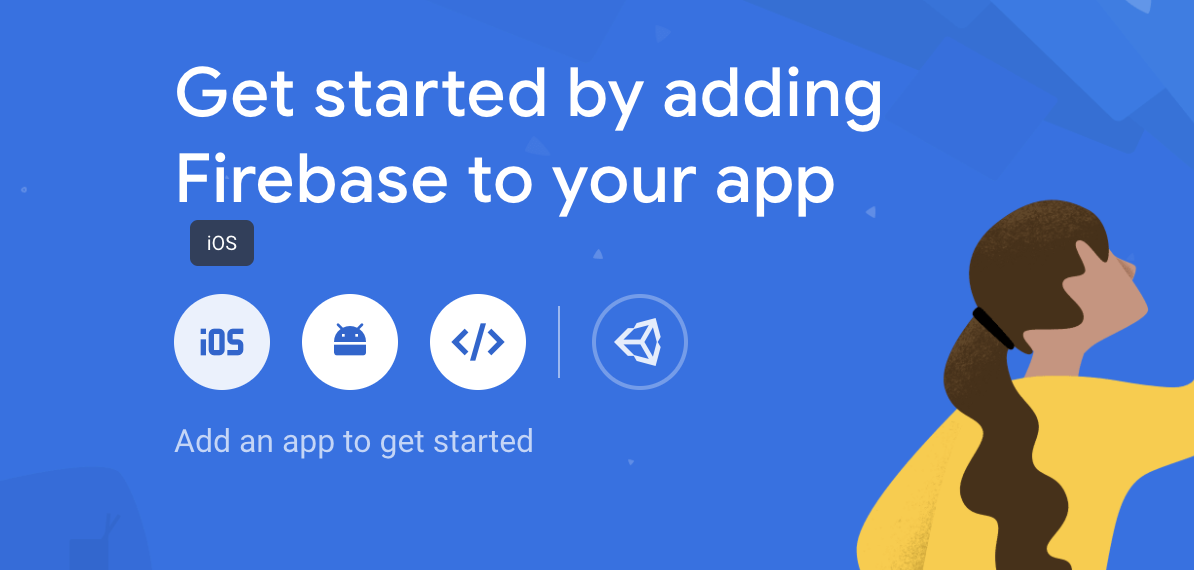
1.4. As suggested by Firebase itself, now it’s time to add the tool to your iOS or Android app. Or both. As our project is cross-platform, we can set up Firebase for the platform of our choice or both of them. We decided to make both iOS and Android apps. Let’s start by clicking on the corresponding icon.
2. Configuring the iOS app
2.1. Enter your iOS bundle ID and app nickname and click on Register App. You can find your Bundle Identifier in the General tab for your app’s primary target in Xcode.2.2. Time to add the app’s nickname. It is the same as your app’s name in Firebase.

2.3. Now, you have to download the config file and move it to the Runner folder in your Xcode.

2.4. Finally, click on this website and install the Firebase core plugin into the pubspec.yaml file.

3. Configuring the Android app
3.1. Configuring the Android app is quite similar to what we did for the iOS one. We first click on the Android icon.
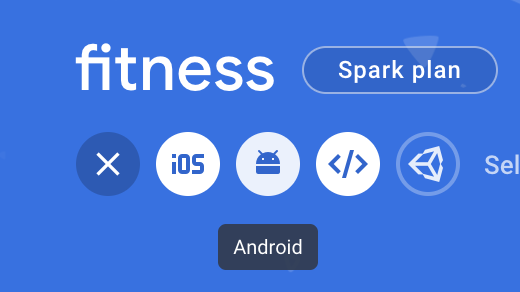
3.2. Just like with the iOS app, we need to add the Android package name and the application nickname. The app package name is usually the applicationId in the app-level build.gradle file. Click on the Register app button.


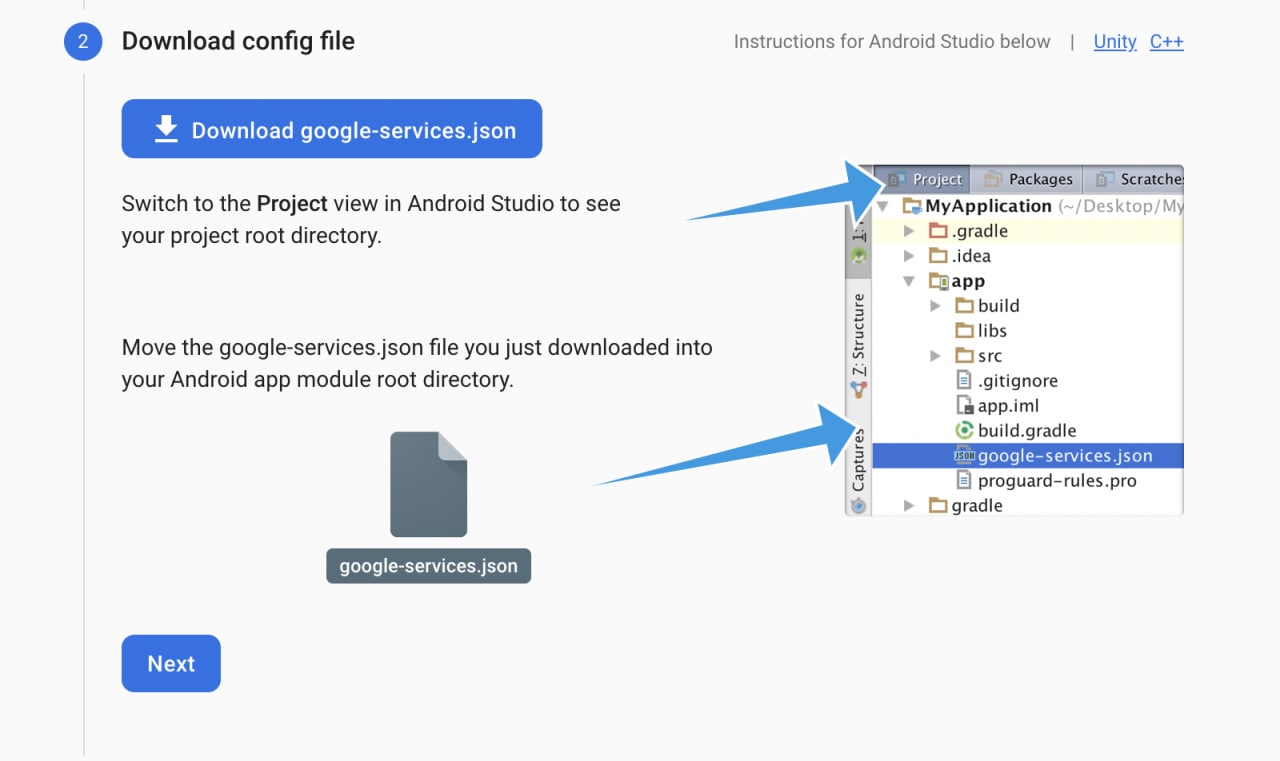
3.3. Now, let’s get our bundle ID. First, download the google-services.json file and place it in the project’s app root directory.
3.4. Modify your build.gradle files to use the plugin. We need to add some code to the particular files so that Firebase would work for Android. Here’s how to do this for each file:
- Project-level build.gradle (<project>/build.gradle):

- App-level build.gradle (<project>/<app-module>/build.gradle):

That’s it — our Firebase setup is all done.
 Mariia Yuskevych
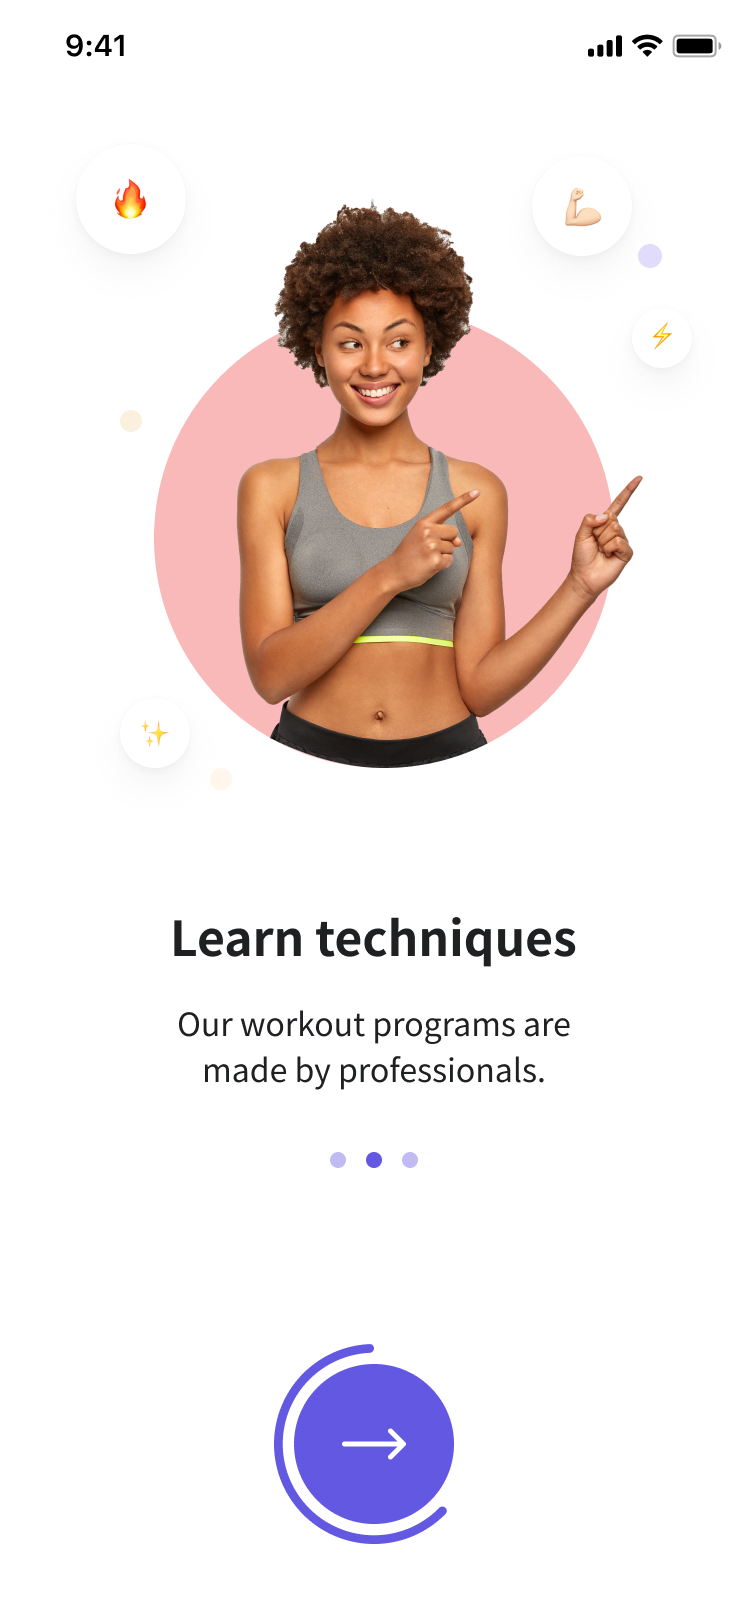
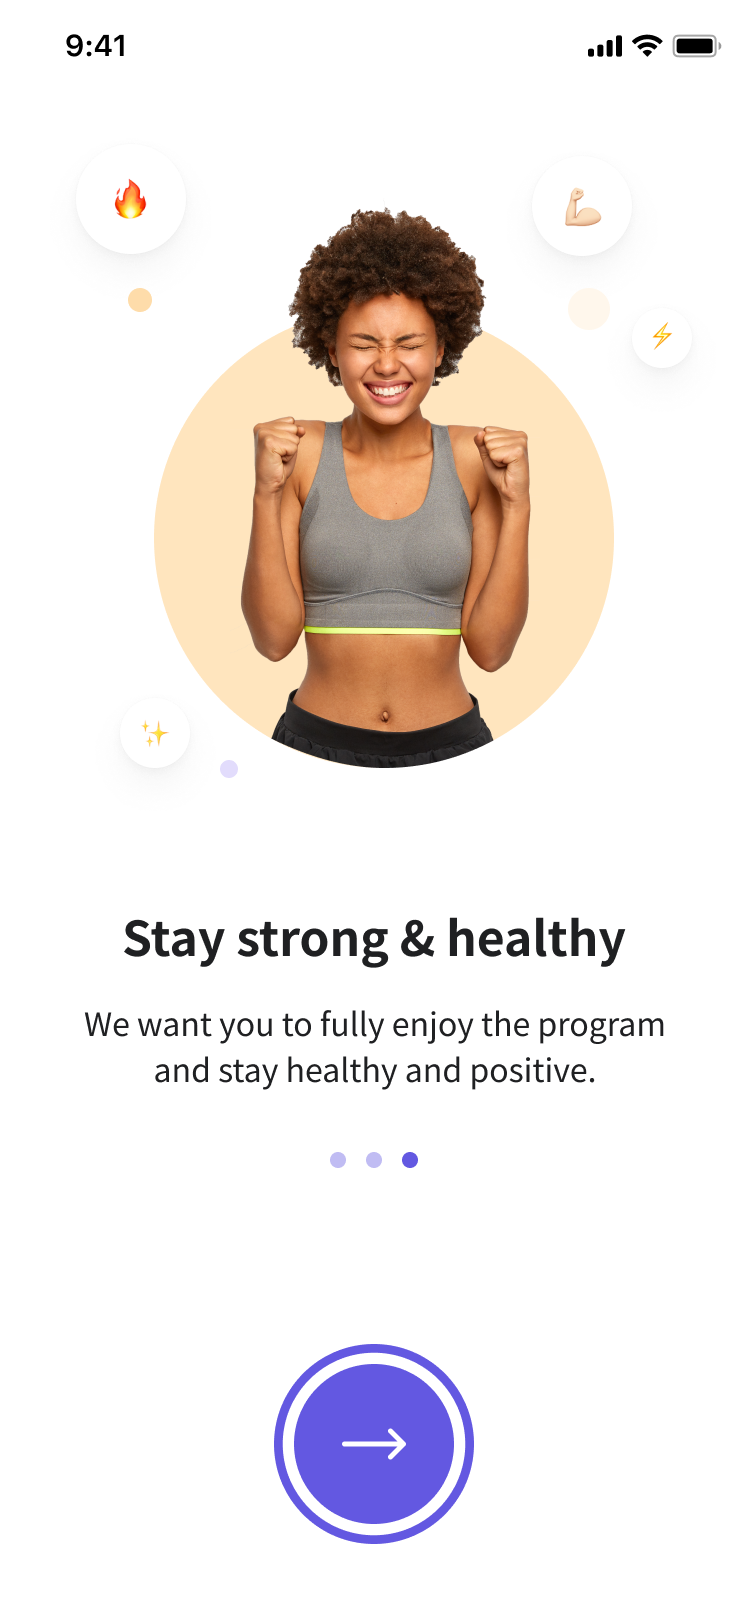
Onboarding screen
Clearly, the user is not logged in now, so we should create our first screen — Onboarding. Onboarding is the first thing users will see when opening the app after downloading it. We can basically call it an introduction. With this in place, users learn what the app is all about and how it can help them.
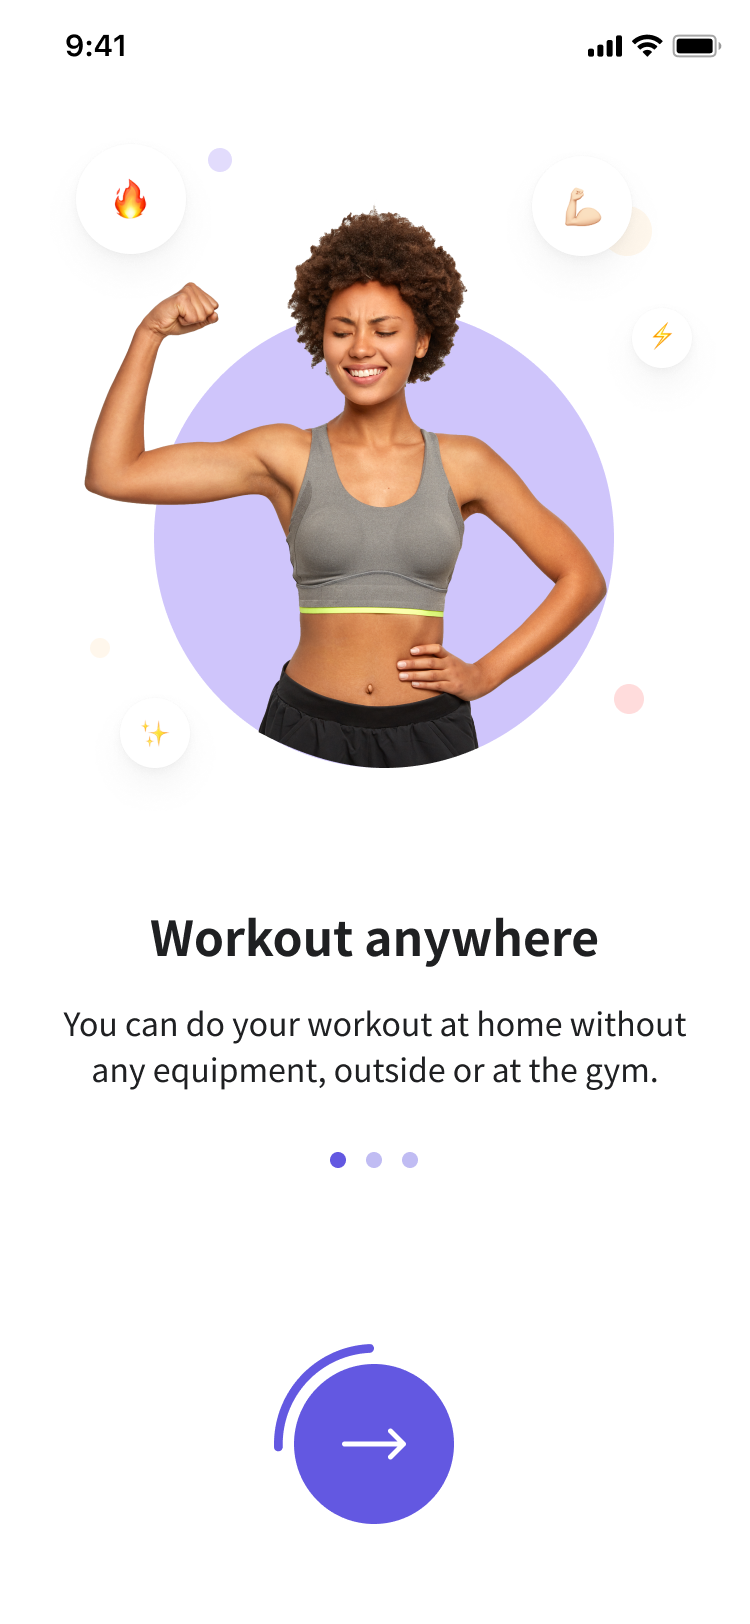
Take a peek at how our final onboarding screen will look:
Now, let’s learn how to get this result step by step.
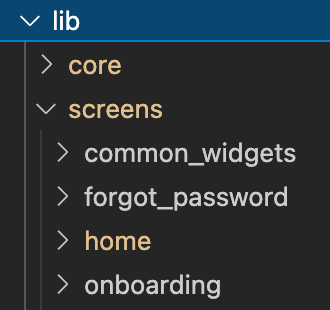
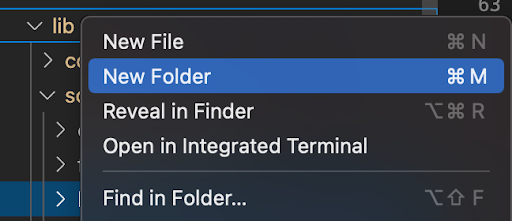
1. Find the lib folder and create a new folder inside it by using the cmd + M combination or right-click on the mouse, and select new file/folder/bloc.
Let’s call it screens because it will contain all the app’s screens.
2. Now, we have to make a new onboarding folder and add a new file by pressing cmd + N or right-clicking the mouse.
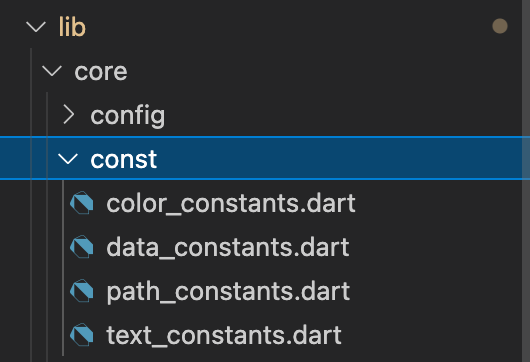
The lib folder created the folder called core, which has all the necessary folders and files in it.

- Сolor_constants helps us have set colors throughout the app (it can also be added during the project).
Hex color codes contain all the colors and use the code to determine which one it is. You might also use the RGB color model for this.
import 'package: flutter/material.dart';
class ColorConstants {
    static const textColor = Color(0xFF1F2022);
    static const primaryColor = Color(0xFF6358E1);
    static const textBlack = Color(OxFF1F2022);
    static const white = Color(OxFFFFFFFF);
    static const grey Color(0xFFB6BDC6);
    static const loadingBlack = Color(0x80000000);

    static const textFieldBackground Color(OxFFFBFCFF);
    static const textFieldBorder = Color (OxFFB9BBC5);
    static const disabledColor = Color(0xFFE1E1E5);
    static const errorColor = Color (OxFFF25252);
    static const homeBackgroundColor = Color.fromRGBO(252, 252, 252, 1);
    static const textGrey = Color(0xFF8F98A3);
    static const cardioColor = Color( OxFFFCB74F);
    static const armsColor = Color(OxFF5C9BA4);
}
- Data_constants will help us organize all the data that we will later use in the Onboarding screen. (It can also be added during the project).
Pay attention to this code. Our Onboarding screen has some titles (you can see them on the screenshots below), so clearly, we need to arrange them properly.
class DataConstants {
    // Onboarding
    static final onboardingTiles = [
        OnboardingTile(
            title: TextConstants.onboarding1Title,
            maintext: TextConstants.onboarding1Description,
            imagePath: PathConstants.onboarding1
        ),
        OnboardingTile(
            title: TextConstants.onboarding Title,
            mainText: TextConstants.onboarding Description,
            imagePath: PathConstants.onboarding2
        ),
        OnboardingTile(
            title: TextConstants.onboarding3Title,
            maintext: TextConstants.onboarding3Description,
            imagePath: PathConstants.onboarding3
        )
    ];
}

- Path_constants will help make constants for the path in assets. (It can also be added during the project). What are paths? These are the ways we use to access a certain image or icon. First, we need to get to the assets folder, then the images or icons folder, and only then can we reach the very file. We have a separate path for each of the onboarding pages.
class PathConstants{
    // Onboarding
    static const String onboarding1 = 'assets/images/onboarding/onboarding.png';
    static const String onboarding2 = 'assets/images/onboarding/onboarding_2.png';
    static const String onboarding3 = 'assets/images/onboarding/onboarding_3.png':
    // Auth
    static const String eye = 'assets/images/auth/eye_icon.png';
    // Tabbar
    static const String home = 'assets/icons/home/home_icon.png';
    static const String workouts = 'assets/icons/home/workouts_icon.png';
    static const String settings'assets/icons/home/settings_icon.png';
    // Home
    static const String profile = 'assets/images/home/profile.png';
    static const String finished = 'assets/images/home/finished.png';
    static const String inProgress = 'assets/icons/home/inProgress.png';
    static const String timeSent = 'assets/icons/home/time.png';
    static const String cardio = 'assets/images/home/cardio.png';
    static const String arms = 'assets/images/home/arms.png';
    static const String progress = 'assets/icons/home/progress.png';
}
- Text_constants will help us organize all the texts. (It can also be added during the project).
class TextConstants {
    // Onboarding
    static const String onboarding1Title = "Workout anywhere";
    static const String onboarding Title = "Learn techniques";
    static const String onboarding3Title = "Stay strong & healthy":
    static const String onboarding Description =
    "You can do your workout at home without any equipment, outside or at the gym.";
    static const String onboarding2Description =
    "Our workout programs are made by professionals.";
    static const String onboarding3Description =
    "We want you to fully enjoy the program and stay healthy and positive.";
}
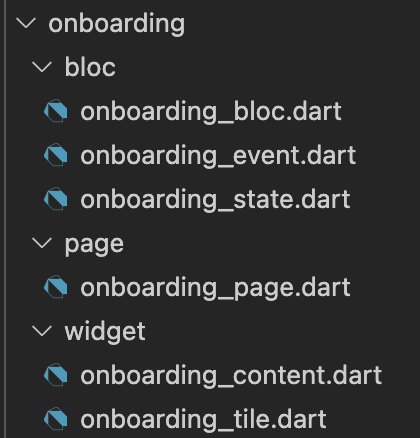
3. In the folder called bloc, we will have our app’s logic, where in Page we connect logic to the UI, in Сontent we return the widgets tree, and in onboarding_tile, we set three objects to be repeated three times. Let’s go through these one by one.
3.1. OnBoardingPage
- Return Scaffold with a body that connects to Business logic (bloc)
- We can connect our UI with the bloc thanks to BlocProvider<*NameScreen*Bloc>.
- Let’s take a look at the child: BlocConsumer<NameBloc, NameState> (...). It contains the Builder and the Listener methods. We will use the Listener method to go to the next screen. The Builder method is for defining which state it is and returning the content of the screen.
- currState should be Initial (that’s its default state, which is created automatically) at first in the buildWhen method because it will be called when the app runs for the first time.
class OnboardingPage extends StatelessWidget {
  @override
  Widget build(BuildContext context) {
    return Scaffold(
      body: _buildBody(context),
    );
  }

  BlocProvider<OnboardingBloc> _buildBody(BuildContext context) {
    return BlocProvider<OnboardingBloc>(
      create: (BuildContext context) => OnboardingBloc(),
      child: BlocConsumer<OnboardingBloc, OnboardingState>(
        listenWhen: (_, currState) => currState is NextScreenState,
        listener: (context, state) {
          Navigator.of(context).pushReplacement(
            MaterialPageRoute(
              builder: (_) {
                return SignUpPage();
              },
            ),
          );
        },
        buildWhen: (_, currState) => currState is OnboardingInitial,
        builder: (context, state) {
          return OnboardingContent();
        },
      ),
    );
  }
}
3.2. OnBoardingContent
- Now we need to return SafeArea to ensure that our content won’t accidentally get off the limits of the device’s screen.
- Our screen is divided into two parts: the first is the page view with the image, title, and description; the second contains animation points and the animation button.
class OnboardingContent extends StatelessWidget {
  @override
  Widget build(BuildContext context) {
    final bloc = BlocProvider.of<OnboardingBloc>(context);
    return SafeArea(
      child: Column(
        crossAxisAlignment: CrossAxisAlignment.center,
        children: [
          Expanded(
            flex: 4,
            child: _createPageView(bloc.pageController, bloc),
          ),
          Expanded(
            flex: 2,
            child: _createStatic(bloc),
          ),
        ],
      ),
    );
  }
3.3. _createPageView(...) in class OnBoardingContent
Widget _createPageView(PageController controller, OnboardingBloc bloc) {
    return PageView(
      scrollDirection: Axis.horizontal,
      controller: controller,
      children: DataConstants.onboardingTiles,
      onPageChanged: (index) {
        bloc.add(PageSwipedEvent(index: index));
      },
    );
  }
In children, we set the data from DataConstants. Here we created a list of onboarding tiles with title, mainText, and imagePath.
class DataConstants {
  // Onboarding
  static final onboardingTiles = [
    OnboardingTile(
      title: TextConstants.onboarding1Title,
      mainText: TextConstants.onboarding1Description,
      imagePath: PathConstants.onboarding1,
    ),
    OnboardingTile(
      title: TextConstants.onboarding2Title,
      mainText: TextConstants.onboarding2Description,
      imagePath: PathConstants.onboarding2,
    ),
    OnboardingTile(
      title: TextConstants.onboarding3Title,
      mainText: TextConstants.onboarding3Description,
      imagePath: PathConstants.onboarding3,
    ),
  ];
In the TextConstants folder, we have title and mainText.
class TextConstants {
  // Common
  static const String start = "Start";

  // Onboarding
  static const String onboarding1Title = "Workout anywhere";
  static const String onboarding2Title = "Learn techniques";
  static const String onboarding3Title = "Stay strong & healthy";

  static const String onboarding1Description = "You can do your workout at home without any equipment, outside or at the gym.";
  static const String onboarding2Description = "Our workout programs are made by professionals.";
  static const String onboarding3Description = "We want you to fully enjoy the program and stay healthy and positive.";
In the PathConstants folder, there is a path to our image.
class PathConstants {
  // Onboarding
  static const String onboarding1 = 'assets/images/onboarding/onboarding.png';
  static const String onboarding2 = 'assets/images/onboarding/onboarding_2.png';
  static const String onboarding3 = 'assets/images/onboarding/onboarding_3.png';
Here you can see the path to the images. Pay attention that 2.0x and 3.0x contain the same images under the same names, but the difference is in their size based on the device’s screen dimensions. For example, if the phone has a bigger screen, the 3.0x photo will be used.

3.3.1. In _createPageView(...), we return PageView to make our animation with scrollDirection horizontal. We will transfer Controller from PageController in the bloc, as shown below.
class OnboardingBloc extends Bloc<OnboardingEvent, OnboardingState> {
  OnboardingBloc() : super(OnboardingInitial());
  int pageIndex = 0;
  final pageController = PageController(initialPage: 0);

  @override
  Stream<OnboardingState> mapEventToState(
    OnboardingEvent event,
  ) async* {
    if (event is PageChangedEvent) {
      if (pageIndex == 2) {
        yield NextScreenState();
        return;
      }
      pageIndex += 1;

      pageController.animateToPage(
        pageIndex,
        duration: Duration(milliseconds: 500),
        curve: Curves.ease,
      );

      yield PageChangedState(counter: pageIndex);
    } else if (event is PageSwipedEvent) {
      pageIndex = event.index;
      yield PageChangedState(counter: pageIndex);
    }
  }
}
onboarding_bloc.dart
part of 'onboarding_bloc.dart';

@immutable
abstract class OnboardingEvent {}

class PageChangedEvent extends OnboardingEvent {}

class PageSwipedEvent extends OnboardingEvent {
  final int index;

  PageSwipedEvent({required this.index});
}
onboarding_event.dart
part of 'onboarding_bloc.dart';

@immutable
abstract class OnboardingState {}

class OnboardingInitial extends OnboardingState {}

class PageChangedState extends OnboardingState {
  final int counter;

  PageChangedState({
    required this.counter,
  });
}

class NextScreenState extends OnboardingState {}
onboarding_state.dart
3.3.2. Let’s now focus on children in _createPageView(...). We have our Data_constants with the list of Onboarding tiles. We need to create a file called onboarding_tile.dart in the widget folder to return a widget.
It should contain a constructor with three main instances: imagePath, mainText, and title. They will repeat three times, and that's why we created one class with the same data and style.


class OnboardingTile extends StatelessWidget {
  final title, imagePath, mainText;

  OnboardingTile({this.imagePath, this.mainText, this.title});

  @override
  Widget build(BuildContext context) {
    final screenWidth = MediaQuery.of(context).size.width;
    return Padding(
      padding: const EdgeInsets.symmetric(horizontal: 24),
      child: Column(
        children: [
          const SizedBox(height: 34),
          Expanded(
            child: Image.asset(
              imagePath,
            ),
          ),
          const SizedBox(height: 65),
          Text(
            title,
            style: TextStyle(
              fontWeight: FontWeight.w700,
              fontSize: 24.0,
            ),
          ),
          const SizedBox(height: 15),
          Padding(
            padding: EdgeInsets.symmetric(
              horizontal: screenWidth / 100,
            ),
            child: Text(
              mainText,
              style: TextStyle(
                fontSize: 16.0,
              ),
              textAlign: TextAlign.center,
            ),
          ),
        ],
      ),
    );
  }
}
3.3.3. We should add OnPageChanged(index) {} to the PageSwippedEvent bloc, which accepts indexes. This event is to help us understand the index of the list of tiles.
3.4. Let’s now move on to the _createStatic() in the OnBoardingContent class.
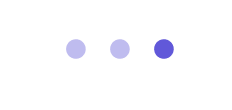
3.4.1. Here, we use two widgets for animation:
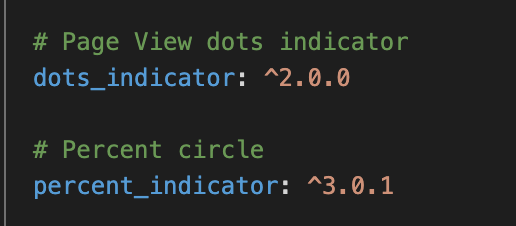
- DotsIndicator contains three dots that change color with pageIndex in the decorator. We will get the position of DotsIndicator from the bloc that stores our pageIndex.


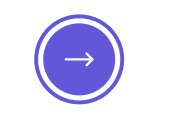
- CircularPercentIndicator wraps the animation (TweenAnimationBuilder) around the button. We have three screens, so we will need one more function called getPercent() to wrap the animation around the button.
Widget _createStatic(OnboardingBloc bloc) {
    return Column(
      children: [
        SizedBox(
          height: 30,
        ),
        BlocBuilder<OnboardingBloc, OnboardingState>(
          buildWhen: (_, currState) => currState is PageChangedState,
          builder: (context, state) {
            return DotsIndicator(
              dotsCount: 3,
              position: bloc.pageIndex.toDouble(),
              decorator: DotsDecorator(
                color: Colors.grey,
                activeColor: ColorConstants.primaryColor,
              ),
            );
          },
        ),
        Spacer(),
        BlocBuilder<OnboardingBloc, OnboardingState>(
          buildWhen: (_, currState) => currState is PageChangedState,
          builder: (context, state) {
            final percent = _getPercent(bloc.pageIndex);
            return TweenAnimationBuilder<double>(
                tween: Tween<double>(begin: 0, end: percent),
                duration: Duration(seconds: 1),
                builder: (context, value, _) => CircularPercentIndicator(
                      radius: 110,
                      backgroundColor: ColorConstants.primaryColor,
                      progressColor: Colors.white,
                      percent: 1 - value,
                      center: Material(
                        shape: CircleBorder(),
                        color: ColorConstants.primaryColor,
                        child: RawMaterialButton(
                          shape: CircleBorder(),
                          onPressed: () {
                            bloc.add(PageChangedEvent());
                          },
                          child: Padding(
                            padding: const EdgeInsets.all(24.0),
                            child: Icon(
                              Icons.east_rounded,
                              size: 38.0,
                              color: Colors.white,
                            ),
                          ),
                        ),
                      ),
                    ));
          },
        ),
        SizedBox(height: 30),
      ],
    );
  }
Take a closer look at the _getPercent() function. We receive the index and, based on its value, will create the animation.
double _getPercent(int pageIndex) {
    switch (pageIndex) {
      case 0:
        return 0.25;
      case 1:
        return 0.65;
      case 2:
        return 1;
      default:
        return 0;
    }
  }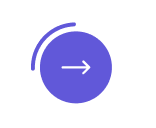

Here’s how the animation looks like:
3.4.2 What about DotsIndicator?We need to add the dependencies to the pubspec.yaml file and save the changes (via cmd + S).
Inside the bloc, we created a pageIndex that starts from 0. Now we have to check if our pageIndex adds + 1 every time the event is PageChangedEvent. When the pageIndex equals 2, we can go on to the next screen (NextScreenState).
- Inside the if statement we call the pageController.animatedToPage(...) method.
It animates the controlled PageView from the current page to the given page with a given duration.
- And now we need to write the PageChangedState yield to catch the current pageIndex.
- Moving on to the ‘_createStatic() method. Here we should wrap the DotsIndicator with BlocBuilder to indicate which state it is. Even more, wrapping with BlocBuilder means that this widget might be rebuilt in some cases.
class OnboardingBloc extends Bloc<OnboardingEvent, OnboardingState> {
  OnboardingBloc() : super(OnboardingInitial());

  int pageIndex = 0;

  final pageController = PageController(initialPage: 0);

  @override
  Stream<OnboardingState> mapEventToState(
    OnboardingEvent event,
  ) async* {
    if (event is PageChangedEvent) {
      if (pageIndex == 2) {
        yield NextScreenState();
        return;
      }
      pageIndex += 1;

      pageController.animateToPage(
        pageIndex,
        duration: Duration(milliseconds: 500),
        curve: Curves.ease,
      );

      yield PageChangedState(counter: pageIndex);
    } else if (event is PageSwipedEvent) {
      pageIndex = event.index;
      yield PageChangedState(counter: pageIndex);
    }
  }
}
3.4.3. Let’s take a look at the CircularPercentIndicator in the _createStatic() method.
- First of all, we need to wrap it with BlocBuilder because the animation button will be changing.
- Next, we set the colors (progress and background).
- We already worked on our Percent element, so now let’s make one last touch. Inside the onPressed: () {} we pass bloc.add(PageChangedEvent()); to catch the event in our bloc.
3.5. Almost done with our first screen; only a few things left! Let’s look at how we will transfer from the Onboarding screen to the next one — the Sign up.
To do this, we create NextScreenState. Once the index is 2, we can navigate to the next Sign Up screen.
3.5.1. Coming back to the bloc where we need to check if the transmission works properly. Here we can see that when pageIndex equals 2, the NextScreenState will be called.
if (pageIndex == 2) {
    yield NextScreenState();
    return;
}
3.5.2. Let’s have one last look at the OnboardingPage.
To navigate to the next screen, we will use listenWhen and listen. listenWhen indicates the current state (for example, NextScreenState). listen creates the navigation and returns us to the next screen. In our case, it is the SignUpPage();
class OnboardingPage extends StatelessWidget {
  @override
  Widget build(BuildContext context) {
    return Scaffold(
      body: _buildBody(context),
    );
  }

  BlocProvider<OnboardingBloc> _buildBody(BuildContext context) {
    return BlocProvider<OnboardingBloc>(
      create: (BuildContext context) => OnboardingBloc(),
      child: BlocConsumer<OnboardingBloc, OnboardingState>(
        listenWhen: (_, currState) => currState is NextScreenState,
        listener: (context, state) {
          Navigator.of(context).pushReplacement(
            MaterialPageRoute(
              builder: (_) {
                return SignUpPage();
              },
            ),
          );
        },
        buildWhen: (_, currState) => currState is OnboardingInitial,
        builder: (context, state) {
          return OnboardingContent();
        },
      ),
    );
  }
}
Sign up Screen
Our first screen is done, yay! But it is too soon to call it a day. Take a little break, maybe make some coffee, and let’s continue with our tutorial. Two more screens to go, starting with the Sign up one.
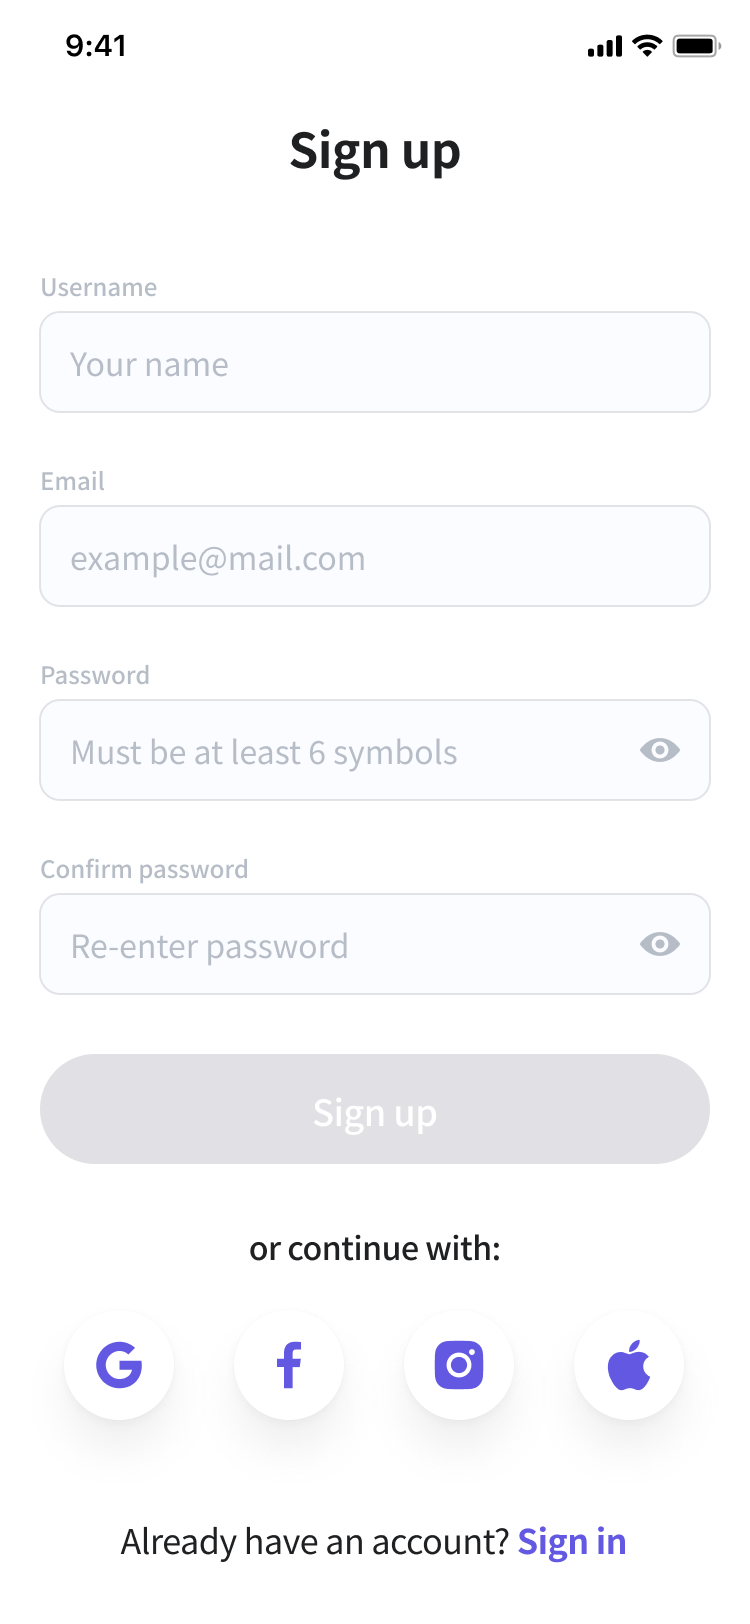
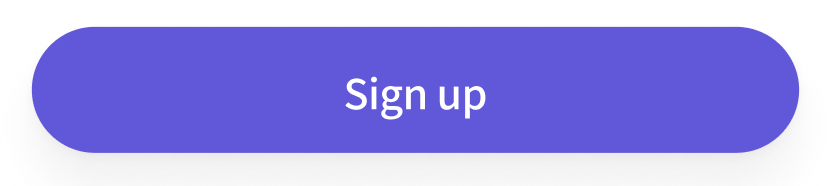
This is how our Sign Up screen will look when we are all done:
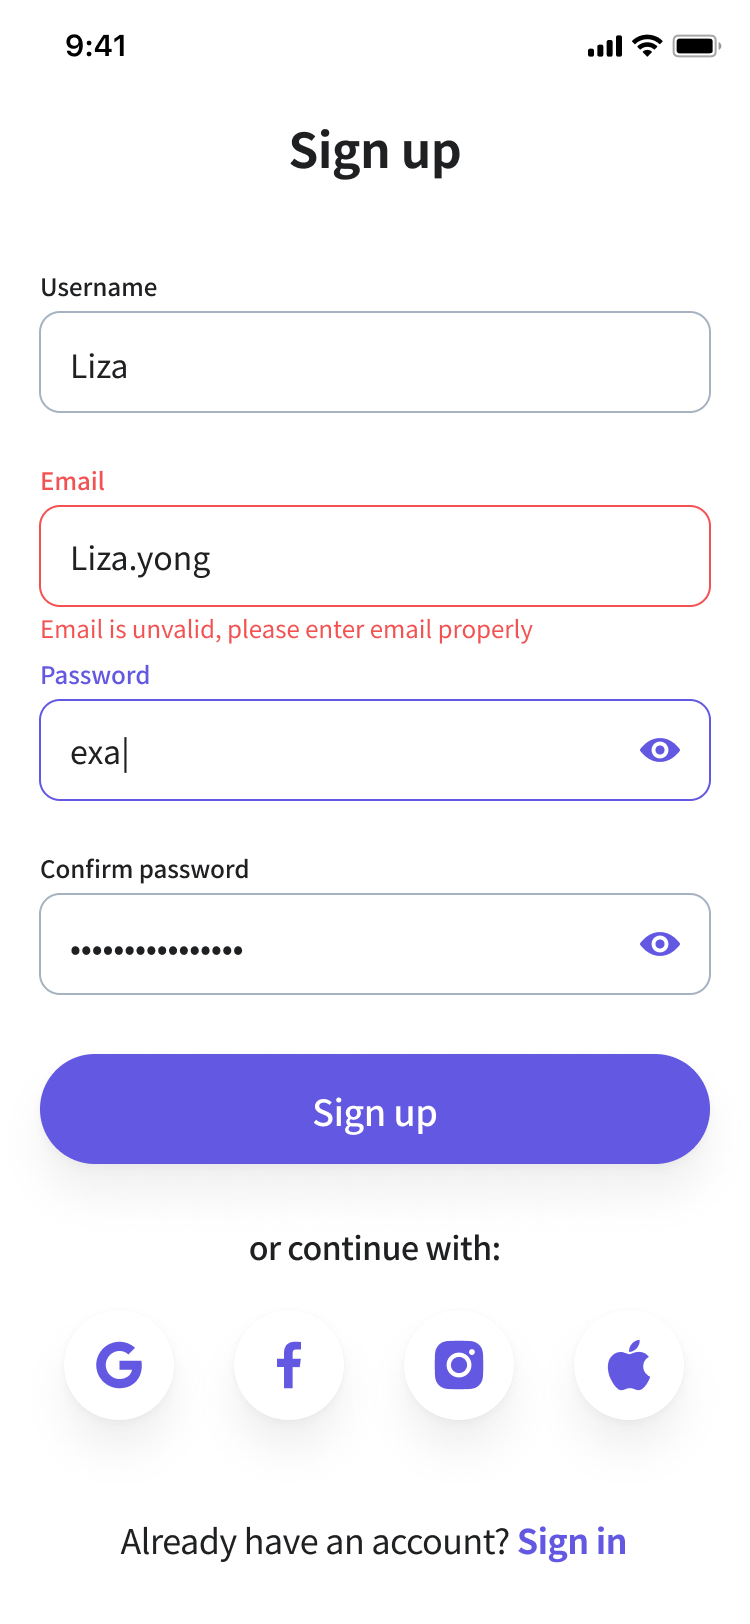
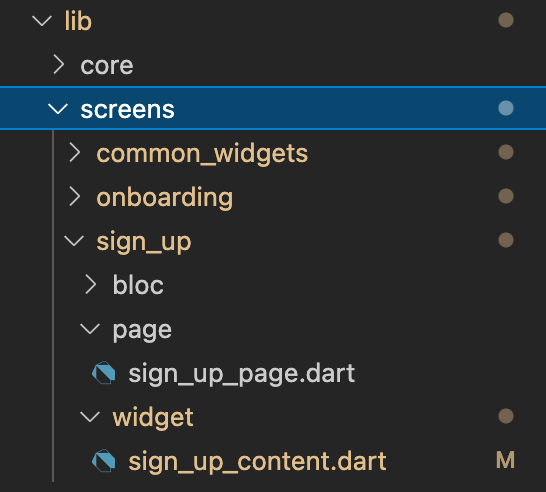
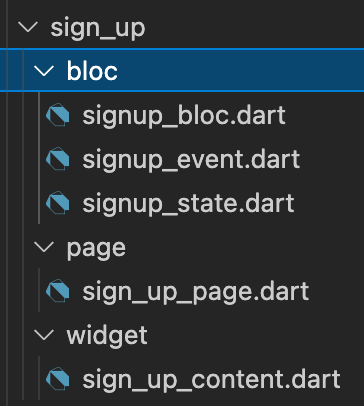
1. In the screens folder, you need to create a folder (via cmd + M) called signup. Then, inside this signup folder, we add folders (again via cmd + M) called page with a file (via cmd + N) sign_up_page.dart and a folder called widget with a file sign_up_content. We will also need the bloc folder. It creates automatically; you just need to click twice and select New Bloc.
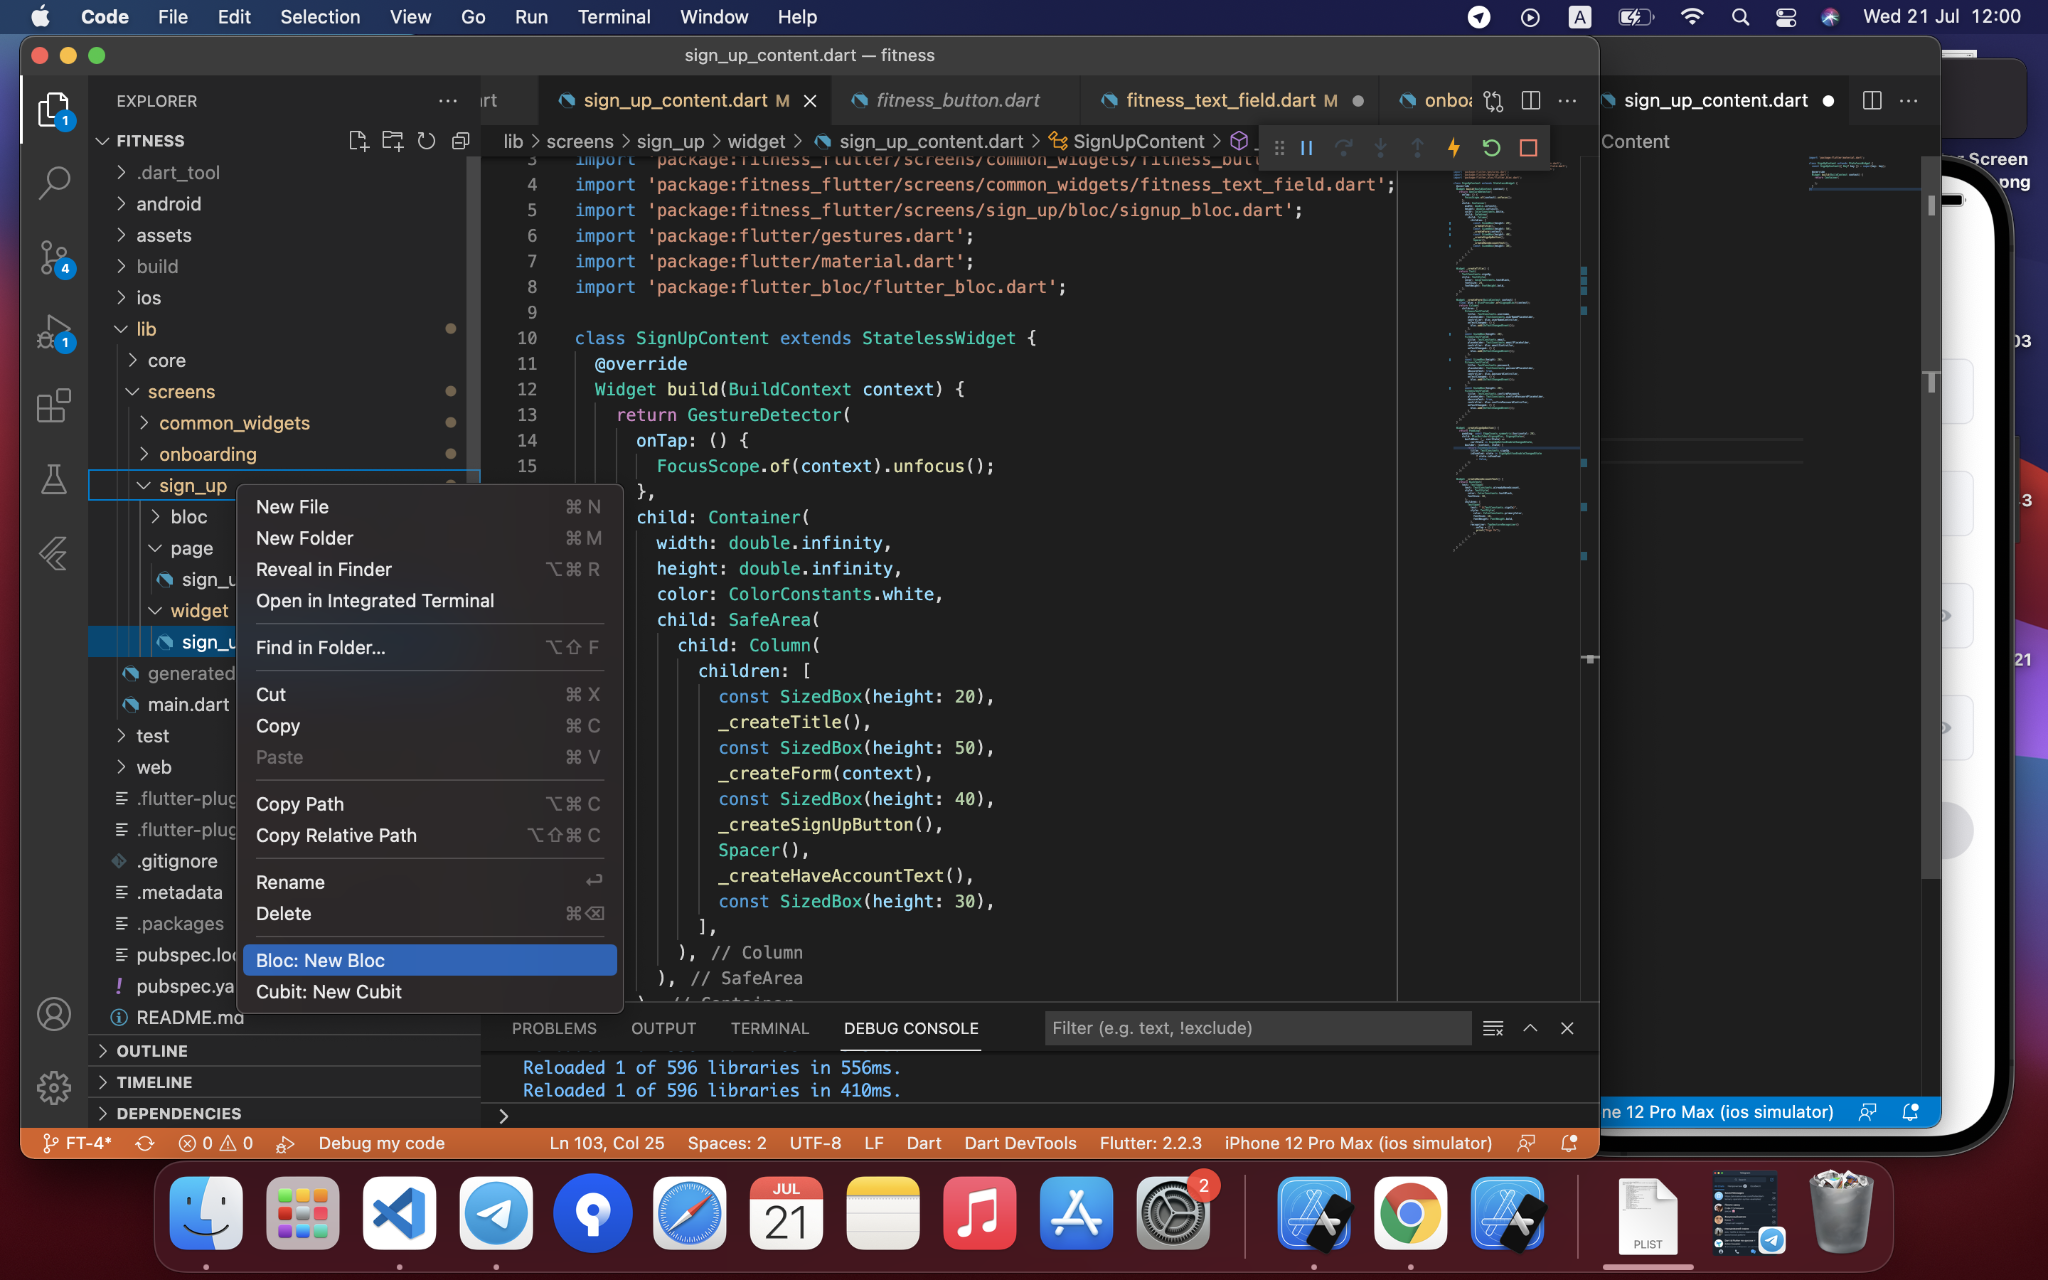
1.1. In the file called sign_up_page.dart, we will connect logic (bloc) with UI and then return the widgets tree in the sign_up_content file. Also, in the sign_up_content, we will make a column of widgets that represent our UI.
That’s how the insides of the Sign_up_page.dart file look. It is similar to what we did in the OnboardingPage.
class SignUpPage extends StatelessWidget {
  @override
  Widget build(BuildContext context) {
    return Scaffold(body: _buildBody(context));
  }

  BlocProvider<SignUpBloc> _buildBody(BuildContext context) {
    return BlocProvider<SignUpBloc>(
      create: (BuildContext context) => SignUpBloc(),
      child: BlocConsumer<SignUpBloc, SignUpState>(
        listenWhen: (_, currState) => currState is NextTabBarPageState || currState is NextSignInPageState || currState is ErrorState,
        listener: (context, state) {
          if (state is NextTabBarPageState) {
            Navigator.of(context).pushReplacement(MaterialPageRoute(builder: (_) => TabBarPage()));
          } else if (state is NextSignInPageState) {
            Navigator.of(context).pushReplacement(MaterialPageRoute(builder: (_) => SignInPage()));
          } else if (state is ErrorState) {
            ScaffoldMessenger.of(context).showSnackBar(
              SnackBar(content: Text(state.message)),
            );
          }
        },
        buildWhen: (_, currState) => currState is SignupInitial,
        builder: (context, state) {
          return SignUpContent();
        },
      ),
    );
  }
}
1.2. Inside the sign_up_content folder, we are going to create a stateless class SignUpContent that returns a stack of widgets. There will be a private method _createMainData(context) that returns a Text widget, four TextField widgets, a Button widget, and a RichText widget. We will create a new method later for each of those widgets to make our code look better.
1.3. Now, you need to wrap the Container with GestureDetector to make it possible to click on the screen and make the text fields unfocus. Give it width, height, and color. double.infinity will adjust the content to the screen dimensions.
The container will also have a child: Stack because when a new user registers in the app, one more widget is added to the screen. It will look just like the loading before accessing one’s profile.
class SignUpContent extends StatelessWidget {
  @override
  Widget build(BuildContext context) {
    return GestureDetector(
      onTap: () {
        FocusScope.of(context).unfocus();
      },
      child: Container(
        width: double.infinity,
        height: double.infinity,
        color: ColorConstants.white,
        child: Stack(
          children: [
            _createMainData(context),
            BlocBuilder<SignUpBloc, SignUpState>(
              buildWhen: (_, currState) => currState is LoadingState || currState is NextTabBarPageState || currState is ErrorState,
              builder: (context, state) {
                if (state is LoadingState) {
                  return _createLoading();
                } else if (state is NextTabBarPageState || state is ErrorState) {
                  return SizedBox();
                }
                return SizedBox();
              },
            ),
          ],
        ),
      ),
    );
  }
1.4. Before moving on to the _createMaindata(context) function, let’s discuss what is going on underneath it. We added a BlocBuilder to indicate what will be happening in each particular state. For instance, when currState is LoadingState, the return method will be _createLoading().

This method returns a separate class that we created in the common_widgets folder. The file is called fitness.loading.dart. It is basically a loading page that the user will see when waiting for the registration to be completed or in any similar situation. Instead of seeing just a page without any signs of progress, with fitness.loading.dart our user will know that they just need to wait a bit.
class FitnessLoading extends StatelessWidget {
  @override
  Widget build(BuildContext context) {
    return Container(
      width: double.infinity,
      height: double.infinity,
      color: ColorConstants.loadingBlack,
      child: Center(
        child: Theme(
          data: ThemeData(
            cupertinoOverrideTheme:
                CupertinoThemeData(brightness: Brightness.dark),
          ),
          child: CupertinoActivityIndicator(
            radius: 17,
          ),
        ),
      ),
    );
  }
}
1.5. Stack also has children, so we need to create a private _createMainData(context) method in the SignUpContext class below the build method. _createMainData(context) will return a column with our main widgets.
Remember to wrap the column with SafeArea to ensure it fits the screen and doesn’t overrun it. Additionally, SizedBox() will help you create some distance between the widgets. We will also wrap the column with SingleChildScrollView, so we can later scroll up and down with no issues. It is especially handy when, for example, the user’s device is quite small, but they still need to see all the information.
Widget _createMainData(BuildContext context) {
    return SafeArea(
      child: SingleChildScrollView(
        child: Column(
          children: [
            const SizedBox(height: 20),
            _createTitle(),
            // const SizedBox(height: 50),
            _createForm(context),
            const SizedBox(height: 40),
            _createSignUpButton(context),
            // Spacer(),
            const SizedBox(height: 40),
            _createHaveAccountText(context),
            const SizedBox(height: 30),
          ],
        ),
      ),
    );
  }
1.6. Now, we need to create a private method for the _createTitle() that returns the Text widget with some information. What kind of information? To make our code more compact, we will have a separate folder for every text, color, path, or data.
Widget _createTitle() {
    return Text(
      TextConstants.signUp,
      style: TextStyle(
        color: ColorConstants.textBlack,
        fontSize: 24,
        fontWeight: FontWeight.bold,
      ),
    );
  }
// Sign Up
static const String signUp = "Sign up";
static const String signIn = "Sign In";
static const String signOut = "Sign Out";
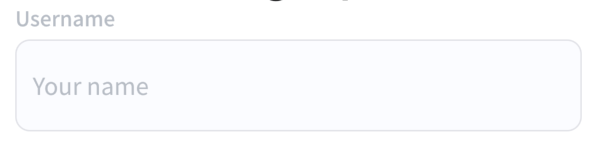
static const String username = "Username";
static const String userNamePlaceholder = "Your name";
static const String usernameErrorText = 'Text is required';
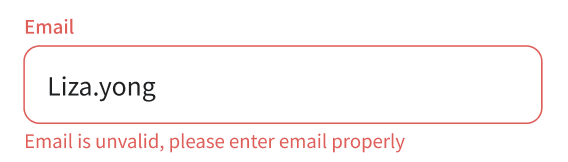
static const String email = "Email";
static const String emailPlaceholder = "example@mail.com";
static const String emailErrorText =
'Email is unvalid, please enter email properly';
static const String password = "Password";
static const String passwordPlaceholder = "Must be at least 6 symbols";
static const String passwordErrorText =
'Password should contain at least 6 characters';
static const String confirmPassword = "Confirm password";
static const String confirmPasswordPlaceholder = "Re-enter password";
static const String confirmPasswordErrorText = 'Password is not the same';
static const String alreadyHaveAccount = "Already have an account?";import 'package:flutter/material.dart';
class ColorConstants {
static const textColor = Color(0xFF1F2022);
static const primaryColor = Color(0xFF6358E1);
static const textBlack = Color(0xFF1F2022);
static const white = Color(0xFFFFFFFF);
static const grey = Color(0xFFB6BDC6);
static const loadingBlack = Color(0x80000000);
static const textFieldBackground = Color(0xFFFBFCFF);
static const textFieldBorder = Color(0xFFB9BBC5);
static const disabledColor = Color(0xFFE1E1E5);
static const errorColor = Color(0xFFF25252);
static const homeBackgroundColor = Color.fromRGBO(252, 252, 252, 1);
static const textGrey = Color(0xFF8F98A3);
static const cardioColor = Color(0xFFFCB74F);
static const armsColor = Color(0xFF5C9BA4);
}

1.7. A private method _createForm(context) contains four FitnessTextFields that are the same in the signUp screen and the signIn screens, so let’s create one TextField and one Button that we can reuse in different screens in the common_widgets folder.
We also need to create a verification via the ternary operator. It is a fascinating one. This method helps us check if the user’s email address is correct, how many symbols are in their password, etc. We will return to discussing the ternary operator verification a bit later.

class ValidationService {
  static bool username(String text) {
    return text.length > 1;
  }

  static bool email(String text) {
    bool emailValid = RegExp(
            r"^[a-zA-Z0-9.a-zA-Z0-9.!#$%&'*+-/=?^_`{|}~]+@[a-zA-Z0-9]+\.[a-zA-Z]+")
        .hasMatch(text);
    return emailValid;
  }

  static bool password(String text) {
    return text.length >= 6;
  }

  static bool confirmPassword(String password, String confirmPassword) {
    return password == confirmPassword;
  }
}
Let’s take a look at the very _createForm() function:

Widget _createForm(BuildContext context) {
    final bloc = BlocProvider.of<SignUpBloc>(context);
    return BlocBuilder<SignUpBloc, SignUpState>(
      buildWhen: (_, currState) => currState is ShowErrorState,
      builder: (context, state) {
        return Column(
          children: [
            FitnessTextField(
              title: TextConstants.username,
              placeholder: TextConstants.userNamePlaceholder,
              controller: bloc.userNameController,
              textInputAction: TextInputAction.next,
              errorText: TextConstants.usernameErrorText,
              isError: state is ShowErrorState ? !ValidationService.username(bloc.userNameController.text) : false,
              onTextChanged: () {
                bloc.add(OnTextChangedEvent());
              },
            ),
            const SizedBox(height: 20),
            FitnessTextField(
              title: TextConstants.email,
              placeholder: TextConstants.emailPlaceholder,
              textInputAction: TextInputAction.next,
              keyboardType: TextInputType.emailAddress,
              controller: bloc.emailController,
              errorText: TextConstants.emailErrorText,
              isError: state is ShowErrorState ? !ValidationService.email(bloc.emailController.text) : false,
              onTextChanged: () {
                bloc.add(OnTextChangedEvent());
              },
            ),
            const SizedBox(height: 20),
            FitnessTextField(
              title: TextConstants.password,
              placeholder: TextConstants.passwordPlaceholder,
              obscureText: true,
              isError: state is ShowErrorState ? !ValidationService.password(bloc.passwordController.text) : false,
              textInputAction: TextInputAction.next,
              controller: bloc.passwordController,
              errorText: TextConstants.passwordErrorText,
              onTextChanged: () {
                bloc.add(OnTextChangedEvent());
              },
            ),
            const SizedBox(height: 20),
            FitnessTextField(
              title: TextConstants.confirmPassword,
              placeholder: TextConstants.confirmPasswordPlaceholder,
              obscureText: true,
              isError: state is ShowErrorState ? !ValidationService.confirmPassword(bloc.passwordController.text, bloc.confirmPasswordController.text) : false,
              controller: bloc.confirmPasswordController,
              errorText: TextConstants.confirmPasswordErrorText,
              onTextChanged: () {
                bloc.add(OnTextChangedEvent());
              },
            ),
          ],
        );
      },
    );
  }
1.8. Create class FitnessTextField extends StatefulWidget where we will make changes (you can read more about Stateless vs. Stateful Widget to understand it better). Then, it’s time to create parameters and add them to the constructor. These parameters will always appear when you call the FitnessTextField class.
class FitnessTextField extends StatefulWidget {
  final String title;
  final String placeholder;
  final String errorText;
  final bool obscureText;
  final bool isError;
  final TextEditingController controller;
  final VoidCallback onTextChanged;
  final TextInputAction textInputAction;
  final TextInputType? keyboardType;

  const FitnessTextField({
    required this.title,
    required this.placeholder,
    this.obscureText = false,
    this.isError = false,
    required this.controller,
    required this.onTextChanged,
    required this.errorText,
    this.textInputAction = TextInputAction.done,
    this.keyboardType,
    Key? key,
  }) : super(key: key);

  @override
  _FitnessTextFieldState createState() => _FitnessTextFieldState();
}
1.9. In the State of FitnessTextField, we need to create two parameters: focusNode, stateObscureText as well as stateIsError with the default “false.” The initState() state is called only once during the project, so everything it contains should be called right at the beginning of our project.
@override
  void initState() {
    super.initState();

    focusNode.addListener(
      () {
        setState(() {
          if (focusNode.hasFocus) {
            stateIsError = false;
          }
        });
      },
    );

    stateObscureText = widget.obscureText;
    stateIsError = widget.isError;
  }
When we click on the TextField, it will rebuild itself every time, either with the focus or not.
Via stateObscureText, we assign the value to the widget above the widget.obscureText to use this value later in the code. The same we do with the stateIsError to check if the validation of the TextField marks any errors with red.
 @override
  void didUpdateWidget(covariant FitnessTextField oldWidget) {
    super.didUpdateWidget(oldWidget);

    stateObscureText = widget.obscureText;
    stateIsError = focusNode.hasFocus ? false : widget.isError;
  }
@override
Widget build(BuildContext context) {
return Container(
width: double.infinity,
padding: const EdgeInsets.symmetric(horizontal: 20),
child: Column(
crossAxisAlignment: CrossAxisAlignment.start,
children: [
_createHeader(),
const SizedBox(height: 5),
_createTextFieldStack(),
if (stateIsError) ...[
_createError(),
],
],
),
);
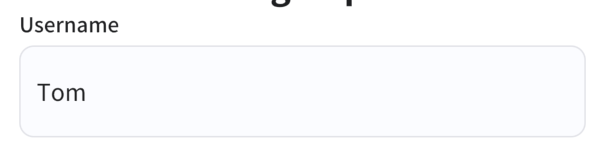
}1.10. TextField has the header above, so we should create a column of a header and a text field. In the header, we transfer the title from the constructor using the widget.title and text style.
Color will change according to the focusNode and the text in the text field, so we need to create one more private method: _getUserNameColor.
Widget _createHeader() {
    return Text(
      widget.title,
      style: TextStyle(
        color: _getUserNameColor(),
        fontSize: 14,
        fontWeight: FontWeight.w500,
      ),
    );
  }
Color _getUserNameColor() {
if (focusNode.hasFocus) {
return ColorConstants.primaryColor;
} else if (stateIsError) {
return ColorConstants.errorColor;
} else if (widget.controller.text.isNotEmpty) {
return ColorConstants.textBlack;
}
return ColorConstants.grey;
}
1.11. After creating the header, we should make one more private method _createTextFieldStack. Why do we need it? Because we have an eye icon on the right side of the TextField, and it should be in the right position.
Widget _createTextFieldStack() {
    return Stack(
      children: [
        _createTextField(),
        if (widget.obscureText) ...[
          Positioned(
            right: 0,
            bottom: 0,
            top: 0,
            child: _createShowEye(),
          ),
        ],
      ],
    );
  }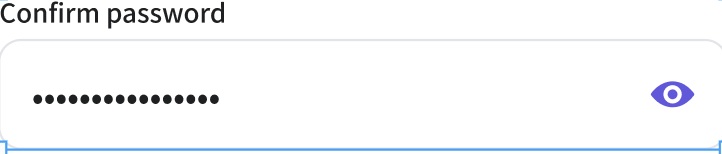
1.12. The next step is to create a method called _createShowEye(). Here, we wrap the image of the eye with the GestureDetector to make it possible to click on that image and see what was typed.
But, there’s more – we can change the color of the eye icon with the conditional (ternary) operator. As a result, if TextField is not empty, it will return the primary color, and if it is, the grey one.
Widget _createShowEye() {
    return GestureDetector(
      onTap: () {
        setState(() {
          stateObscureText = !stateObscureText;
        });
      },
      child: Image(
        image: AssetImage(
          PathConstants.eye,
        ),
        color: widget.controller.text.isNotEmpty ? ColorConstants.primaryColor : ColorConstants.grey,
      ),
    );
  }
When you tap on the eye icon, the text is shown:
1.13. Finally, we need to work on the main method: _createTextField.
Let’s assign focusNode to focusNode and controller to widget.controller.
What else is on our to-do list?
- Check if there is an error that marks the border red with the ternary operator.
- Assign the corresponding elements to every color or text from our const folder.
Widget _createTextField() {
    return TextField(
      focusNode: focusNode,
      controller: widget.controller,
      obscureText: stateObscureText,
      textInputAction: widget.textInputAction,
      keyboardType: widget.keyboardType,
      style: TextStyle(
        color: ColorConstants.textBlack,
        fontSize: 16,
      ),
      decoration: InputDecoration(
        enabledBorder: OutlineInputBorder(
          borderRadius: BorderRadius.circular(10.0),
          borderSide: BorderSide(
            color: stateIsError ? ColorConstants.errorColor : ColorConstants.textFieldBorder.withOpacity(0.4),
          ),
        ),
        focusedBorder: OutlineInputBorder(
          borderRadius: BorderRadius.circular(10.0),
          borderSide: BorderSide(
            color: ColorConstants.primaryColor,
          ),
        ),
        hintText: widget.placeholder,
        hintStyle: TextStyle(
          color: ColorConstants.grey,
          fontSize: 16,
        ),
        filled: true,
        fillColor: ColorConstants.textFieldBackground,
      ),
      onChanged: (text) {
        setState(() {});
        widget.onTextChanged();
      },
    );
  }
1.14. Finally, we need to make the _createError() method.
Widget _createError() {
    return Container(
      padding: const EdgeInsets.only(top: 2),
      child: Text(
        widget.errorText,
        style: TextStyle(
          fontSize: 14,
          color: ColorConstants.errorColor,
        ),
      ),
    );
  }
2. Let’s now return to the SignUpContent.
2.1. After the _createForm(), we should make a _createSignInButton() to check the validation of TextFields and navigate to the Home screen.
Widget _createSignUpButton(BuildContext context) {
final bloc = BlocProvider.of<SignUpBloc>(context);
return Padding(
padding: const EdgeInsets.symmetric(horizontal: 20),
child: BlocBuilder<SignUpBloc, SignUpState>(
buildWhen: (_, currState) =>
currState is SignUpButtonEnableChangedState,
builder: (context, state) {
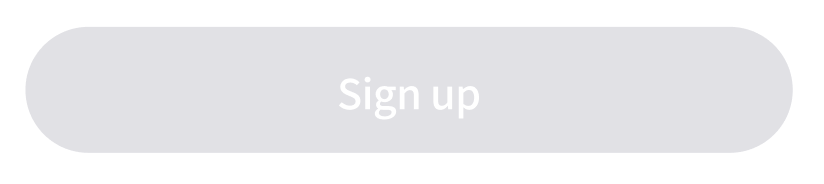
return FitnessButton(
title: TextConstants.signUp,
isEnabled: state is SignUpButtonEnableChangedState
? state.isEnabled
: false,
onTap: () {
FocusScope.of(context).unfocus();
bloc.add(SignUpTappedEvent());
},
);
},
),
);
}There is one more common widget: child: FitnessButton.
import 'package:fitness_flutter/core/const/color_constants.dart';
import 'package:flutter/material.dart';

class FitnessButton extends StatelessWidget {
  final String title;
  final bool isEnabled;
  final Function() onTap;

  FitnessButton({required this.title, this.isEnabled = true, required this.onTap});

  @override
  Widget build(BuildContext context) {
    return Container(
      width: double.infinity,
      height: 55,
      decoration: BoxDecoration(
        color: isEnabled ? ColorConstants.primaryColor : ColorConstants.disabledColor,
        borderRadius: BorderRadius.circular(100),
      ),
      child: Material(
        color: Colors.transparent,
        child: InkWell(
          borderRadius: BorderRadius.circular(100),
          onTap: onTap,
          child: Center(
            child: Text(
              title,
              style: TextStyle(
                color: ColorConstants.white,
                fontSize: 18,
                fontWeight: FontWeight.bold,
              ),
            ),
          ),
        ),
      ),
    );
  }
}
Here’s our button:
2.2. Now, we wrap the GestureDetector with the BlocBuilder to make some changes in the UI. First of all, we created the SignUpButtonEnabledState to make sure that none of the TextFields is empty. We can check it in the bloc.
Next, we need to create events in the signup_event.dart.
part of 'signup_bloc.dart';

@immutable
abstract class SignupEvent {}

class OnTextChangedEvent extends SignupEvent {}

class SignUpTappedEvent extends SignupEvent {}

class SignInTappedEvent extends SignupEvent {}
Here, you can check all the states needed in the signup_state.dart. Let’s quickly recap what states are. In the UI bloc (and you might know that bloc is a separate component for writing the app’s business logic), we send events for particular changes and, as a result, they are transmitted by states that basically modify the UI.
part of 'signup_bloc.dart';

@immutable
abstract class SignUpState {}

class SignupInitial extends SignUpState {}

class SignUpButtonEnableChangedState extends SignUpState {
  final bool isEnabled;

  SignUpButtonEnableChangedState({
    required this.isEnabled,
  });
}

class ShowErrorState extends SignUpState {}

class ErrorState extends SignUpState {
  final String message;

  ErrorState({required this.message});
}

class NextTabBarPageState extends SignUpState {}

class NextSignInPageState extends SignUpState {}

class LoadingState extends SignUpState {}
And we need to do the same with them in the signup_bloc.dart bloc.
import 'dart:async';

import 'package:bloc/bloc.dart';
import 'package:fitness_flutter/core/service/auth_service.dart';
import 'package:fitness_flutter/core/service/validation_service.dart';
import 'package:flutter/material.dart';
import 'package:meta/meta.dart';

part 'signup_event.dart';
part 'signup_state.dart';

class SignUpBloc extends Bloc<SignupEvent, SignUpState> {
  SignUpBloc() : super(SignupInitial());

  final userNameController = TextEditingController();
  final emailController = TextEditingController();
  final passwordController = TextEditingController();
  final confirmPasswordController = TextEditingController();

  bool isButtonEnabled = false;

  @override
  Stream<SignUpState> mapEventToState(
    SignupEvent event,
  ) async* {
    if (event is OnTextChangedEvent) {
      if (isButtonEnabled != checkIfSignUpButtonEnabled()) {
        isButtonEnabled = checkIfSignUpButtonEnabled();
        yield SignUpButtonEnableChangedState(isEnabled: isButtonEnabled);
      }
    } else if (event is SignUpTappedEvent) {
      if (checkValidatorsOfTextField()) {
        try {
          yield LoadingState();
          await AuthService.signUp(emailController.text, passwordController.text, userNameController.text);
          yield NextTabBarPageState();
          print("Go to the next page");
        } catch (e) {
          yield ErrorState(message: e.toString());
        }
      } else {
        yield ShowErrorState();
      }
    } else if (event is SignInTappedEvent) {
      yield NextSignInPageState();
    }
  }

  bool checkIfSignUpButtonEnabled() {
    return userNameController.text.isNotEmpty &&
        emailController.text.isNotEmpty &&
        passwordController.text.isNotEmpty &&
        confirmPasswordController.text.isNotEmpty;
  }

  bool checkValidatorsOfTextField() {
    return ValidationService.username(userNameController.text) &&
        ValidationService.email(emailController.text) &&
        ValidationService.password(passwordController.text) &&
        ValidationService.confirmPassword(passwordController.text, confirmPasswordController.text);
  }
}
2.3. Let’s return to our SignUp button. Here, we should check with the ternary operator if it's true that none of the TextFields are empty. If they aren’t, our button will change its color (the common widgets folder in the FitnessButton has more details).
When we tap on the FitnessButton, we call the SignUptappedEvent to check if validators are correct (take a look at the signup_bloc).
Widget _createSignUpButton(BuildContext context) {
final bloc = BlocProvider.of<SignUpBloc>(context);
return Padding(
padding: const EdgeInsets.symmetric(horizontal: 20),
child: BlocBuilder<SignUpBloc, SignUpState>(
buildWhen: (_, currState) =>
currState is SignUpButtonEnableChangedState,
builder: (context, state) {
return FitnessButton(
title: TextConstants.signUp,
isEnabled: state is SignUpButtonEnableChangedState
? state.isEnabled
: false,
onTap: () {
FocusScope.of(context).unfocus();
bloc.add(SignUpTappedEvent());
},
);
},
),
);
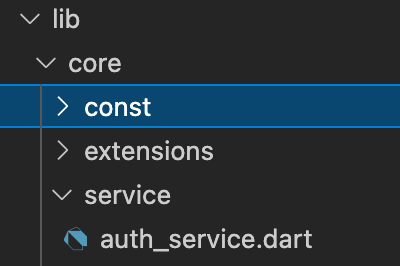
}To check the validations, let’s add a service folder to the lib one. Then, we create a file called validation_service.

class ValidationService {
  static bool username(String text) {
    return text.length > 1;
  }

  static bool email(String text) {
    bool emailValid = RegExp(
            r"^[a-zA-Z0-9.a-zA-Z0-9.!#$%&'*+-/=?^_`{|}~]+@[a-zA-Z0-9]+\.[a-zA-Z]+")
        .hasMatch(text);
    return emailValid;
  }

  static bool password(String text) {
    return text.length >= 6;
  }

  static bool confirmPassword(String password, String confirmPassword) {
    return password == confirmPassword;
  }
}
In ValidationService, we check every TextField to see if the information is correct.
3.1. The last thing: we need to make a _createHaveAccountText() method in the SignUpContent. When we tap on the Text (Sign In), we call SignInTappedEvent that navigates us to the SignIn screen.
Widget _createHaveAccountText(BuildContext context) {
    final bloc = BlocProvider.of<SignUpBloc>(context);
    return RichText(
      text: TextSpan(
        text: TextConstants.alreadyHaveAccount,
        style: TextStyle(
          color: ColorConstants.textBlack,
          fontSize: 18,
        ),
        children: [
          TextSpan(
            text: " ${TextConstants.signIn}",
            style: TextStyle(
              color: ColorConstants.primaryColor,
              fontSize: 18,
              fontWeight: FontWeight.bold,
            ),
            recognizer: TapGestureRecognizer()
              ..onTap = () {
                bloc.add(SignInTappedEvent());
              },
          ),
        ],
      ),
    );
  }
}
Authentication setup
Talking about signing in, it is time to add Firebase Authentication to our app, which will provide backend services and SDKs to authenticate users to your app. It does this by using passwords, phone numbers, as well as Google, Facebook and Twitter, and more to support authentication.
1. First of all, we create the auth_service.dart file in the lib folder.
2. Then, we need to write this code inside the file:
import 'package:firebase_auth/firebase_auth.dart';
import 'package:fitness_flutter/core/const/global_constants.dart';
import 'package:fitness_flutter/core/extensions/exceptions.dart';
import 'package:fitness_flutter/core/service/user_storage_service.dart';
import 'package:fitness_flutter/data/user_data.dart';

class AuthService {
  static final FirebaseAuth auth = FirebaseAuth.instance;

  static Future<User> signUp(String email, String password, String name) async {
    UserCredential result = await auth.createUserWithEmailAndPassword(
        email: email.trim(), password: password.trim());
    final User user = result.user!;
    await user.updateDisplayName(name);

    final userData = UserData.fromFirebase(auth.currentUser);
    await UserStorageService.writeSecureData(email, userData.toJsonString());
    GlobalConstants.currentUser = userData;

    return user;
  }

  static Future resetPassword(String email) async {
    try {
      await auth.sendPasswordResetEmail(email: email);
      return true;
    } on FirebaseAuthException catch (e) {
      throw CustomFirebaseException(getExceptionMessage(e));
    } catch (e) {
      throw Exception(e);
    }
  }

  static Future<User?> signIn(String email, String password) async {
    try {
      final UserCredential result = await auth.signInWithEmailAndPassword(
        email: email.trim(),
        password: password.trim(),
      );
      final User? user = result.user;

      if (user == null) {
        throw Exception("User not found");
      } else {
        final userFromLocal = await UserStorageService.readSecureData(email);
        final userData = UserData.fromFirebase(auth.currentUser);
        if (userFromLocal == null) {
          await UserStorageService.writeSecureData(
              email, userData.toJsonString());
        }
        GlobalConstants.currentUser = userData;
      }

      return user;
    } on FirebaseAuthException catch (e) {
      throw CustomFirebaseException(getExceptionMessage(e));
    } catch (e) {
      throw Exception(e);
    }
  }

  static Future<void> signOut() async {
    await auth.signOut();
  }
}

String getExceptionMessage(FirebaseAuthException e) {
  print(e.code);
  switch (e.code) {
    case 'user-not-found':
      return 'User not found';
    case 'wrong-password':
      return 'Password is incorrect';
    case 'requires-recent-login':
      return 'Log in again before retrying this request';
    default:
      return e.message ?? 'Error';
  }
}
By doing so, we made some important functions that will be used a lot later. These are:
- signUp(). This function is called when someone presses the sign up button. All the user data, such as email, password, and name, will be automatically added to the server.
- signIn(). This function is called when the sign in button is pressed. It checks whether the user is registered in the app by looking up their information in the database.
- signOut(). This function is called when someone presses the sign out button. It logs the user out of their account.getExeptionMessage(). Lastly, this is an error message that will be shown to the user when something goes wrong.
Sign In screen
Finally, it’s time to make our last screen. Just a bit of work left for today, so get ready for the final stretch.
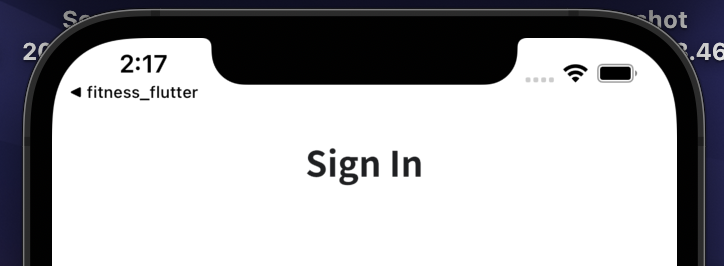
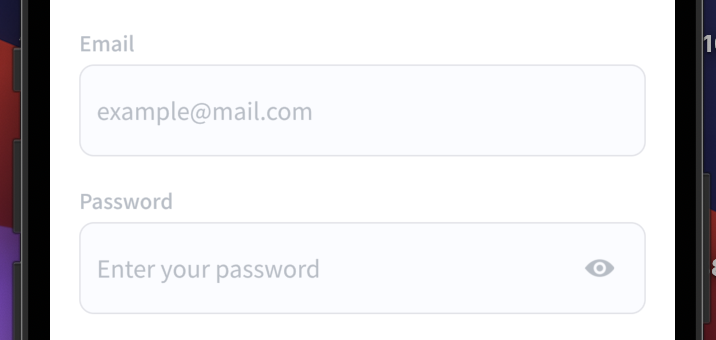
Here is what our Sign In screen will look like when we are all done:

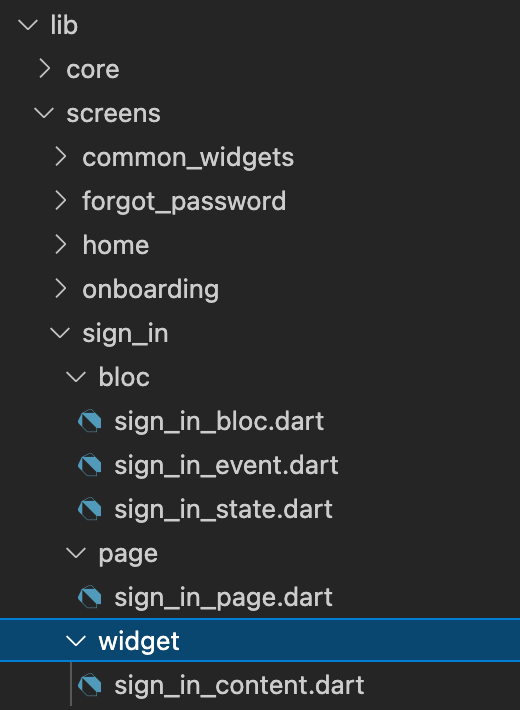
Inside the screens folder, create one more folder called sign_in with the folders we discussed earlier: bloc, page, widget.
1.0 Take a look at what the sign_in_bloc.dart file consists of:
class SignInBloc extends Bloc<SignInEvent, SignInState> {
  SignInBloc() : super(SignInInitial());

  final emailController = TextEditingController();
  final passwordController = TextEditingController();

  bool isButtonEnabled = false;

  @override
  Stream<SignInState> mapEventToState(
    SignInEvent event,
  ) async* {
    if (event is OnTextChangeEvent) {
      if (isButtonEnabled != _checkIfSignInButtonEnabled()) {
        isButtonEnabled = _checkIfSignInButtonEnabled();
        yield SignInButtonEnableChangedState(isEnabled: isButtonEnabled);
      }
    } else if (event is SignInTappedEvent) {
      if (_checkValidatorsOfTextField()) {
        try {
          yield LoadingState();
          await AuthService.signIn(emailController.text, passwordController.text);
          yield NextTabBarPageState();
          print("Go to the next page");
        } catch (e) {
          print('E to tstrng: ' + e.toString());
          yield ErrorState(message: e.toString());
        }
      } else {
        yield ShowErrorState();
      }
    } else if (event is ForgotPasswordTappedEvent) {
      yield NextForgotPasswordPageState();
    } else if (event is SignUpTappedEvent) {
      yield NextSignUpPageState();
    }
  }

  bool _checkIfSignInButtonEnabled() {
    return emailController.text.isNotEmpty && passwordController.text.isNotEmpty;
  }

  bool _checkValidatorsOfTextField() {
    return ValidationService.email(emailController.text) && ValidationService.password(passwordController.text);
  }
}
Here is the sign_in_event.dart file:
part of 'sign_in_bloc.dart';

abstract class SignInEvent {}

class OnTextChangeEvent extends SignInEvent {}

class SignInTappedEvent extends SignInEvent {}

class SignUpTappedEvent extends SignInEvent {}

class ForgotPasswordTappedEvent extends SignInEvent {}
And the sign_in_state.dart file:
part of 'sign_in_bloc.dart';

abstract class SignInState {
  const SignInState();
}

class SignInInitial extends SignInState {}

class SignInButtonEnableChangedState extends SignInState {
  final bool isEnabled;

  SignInButtonEnableChangedState({
    required this.isEnabled,
  });
}

class ShowErrorState extends SignInState {}

class NextForgotPasswordPageState extends SignInState {}

class NextSignUpPageState extends SignInState {}

class NextTabBarPageState extends SignInState {}

class ErrorState extends SignInState {
  final String message;

  ErrorState({
    required this.message,
  });
}

class LoadingState extends SignInState {}
1.1 Let’s start with the sign_in_page.dart. In the page, we return Scaffold with the body method _buildContext(context). As usual, in this method, we should return BlocProvider with child: BlocConsumer. Then, just like we did earlier, we need to return the content of the screen in the builder and make navigation for each state in the listener or, as you can see in the end, call the SnackBar.
class SignInPage extends StatelessWidget {
  const SignInPage({Key? key}) : super(key: key);

  @override
  Widget build(BuildContext context) {
    return Scaffold(
      body: _buildContext(context),
    );
  }

  BlocProvider<SignInBloc> _buildContext(BuildContext context) {
    return BlocProvider<SignInBloc>(
      create: (BuildContext context) => SignInBloc(),
      child: BlocConsumer<SignInBloc, SignInState>(
        buildWhen: (_, currState) => currState is SignInInitial,
        builder: (context, state) {
          return SignInContent();
        },
        listenWhen: (_, currState) =>
            currState is NextForgotPasswordPageState || currState is NextSignUpPageState || currState is NextTabBarPageState || currState is ErrorState,
        listener: (context, state) {
          if (state is NextForgotPasswordPageState) {
            Navigator.of(context).push(MaterialPageRoute(builder: (_) => ForgotPasswordPage()));
          } else if (state is NextSignUpPageState) {
            Navigator.pushReplacement(context, MaterialPageRoute(builder: (_) => SignUpPage()));
          } else if (state is NextTabBarPageState) {
            Navigator.of(context).pushReplacement(MaterialPageRoute(builder: (_) => TabBarPage()));
          } else if (state is ErrorState) {
            ScaffoldMessenger.of(context).showSnackBar(
              SnackBar(content: Text(state.message)),
            );
          }
        },
      ),
    );
  }
}
1.2. In this file, everything will be a bit similar to what we had in the sign_up_content.dart.
class SignInContent extends StatelessWidget {
  const SignInContent({Key? key}) : super(key: key);

  @override
  Widget build(BuildContext context) {
    return Container(
      height: double.infinity,
      width: double.infinity,
      color: ColorConstants.white,
      child: Stack(
        children: [
          _createMainData(context),
          BlocBuilder<SignInBloc, SignInState>(
            buildWhen: (_, currState) => currState is LoadingState || currState is ErrorState || currState is NextTabBarPageState,
            builder: (context, state) {
              if (state is LoadingState) {
                return _createLoading();
              } else if (state is ErrorState || state is NextTabBarPageState) {
                return SizedBox();
              }
              return SizedBox();
            },
          ),
        ],
      ),
    );
  }

  Widget _createMainData(BuildContext context) {
    double height = MediaQuery.of(context).size.height;
    return SafeArea(
      child: SingleChildScrollView(
        child: SizedBox(
          height: height - 30 - MediaQuery.of(context).padding.bottom,
          child: Column(
            crossAxisAlignment: CrossAxisAlignment.start,
            children: [
              const SizedBox(height: 20),
              _createHeader(),
              const SizedBox(height: 50),
              _createForm(context),
              const SizedBox(height: 20),
              _createForgotPasswordButton(context),
              const SizedBox(height: 40),
              _createSignInButton(context),
              Spacer(),
              _createDoNotHaveAccountText(context),
              const SizedBox(height: 30),
            ],
          ),
        ),
      ),
    );
  }

  Widget _createLoading() {
    return FitnessLoading();
  }

  Widget _createHeader() {
    return Center(
      child: Text(
        TextConstants.signIn,
        style: TextStyle(
          color: ColorConstants.textBlack,
          fontSize: 24,
          fontWeight: FontWeight.bold,
        ),
      ),
    );
  }

  Widget _createForm(BuildContext context) {
    final bloc = BlocProvider.of<SignInBloc>(context);
    return BlocBuilder<SignInBloc, SignInState>(
      buildWhen: (_, currState) => currState is ShowErrorState,
      builder: (context, state) {
        return Column(
          crossAxisAlignment: CrossAxisAlignment.start,
          children: [
            FitnessTextField(
              title: TextConstants.email,
              textInputAction: TextInputAction.next,
              keyboardType: TextInputType.emailAddress,
              placeholder: TextConstants.emailPlaceholder,
              controller: bloc.emailController,
              errorText: TextConstants.emailErrorText,
              isError: state is ShowErrorState ? !ValidationService.email(bloc.emailController.text) : false,
              onTextChanged: () {
                bloc.add(OnTextChangeEvent());
              },
            ),
            const SizedBox(height: 20),
            FitnessTextField(
              title: TextConstants.password,
              placeholder: TextConstants.passwordPlaceholderSignIn,
              controller: bloc.passwordController,
              errorText: TextConstants.passwordErrorText,
              isError: state is ShowErrorState ? !ValidationService.password(bloc.passwordController.text) : false,
              obscureText: true,
              onTextChanged: () {
                bloc.add(OnTextChangeEvent());
              },
            ),
          ],
        );
      },
    );
  }

  Widget _createForgotPasswordButton(BuildContext context) {
    final bloc = BlocProvider.of<SignInBloc>(context);
    return GestureDetector(
      child: Padding(
        padding: const EdgeInsets.only(left: 21),
        child: Text(
          TextConstants.forgotPassword,
          style: TextStyle(
            fontSize: 16,
            fontWeight: FontWeight.bold,
            color: ColorConstants.primaryColor,
          ),
        ),
      ),
      onTap: () {
        FocusScope.of(context).unfocus();
        bloc.add(ForgotPasswordTappedEvent());
      },
    );
  }

  Widget _createSignInButton(BuildContext context) {
    final bloc = BlocProvider.of<SignInBloc>(context);
    return Padding(
      padding: const EdgeInsets.symmetric(horizontal: 20),
      child: BlocBuilder<SignInBloc, SignInState>(
        buildWhen: (_, currState) => currState is SignInButtonEnableChangedState,
        builder: (context, state) {
          return FitnessButton(
            title: TextConstants.signIn,
            isEnabled: state is SignInButtonEnableChangedState ? state.isEnabled : false,
            onTap: () {
              FocusScope.of(context).unfocus();
              bloc.add(SignInTappedEvent());
            },
          );
        },
      ),
    );
  }

  Widget _createDoNotHaveAccountText(BuildContext context) {
    final bloc = BlocProvider.of<SignInBloc>(context);
    return Center(
      child: RichText(
        text: TextSpan(
          text: TextConstants.doNotHaveAnAccount,
          style: TextStyle(
            color: ColorConstants.textBlack,
            fontSize: 18,
          ),
          children: [
            TextSpan(
              text: " ${TextConstants.signUp}",
              style: TextStyle(
                color: ColorConstants.primaryColor,
                fontSize: 18,
                fontWeight: FontWeight.bold,
              ),
              recognizer: TapGestureRecognizer()
                ..onTap = () {
                  bloc.add(SignUpTappedEvent());
                },
            ),
          ],
        ),
      ),
    );
  }
}
In the _createMainData method, each widget should have separate functions so we won’t get confused. Each function is responsible for a particular widget that it returns. Thus, because we don’t want to have code clustered in one place, we divided our functions and named them according to what each of them returns.
  Widget _createHeader() {
    return Text(
      widget.title,
      style: TextStyle(
        color: _getUserNameColor(),
        fontSize: 14,
        fontWeight: FontWeight.w500,
      ),
    );
  }
  Widget _createForm(BuildContext context) {
    final bloc = BlocProvider.of<SignInBloc>(context);
    return BlocBuilder<SignInBloc, SignInState>(
      buildWhen: (_, currState) => currState is ShowErrorState,
      builder: (context, state) {
        return Column(
          crossAxisAlignment: CrossAxisAlignment.start,
          children: [
            FitnessTextField(
              title: TextConstants.email,
              textInputAction: TextInputAction.next,
              keyboardType: TextInputType.emailAddress,
              placeholder: TextConstants.emailPlaceholder,
              controller: bloc.emailController,
              errorText: TextConstants.emailErrorText,
              isError: state is ShowErrorState ? !ValidationService.email(bloc.emailController.text) : false,
              onTextChanged: () {
                bloc.add(OnTextChangeEvent());
              },
            ),
            const SizedBox(height: 20),
            FitnessTextField(
              title: TextConstants.password,
              placeholder: TextConstants.passwordPlaceholderSignIn,
              controller: bloc.passwordController,
              errorText: TextConstants.passwordErrorText,
              isError: state is ShowErrorState ? !ValidationService.password(bloc.passwordController.text) : false,
              obscureText: true,
              onTextChanged: () {
                bloc.add(OnTextChangeEvent());
              },
            ),
          ],
        );
      },
    );
  }
 Widget _createForgotPasswordButton(BuildContext context) {
    final bloc = BlocProvider.of<SignInBloc>(context);
    return GestureDetector(
      child: Padding(
        padding: const EdgeInsets.only(left: 21),
        child: Text(
          TextConstants.forgotPassword,
          style: TextStyle(
            fontSize: 16,
            fontWeight: FontWeight.bold,
            color: ColorConstants.primaryColor,
          ),
        ),
      ),
      onTap: () {
        FocusScope.of(context).unfocus();
        bloc.add(ForgotPasswordTappedEvent());
      },
    );
  }
Widget _createSignInButton(BuildContext context) {
final bloc = BlocProvider.of<SignInBloc>(context);
return Padding(
padding: const EdgeInsets.symmetric(horizontal: 20),
child: BlocBuilder<SignInBloc, SignInState>(
buildWhen: (_, currState) => currState is SignInButtonEnableChangedState,
builder: (context, state) {
return FitnessButton(
title: TextConstants.signIn,
isEnabled: state is SignInButtonEnableChangedState ? state.isEnabled : false,
onTap: () {
FocusScope.of(context).unfocus();
bloc.add(SignInTappedEvent());
},
);
},
),
);
} Widget _createDoNotHaveAccountText(BuildContext context) {
final bloc = BlocProvider.of<SignInBloc>(context);
return Center(
child: RichText(
text: TextSpan(
text: TextConstants.doNotHaveAnAccount,
style: TextStyle(
color: ColorConstants.textBlack,
fontSize: 18,
),
children: [
TextSpan(
text: " ${TextConstants.signUp}",
style: TextStyle(
color: ColorConstants.primaryColor,
fontSize: 18,
fontWeight: FontWeight.bold,
),
recognizer: TapGestureRecognizer()
..onTap = () {
bloc.add(SignUpTappedEvent());
},
),
],
),
),
);
}
}Congrats – part one is done!
And that’s it for today, folks. Was it an easy one or rather complex? The first step might be the hardest, but the foundation for our app is complete now. Today we managed to:
- Start the Flutter project from scratch and work on the basic elements, such as adding the app’s logic and visual assets.
- Work on the BLoC and Firebase integration, as well as user verification via Firebase.
- Create three screens: Onboarding, Sign Up, and Sign In
We hope you learned something new and are ready to continue learning how to build a fitness app with Flutter with us next time. And you know what? The second part is even more exciting as we’ll build the very core of our fitness app: the Home and Workout screens.
You can view this project on our Github.
Can you build an app using Flutter?
Of course. You can build a cross-platform fitness application with Flutter to create a solution that runs on both iOS and Android.
How do you make a simple Flutter app?
This tutorial demonstrates step-by-step how to develop a simple fitness application with the Flutter framework.
How do you make a fitness app?
As a business owner, you can contact a professional mobile app development team to get your fitness app built. To understand the process behind developing a fitness application with Flutter better, you can consult this tutorial.