Welcome back to Perpetio’s fitness app tutorial. Just to remind you — we demonstrate how to make a Flutter app from scratch step by step. Last time, we established all the basics for our Flutter project and completed the first three screens: Onboarding, where we introduced the users to our app, the Sign Up screen for registering, and Sign In for logging in.
Today, we will work on some of the most integral aspects of our app: a Home screen and tab bar, a local database, a Workouts screen, and two screens that connect with it — Workout details and Start workout.
Ready? Let’s jump back in!
Tab bar
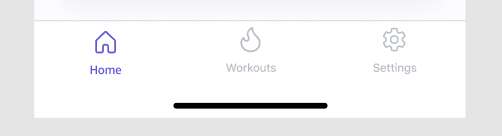
Our first task for today is creating a tab bar at the bottom of the page. This bar helps us access the three main screens: Home screen, Workout screen, and Settings screen.

How do we create it?
1. Navigate to the screens folder and add a folder called tab_bar. Once that is ready, create two additional default folders inside: bloc and page.
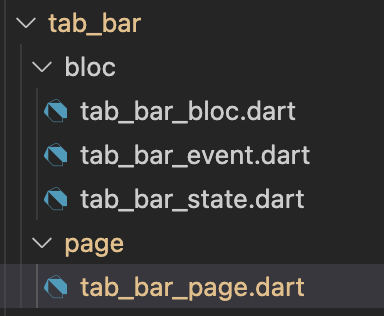
2. Now, inside the tab_bar_page.dart, add a bloc. Using index, we will be able to determine which screen to transit to.
class TabBarPage extends StatelessWidget {
  const TabBarPage({Key? key}) : super(key: key);

  @override
  Widget build(BuildContext context) {
    return BlocProvider<TabBarBloc>(
      create: (BuildContext context) => TabBarBloc(),
      child: BlocConsumer<TabBarBloc, TabBarState>(
        listener: (context, state) {},
        buildWhen: (_, currState) =>
            currState is TabBarInitial || currState is TabBarItemSelectedState,
        builder: (context, state) {
          final bloc = BlocProvider.of<TabBarBloc>(context);
          return Scaffold(
            body: _createBody(context, bloc.currentIndex),
            bottomNavigationBar: _createdBottomTabBar(context),
          );
        },
      ),
    );
  }

  Widget _createdBottomTabBar(BuildContext context) {
    final bloc = BlocProvider.of<TabBarBloc>(context);
    return BottomNavigationBar(
      currentIndex: bloc.currentIndex,
      fixedColor: ColorConstants.primaryColor,
      items: [
        BottomNavigationBarItem(
          icon: Image(
            image: AssetImage(PathConstants.home),
            color: bloc.currentIndex == 0 ? ColorConstants.primaryColor : null,
          ),
          label: TextConstants.homeIcon,
        ),
        BottomNavigationBarItem(
          icon: Image(
            image: AssetImage(PathConstants.workouts),
            color: bloc.currentIndex == 1 ? ColorConstants.primaryColor : null,
          ),
          label: TextConstants.workoutsIcon,
        ),
        BottomNavigationBarItem(
          icon: Image(
            image: AssetImage(PathConstants.settings),
            color: bloc.currentIndex == 2 ? ColorConstants.primaryColor : null,
          ),
          label: TextConstants.settingsIcon,
        ),
      ],
      onTap: (index) {
        bloc.add(TabBarItemTappedEvent(index: index));
      },
    );
  }

  Widget _createBody(BuildContext context, int index) {
    final children = [HomePage(), WorkoutsPage(), SettingsScreen()];
    return children[index];
  }
}- Take a look at the code inside the bloc:
class TabBarBloc extends Bloc<TabBarEvent, TabBarState> {
  TabBarBloc() : super(TabBarInitial());

  int currentIndex = 0;
  bool isSelected = false;

  @override
  Stream<TabBarState> mapEventToState(
    TabBarEvent event,
  ) async* {
    if (event is TabBarItemTappedEvent) {
      currentIndex = event.index;
      yield TabBarItemSelectedState(index: currentIndex);
    }
  }
}- Here is the code in the event:
part of 'tab_bar_bloc.dart';

@immutable
abstract class TabBarEvent {}

class TabBarItemTappedEvent extends TabBarEvent {
  final int index;

  TabBarItemTappedEvent({
    required this.index,
  });
}- And this is the state code:
part of 'tab_bar_bloc.dart';

@immutable
abstract class TabBarState {}

class TabBarInitial extends TabBarState {}

class TabBarItemSelectedState extends TabBarState {
  final int index;

  TabBarItemSelectedState({
    required this.index,
  });
}
3. We will use bloc for calling the event and checking the index. For example, now we will try to change the color.
When we tap on the first icon (the index is 0), it has the primaryColor. Still, if the index indicates that this is not the chosen screen at the moment, we get null, meaning the default grey color.
    return BottomNavigationBar(
      currentIndex: bloc.currentIndex,
      fixedColor: ColorConstants.primaryColor,
      items: [
        BottomNavigationBarItem(
          icon: Image(
            image: AssetImage(PathConstants.home),
            color: bloc.currentIndex == 0 ? ColorConstants.primaryColor : null,
          ),
          label: TextConstants.homeIcon,
        ),
4. In the _createBody() function, we can choose the icon based on the index and move on to the next screen.
Widget _createBody(BuildContext context, int index) {
    final children = [HomePage(), WorkoutsPage(), SettingsScreen()];
    return children[index];
  }
The local database
Why do we need a local database? It stores all the user’s data on the device. For example, our app will memorize which workouts are already completed and the user’s current progress.
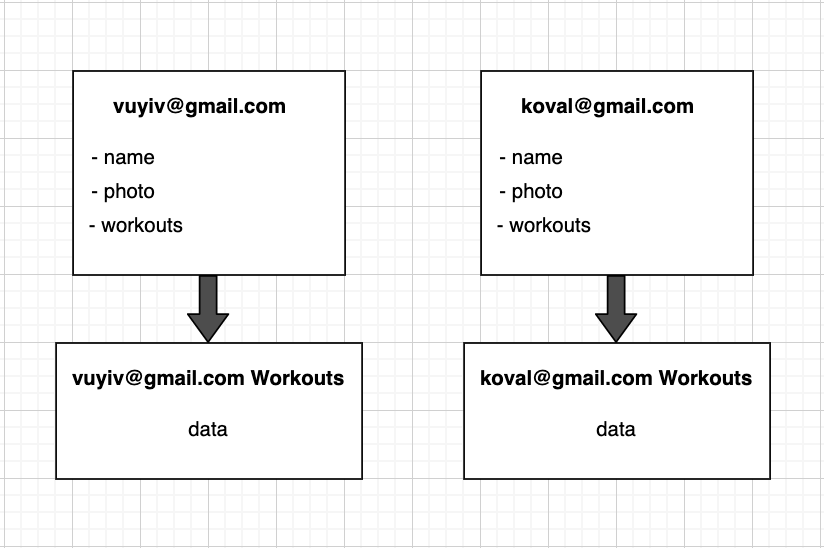
The screenshot below demonstrates how our local database works. Each user has a key by which we can identify them. In this case, it is their email. With this key, we can access the user’s information, such as their name, photo, workout list, etc. For example, using the key email + Workouts, we will be able to access the data from the workouts the user has already completed.
Now that you understand why we need a local database, let’s create it.
We will need to use the flutter_secure_storage: *current version* library (the current version at the moment is 4.2.1). Simply add it to the dependencies in the pubspec.yaml file.
1. First, we add a folder called data where we will store the models for keeping all the information.
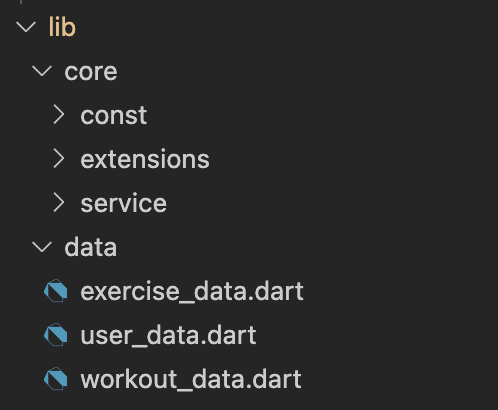
2. Let’s begin with the user_data.dart. This one will contain the user’s data that can be changed later on, such as the name, photo, email, and workout list.
import 'package:firebase_auth/firebase_auth.dart';
import 'package:fitness_flutter/data/workout_data.dart';

class UserData {
  String? name;
  String? photo;
  String? mail;
  List<WorkoutData>? workouts;

  UserData({
    required this.name,
    required this.photo,
    required this.mail,
    required this.workouts,
  });

  UserData.fromJson(Map<String, dynamic> json) {
    name = json['name'];
    photo = json['photo'];
    mail = json['mail'];
    if (json['workouts'] != null) {
      List<WorkoutData> workouts = [];
      json['workouts'].forEach((v) {
        workouts.add(new WorkoutData.fromJson(v));
      });
    }
  }

  Map<String, dynamic> toJson() {
    final Map<String, dynamic> data = new Map<String, dynamic>();
    data['name'] = this.name;
    data['photo'] = this.photo;
    data['mail'] = this.mail;
    if (this.workouts != null) {
      data['workouts'] = this.workouts!.map((v) => v.toJson()).toList();
    }
    return data;
  }

  static fromFirebase(User? user) {
    return user != null
        ? UserData(
            name: user.displayName ?? "",
            photo: user.photoURL ?? "",
            mail: user.email ?? "",
            workouts: [],
          )
        : [];
  }
}
3. In our local database, everything will be stored in the json (key: value) file. By using a certain key, we will be able to find any element. For example, we can use the key email if we need to get a particular user’s email address.
For a better understanding of what we just did in the user_data.dart file, you can read this helpful piece.
4. Now, we are moving on to the WorkoutData. There is nothing complicated here — the process is identical to what we did in the UserData, just with the different variables. We will discuss the WorkoutData more when we get to our Workout screen.
import 'dart:convert';

import 'package:fitness_flutter/data/exercise_data.dart';

class WorkoutData {
  String? id;
  String? title;
  String? exercises;
  String? minutes;
  int? currentProgress;
  int? progress;
  String? image;
  List<ExerciseData>? exerciseDataList;

  WorkoutData({
    required this.id,
    required this.title,
    required this.exercises,
    required this.minutes,
    required this.currentProgress,
    required this.progress,
    required this.image,
    required this.exerciseDataList,
  });

  WorkoutData.fromJson(Map<String, dynamic> json) {
    id = json['id'];
    title = json['title'];
    exercises = json['exercises'];
    minutes = json['minutes'];
    currentProgress = json['currentProgress'];
    progress = json['progress'];
    image = json['image'];
    if (json['exerciseDataList'] != null) {
      List<ExerciseData> exercises = [];
      json['exerciseDataList'].forEach((v) {
        exercises.add(ExerciseData.fromJson(v));
      });
      exerciseDataList = exercises;
    }
  }

  Map<String, dynamic> toJson() {
    final Map<String, dynamic> data = new Map<String, dynamic>();
    data['id'] = this.id;
    data['title'] = this.title;
    data['exercises'] = this.exercises;
    data['minutes'] = this.minutes;
    data['currentProgress'] = this.currentProgress;
    data['progress'] = this.progress;
    data['image'] = this.image;
    if (this.exerciseDataList != null) {
      data['exerciseDataList'] =
          this.exerciseDataList!.map((v) => v.toJson()).toList();
    }
    return data;
  }

  String toJsonString() {
    final str = json.encode(this.toJson());
    return str;
  }
}
5. Next, take a look at the ExerciseData. Again, the code here is similar to the two previous cases. We will give you more details about this one when working on the ExerciseData screen.
import 'dart:convert';

class ExerciseData {
  String? id;
  String? title;
  int? minutes;
  double? progress;
  String? video;
  String? description;
  List<String>? steps;

  ExerciseData({
    required this.id,
    required this.title,
    required this.minutes,
    required this.progress,
    required this.video,
    required this.description,
    required this.steps,
  });

  ExerciseData.fromJson(Map<String, dynamic> json) {
    id = json['id'];
    title = json['title'];
    minutes = json['minutes'];
    progress = json['progress'];
    video = json['video'];
    description = json['description'];
    steps = json['steps'].cast<String>();
  }

  Map<String, dynamic> toJson() {
    final Map<String, dynamic> data = new Map<String, dynamic>();
    data['id'] = this.id;
    data['title'] = this.title;
    data['minutes'] = this.minutes;
    data['progress'] = this.progress;
    data['video'] = this.video;
    data['description'] = this.description;
    data['steps'] = this.steps;
    return data;
  }

  String toJsonString() {
    final str = json.encode(this.toJson());
    return str;
  }
}
6. It’s time to work on Services — this part of our code is just as important. There are several methods to pay attention to:

6.1. User_storage_service.dart contains the methods that help add data to the local database, read it, and delete it if necessary.
import 'package:flutter_secure_storage/flutter_secure_storage.dart';

class UserStorageService {
  static final _storage = FlutterSecureStorage();

  static Future writeSecureData(String key, String value) async {
    var writeData = await _storage.write(key: key, value: value);
    return writeData;
  }

  static Future readSecureData(String key) async {
    var readData = await _storage.read(key: key);
    return readData;
  }

  static Future deleteSecureData(String key) async {
    var readData = await _storage.delete(key: key);
    return readData;
  }
}
6.2. We need to create the DataService, so we can read and add data by looking it up via the unique key (for example, email + Workouts).
import 'dart:convert';

import 'package:fitness_flutter/core/const/global_constants.dart';
import 'package:fitness_flutter/core/service/user_storage_service.dart';
import 'package:fitness_flutter/data/workout_data.dart';

class DataService {
  static Future<List<WorkoutData>> getWorkoutsForUser() async {
    final currUserEmail = GlobalConstants.currentUser.mail;

    // await UserStorageService.deleteSecureData('${currUserEmail}Workouts');

    final workoutsStr =
        await UserStorageService.readSecureData('${currUserEmail}Workouts');
    if (workoutsStr == null) return [];
    final decoded = (json.decode(workoutsStr) as List?) ?? [];
    final workouts = decoded.map((e) {
      final decodedE = json.decode(e) as Map<String, dynamic>?;
      return WorkoutData.fromJson(decodedE!);
    }).toList();
    GlobalConstants.workouts = workouts;
    return workouts;
  }

  static Future<void> saveWorkout(WorkoutData workout) async {
    final allWorkouts = await getWorkoutsForUser();
    final index = allWorkouts.indexWhere((w) => w.id == workout.id);
    if (index != -1) {
      allWorkouts[index] = workout;
    } else {
      allWorkouts.add(workout);
    }
    GlobalConstants.workouts = allWorkouts;
    final workoutsStr = allWorkouts.map((e) => e.toJsonString()).toList();
    final encoded = json.encode(workoutsStr);
    final currUserEmail = GlobalConstants.currentUser.mail;
    await UserStorageService.writeSecureData(
      '${currUserEmail}Workouts',
      encoded,
    );
  }
}
6.3. Additionally, we have to create the GlobalConstants class in the lib/core/const folder. We need this one to pass along data about the user and workouts.
import 'package:fitness_flutter/data/user_data.dart';
import 'package:fitness_flutter/data/workout_data.dart';

class GlobalConstants {
  static late UserData currentUser;
  static late List<WorkoutData> workouts;
}
Home screen
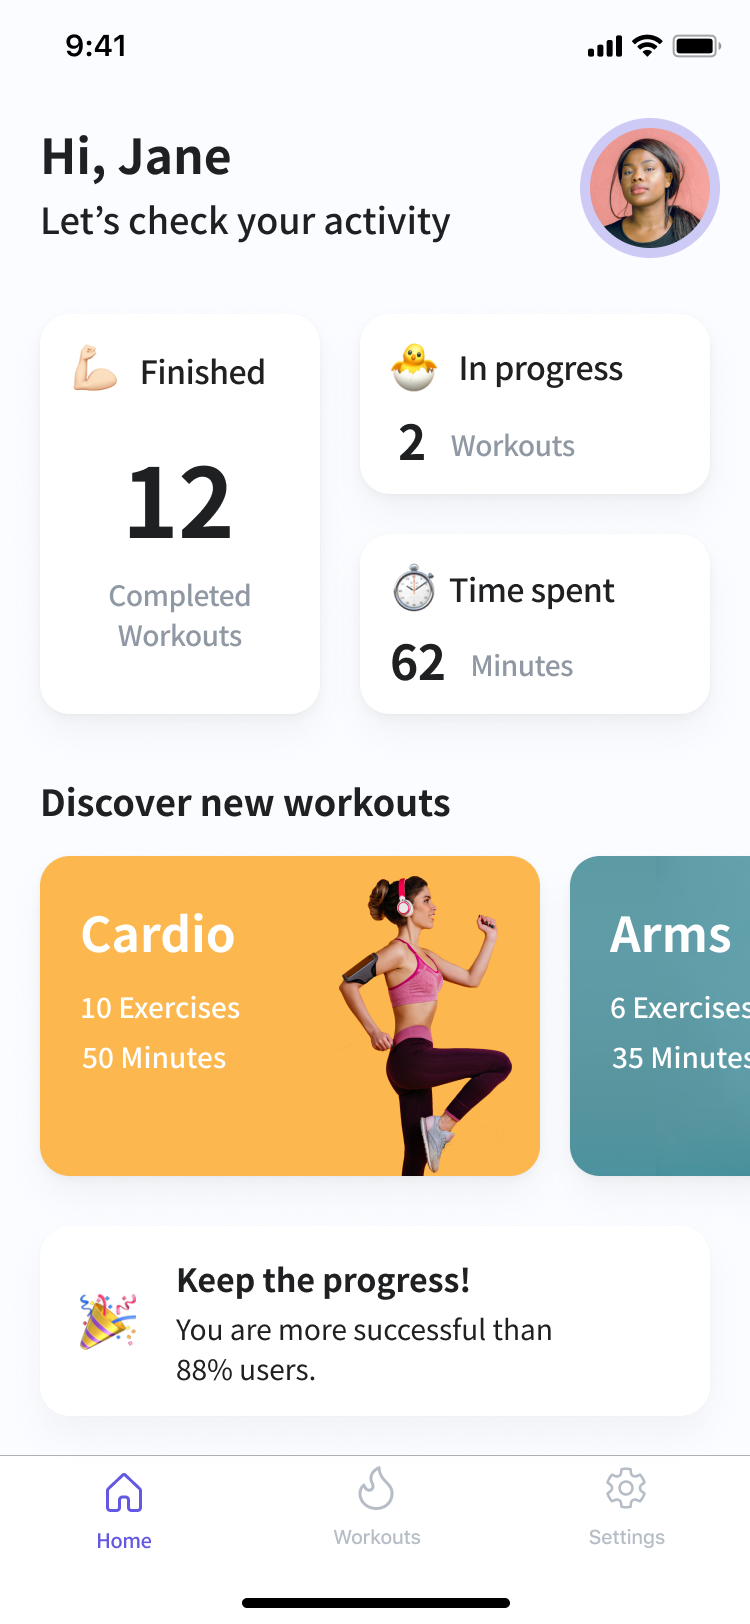
Moving on to the heart of our app — the Home screen. If the user is all set and logged in (using the screens we made in part one), they will arrive at the home screen when opening the app. This is how it looks:
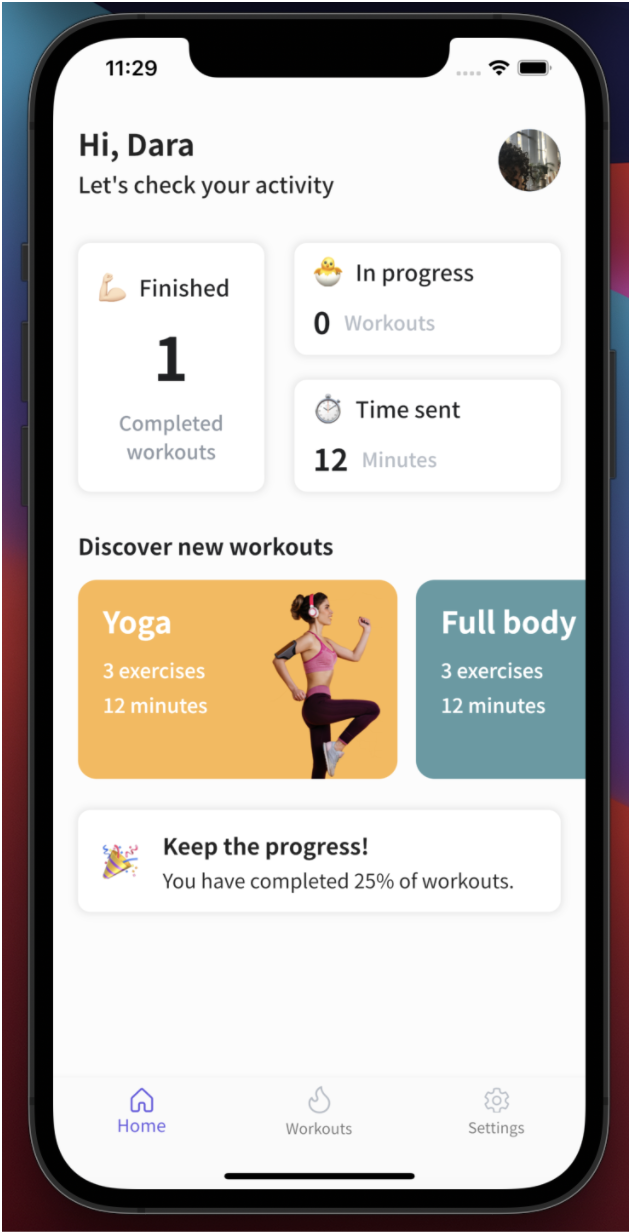
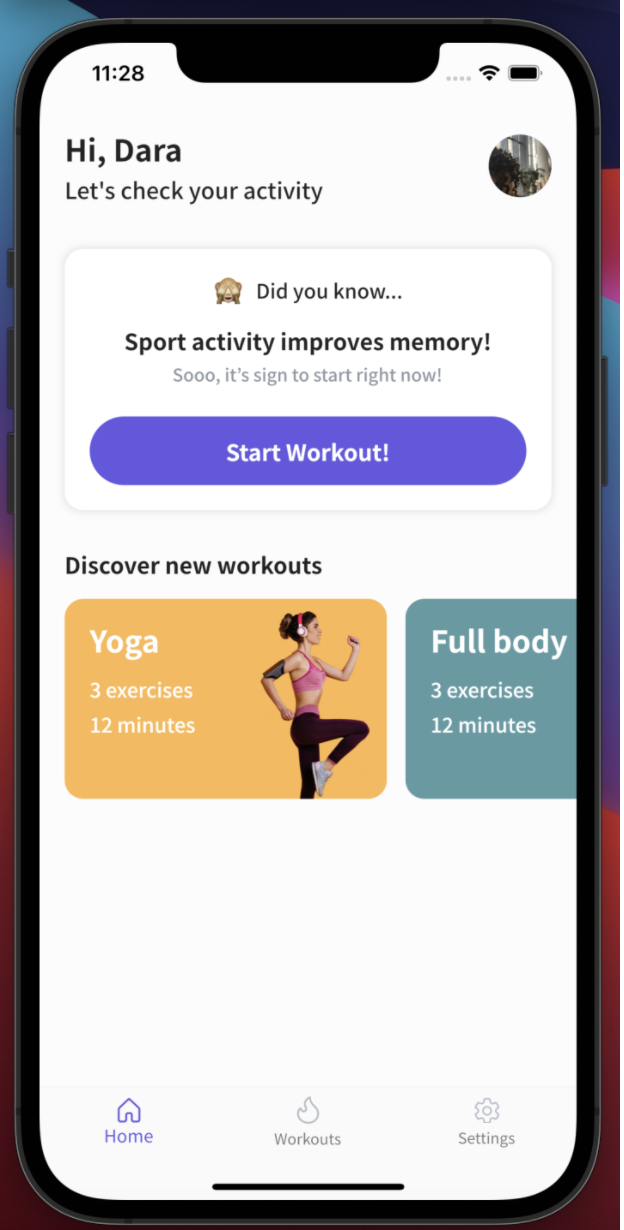
Pay attention to the difference between the two UI examples. The user will receive the first one if they haven't completed any workouts yet while the second one includes information about the user’s progress.
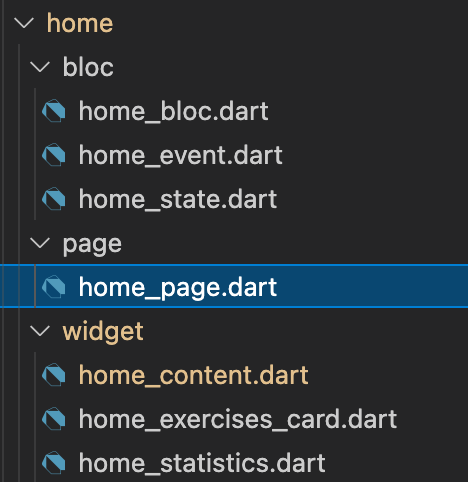
1. As usual, we first need to create the home folder within the screens one. Then we add a bloc and separate page and widget.
class HomePage extends StatelessWidget {
  const HomePage({Key? key}) : super(key: key);

  @override
  Widget build(BuildContext context) {
    return Scaffold(
      body: _buildContext(context),
    );
  }

  BlocProvider<HomeBloc> _buildContext(BuildContext context) {
    return BlocProvider<HomeBloc>(
      create: (BuildContext context) => HomeBloc(),
      child: BlocConsumer<HomeBloc, HomeState>(
        buildWhen: (_, currState) =>
            currState is HomeInitial || currState is WorkoutsGotState,
        builder: (context, state) {
          final bloc = BlocProvider.of<HomeBloc>(context);
          if (state is HomeInitial) {
            bloc.add(HomeInitialEvent());
            bloc.add(ReloadDisplayNameEvent());
            bloc.add(ReloadImageEvent());
          }
          return HomeContent(workouts: bloc.workouts);
        },
        listenWhen: (_, currState) => true,
        listener: (context, state) {},
      ),
    );
  }
}
2. What is going on inside the bloc? Here we can change the user’s name and photo via the provided key as needed.
Take a quick look at the functions in this class, but don’t get overwhelmed. We will explain each one as we use them.
class HomeBloc extends Bloc<HomeEvent, HomeState> {
  HomeBloc() : super(HomeInitial());

  List<WorkoutData> workouts = <WorkoutData>[];
  List<ExerciseData> exercises = <ExerciseData>[];
  int timeSent = 0;

  @override
  Stream<HomeState> mapEventToState(
    HomeEvent event,
  ) async* {
    if (event is HomeInitialEvent) {
      workouts = await DataService.getWorkoutsForUser();
      yield WorkoutsGotState(workouts: workouts);
    } else if (event is ReloadImageEvent) {
      String? photoURL = await UserStorageService.readSecureData('image');
      if (photoURL == null) {
        photoURL = AuthService.auth.currentUser?.photoURL;
        photoURL != null
            ? await UserStorageService.writeSecureData('image', photoURL)
            : print('no image');
      }
      yield ReloadImageState(photoURL: photoURL);
    } else if (event is ReloadDisplayNameEvent) {
      final displayName = await UserStorageService.readSecureData('name');
      yield ReloadDisplayNameState(displayName: displayName);
    }
  }

  int getProgressPercentage() {
    final completed = workouts
        .where((w) =>
            (w.currentProgress ?? 0) > 0 && w.currentProgress == w.progress)
        .toList();
    final percent01 =
        completed.length.toDouble() / DataConstants.workouts.length.toDouble();
    final percent = (percent01 * 100).toInt();
    return percent;
  }

  int? getFinishedWorkouts() {
    final completedWorkouts =
        workouts.where((w) => w.currentProgress == w.progress).toList();
    return completedWorkouts.length;
  }

  int? getInProgressWorkouts() {
    final completedWorkouts = workouts.where(
        (w) => (w.currentProgress ?? 0) > 0 && w.currentProgress != w.progress);
    return completedWorkouts.length;
  }

  int? getTimeSent() {
    for (final WorkoutData workout in workouts) {
      exercises.addAll(workout.exerciseDataList!);
    }
    final exercise = exercises.where((e) => e.progress == 1).toList();
    exercise.forEach((e) {
      timeSent += e.minutes!;
    });
    return timeSent;
  }
}
- Here are the events:
part of 'home_bloc.dart';

@immutable
abstract class HomeEvent {}

class HomeInitialEvent extends HomeEvent {}

class ReloadDisplayNameEvent extends HomeEvent {}

class ReloadImageEvent extends HomeEvent {}- And the states:
part of 'home_bloc.dart';

@immutable
abstract class HomeState {}

class HomeInitial extends HomeState {}

class ReloadImageState extends HomeState {
  final String? photoURL;

  ReloadImageState({
    required this.photoURL,
  });
}

class ReloadDisplayNameState extends HomeState {
  final String? displayName;

  ReloadDisplayNameState({
    required this.displayName,
  });
}

class WorkoutsGotState extends HomeState {
  final List<WorkoutData> workouts;

  WorkoutsGotState({
    required this.workouts,
  });
}
3. Now, let’s review the elements in a HomeContent class.
class HomeContent extends StatelessWidget {
  final List<WorkoutData> workouts;

  const HomeContent({
    required this.workouts,
    Key? key,
  }) : super(key: key);

  @override
  Widget build(BuildContext context) {
    return Container(
      color: ColorConstants.homeBackgroundColor,
      height: double.infinity,
      width: double.infinity,
      child: _createHomeBody(context),
    );
  }

  Widget _createHomeBody(BuildContext context) {
    final bloc = BlocProvider.of<HomeBloc>(context);
    return SafeArea(
      child: ListView(
        padding: const EdgeInsets.symmetric(vertical: 20),
        children: [
          _createProfileData(context),
          const SizedBox(height: 35),
          _showStartWorkout(context, bloc),
          const SizedBox(height: 30),
          _createExercisesList(context),
          const SizedBox(height: 25),
          _showProgress(bloc),
        ],
      ),
    );
  }
3.1. First we have the _createProfileData():

 Widget _createProfileData(BuildContext context) {
    return Padding(
      padding: const EdgeInsets.symmetric(horizontal: 20),
      child: Row(
        mainAxisAlignment: MainAxisAlignment.spaceBetween,
        children: [
          Column(
            crossAxisAlignment: CrossAxisAlignment.start,
            children: [
              BlocBuilder<HomeBloc, HomeState>(
                buildWhen: (_, currState) =>
                    currState is ReloadDisplayNameState,
                builder: (context, state) {
                  final displayName = state is ReloadDisplayNameState
                      ? state.displayName
                      : '[name]';
                  return Text(
                    'Hi, $displayName',
                    style: TextStyle(
                      fontSize: 24,
                      fontWeight: FontWeight.bold,
                    ),
                  );
                },
              ),
              const SizedBox(height: 2),
              Text(
                TextConstants.checkActivity,
                style: TextStyle(
                  fontSize: 18,
                  fontWeight: FontWeight.w500,
                ),
              ),
            ],
          ),
          BlocBuilder<HomeBloc, HomeState>(
            buildWhen: (_, currState) => currState is ReloadImageState,
            builder: (context, state) {
              final photoURL =
                  state is ReloadImageState ? state.photoURL : null;
              return GestureDetector(
                child: photoURL == null
                    ? CircleAvatar(
                        backgroundImage: AssetImage(PathConstants.profile),
                        radius: 25)
                    : CircleAvatar(
                        child: ClipOval(
                            child: FadeInImage.assetNetwork(
                                placeholder: PathConstants.profile,
                                image: photoURL,
                                fit: BoxFit.cover,
                                width: 200,
                                height: 120)),
                        radius: 25),
                onTap: () async {
                  await Navigator.of(context).push(
                      MaterialPageRoute(builder: (_) => EditAccountScreen()));
                  BlocProvider.of<HomeBloc>(context).add(ReloadImageEvent());
                },
              );
            },
          ),
        ],
      ),
    );
  }
3.2. After choosing onTap: (), we are redirected to the Edit Account screen, where, you guessed it, one can edit their profile.
3.3. The _showStartWorkout() lets us see whether the workout list is empty or not. If it is empty, we get the _createStartWorkout() widget, if not — HomeStatistics().
  Widget _showStartWorkout(BuildContext context, HomeBloc bloc) {
    return workouts.isEmpty
        ? _createStartWorkout(context, bloc)
        : HomeStatistics();
  }
3.4. This is the _createStartWorkout() widget:
Widget _createStartWorkout(BuildContext context, HomeBloc bloc) {
    final blocTabBar = BlocProvider.of<TabBarBloc>(context);
    return Container(
      padding: const EdgeInsets.symmetric(horizontal: 20, vertical: 20),
      margin: const EdgeInsets.symmetric(horizontal: 20),
      width: double.infinity,
      decoration: BoxDecoration(
        borderRadius: BorderRadius.circular(15),
        color: ColorConstants.white,
        boxShadow: [
          BoxShadow(
            color: ColorConstants.textBlack.withOpacity(0.12),
            blurRadius: 5.0,
            spreadRadius: 1.1,
          )
        ],
      ),
      child: Column(
        children: [
          Row(
            mainAxisAlignment: MainAxisAlignment.center,
            children: [
              Image(
                image: AssetImage(PathConstants.didYouKnow),
                width: 24,
                height: 24,
              ),
              const SizedBox(width: 10),
              Text(TextConstants.didYouKnow,
                  style: TextStyle(fontSize: 16, fontWeight: FontWeight.w500))
            ],
          ),
          const SizedBox(height: 16),
          Text(TextConstants.sportActivity,
              style: TextStyle(fontSize: 18, fontWeight: FontWeight.w700)),
          const SizedBox(height: 4),
          Text(TextConstants.signToStart,
              style: TextStyle(
                  fontSize: 14,
                  fontWeight: FontWeight.w500,
                  color: ColorConstants.textGrey)),
          const SizedBox(height: 24),
          FitnessButton(
            title: TextConstants.startWorkout,
            onTap: () {
              blocTabBar.add(
                  TabBarItemTappedEvent(index: blocTabBar.currentIndex = 1));
            },
          ),
        ],
      ),
    );
  }
3.5. One important note: when the Start Workout! button is pressed, we need to add the TabBar bloc to get to the Workouts screen (with the currentIndex == 1).
4. Now, it’s time to work on the HomeStatistics() class. The final result is reflected in these widgets:
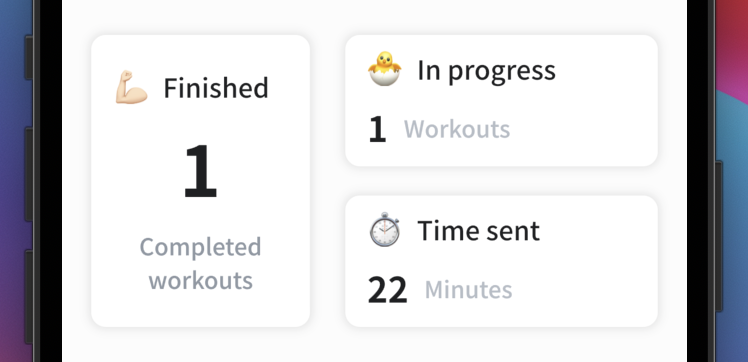
How do we achieve this outcome? This the code we need:
class HomeStatistics extends StatelessWidget {
  const HomeStatistics({Key? key}) : super(key: key);

  @override
  Widget build(BuildContext context) {
    final bloc = BlocProvider.of<HomeBloc>(context);
    return Container(
      margin: const EdgeInsets.symmetric(horizontal: 20),
      child: Row(
        mainAxisAlignment: MainAxisAlignment.spaceBetween,
        children: [
          _createComletedWorkouts(context, bloc),
          _createColumnStatistics(bloc),
        ],
      ),
    );
  }
Let’s review its elements:
4.1. _createCompletedWorkouts() is where the number of completed workouts will be changing.
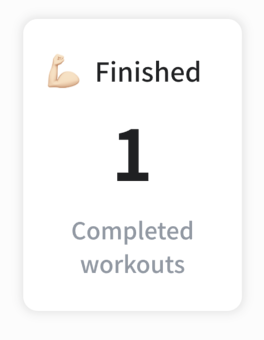
4.2. Next, we will be using the getFinishedWorkouts(), which we can get from the bloc:
 Widget _createComletedWorkouts(BuildContext context, HomeBloc bloc) {
    final screenWidth = MediaQuery.of(context).size.width;
    return Container(
      padding: const EdgeInsets.all(15),
      height: 200,
      width: screenWidth * 0.35,
      decoration: BoxDecoration(
        borderRadius: BorderRadius.circular(10),
        color: ColorConstants.white,
        boxShadow: [
          BoxShadow(
            color: ColorConstants.textBlack.withOpacity(0.12),
            blurRadius: 5.0,
            spreadRadius: 1.1,
          ),
        ],
      ),
      child: Column(
        mainAxisAlignment: MainAxisAlignment.spaceEvenly,
        children: [
          Row(
            children: [
              Image(
                image: AssetImage(
                  PathConstants.finished,
                ),
              ),
              const SizedBox(width: 10),
              Expanded(
                child: Text(
                  TextConstants.finished,
                  style: TextStyle(
                    color: ColorConstants.textBlack,
                    fontSize: 18,
                    fontWeight: FontWeight.w500,
                  ),
                  overflow: TextOverflow.fade,
                  softWrap: false,
                ),
              ),
            ],
          ),
          Text(
            '${bloc.getFinishedWorkouts()}',
            style: TextStyle(
              fontSize: 48,
              fontWeight: FontWeight.w700,
              color: ColorConstants.textBlack,
            ),
          ),
          Text(
            TextConstants.completedWorkouts,
            textAlign: TextAlign.center,
            style: TextStyle(
              fontSize: 16,
              fontWeight: FontWeight.w500,
              color: ColorConstants.textGrey,
            ),
          ),
        ],
      ),
    );
  }
4.3. And here we are checking the workouts’ progress (we will share more details when we get to the Workout screen):
 int? getInProgressWorkouts() {
    final completedWorkouts = workouts.where(
        (w) => (w.currentProgress ?? 0) > 0 && w.currentProgress != w.progress);
    return completedWorkouts.length;
  }
4.4. That’s the _createColumnStatistics() widget. It contains the statistics on how many workouts are now in progress and the total time spent on them.
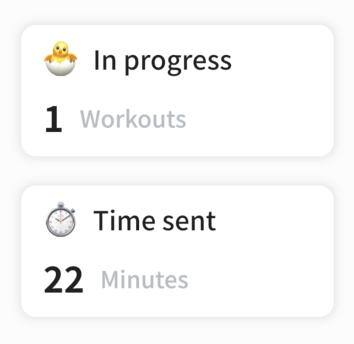
Widget _createColumnStatistics(HomeBloc bloc) {
    return Column(
      children: [
        DataWorkouts(
          icon: PathConstants.inProgress,
          title: TextConstants.inProgress,
          count: bloc.getInProgressWorkouts() ?? 0,
          text: TextConstants.workouts,
        ),
        const SizedBox(height: 20),
        DataWorkouts(
          icon: PathConstants.timeSent,
          title: TextConstants.timeSent,
          count: bloc.getTimeSent() ?? 0,
          text: TextConstants.minutes,
        ),
      ],
    );
  }
}
Here, we are using bloc methods, such as:
- getInProgressWorkouts()

 int? getInProgressWorkouts() {
    final completedWorkouts = workouts.where(
        (w) => (w.currentProgress ?? 0) > 0 && w.currentProgress != w.progress);
    return completedWorkouts.length;
  }
It helps us check whether the currentProgress has reached the maximum possible progress number and is bigger than zero (meaning that the user completed at least one exercise).
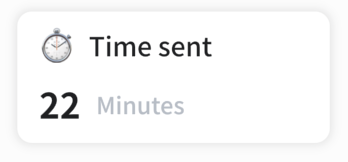
- getTimeSent()
This one is to check the workout progress and the total time spent on exercises.
int? getTimeSent() {
    for (final WorkoutData workout in workouts) {
      exercises.addAll(workout.exerciseDataList!);
    }
    final exercise = exercises.where((e) => e.progress == 1).toList();
    exercise.forEach((e) {
      timeSent += e.minutes!;
    });
    return timeSent;
  }
5. Besides the HomeStatistics class, we have to create one more class called DataWorkouts, so the code is not clustered in one function.
class DataWorkouts extends StatelessWidget {
  final String icon;
  final String title;
  final int count;
  final String text;

  DataWorkouts({
    required this.icon,
    required this.title,
    required this.count,
    required this.text,
  });

  @override
  Widget build(BuildContext context) {
    final screenWidth = MediaQuery.of(context).size.width;
    return Container(
      padding: const EdgeInsets.symmetric(horizontal: 15),
      height: 90,
      width: screenWidth * 0.5,
      decoration: BoxDecoration(
        borderRadius: BorderRadius.circular(10),
        color: ColorConstants.white,
        boxShadow: [
          BoxShadow(
            color: ColorConstants.textBlack.withOpacity(0.12),
            blurRadius: 5.0,
            spreadRadius: 1.1,
          ),
        ],
      ),
      child: Column(
        mainAxisAlignment: MainAxisAlignment.spaceEvenly,
        children: [
          Row(
            children: [
              Image(image: AssetImage(icon)),
              const SizedBox(width: 10),
              Text(
                title,
                style: TextStyle(
                  fontSize: 18,
                  fontWeight: FontWeight.w500,
                  color: ColorConstants.textBlack,
                ),
              ),
            ],
          ),
          Row(
            children: [
              Text(
                count.toString(),
                style: TextStyle(
                  fontSize: 24,
                  fontWeight: FontWeight.w700,
                  color: ColorConstants.textBlack,
                ),
              ),
              const SizedBox(width: 10),
              Text(
                text,
                style: TextStyle(
                  fontSize: 16,
                  fontWeight: FontWeight.w500,
                  color: ColorConstants.grey,
                ),
              ),
            ],
          ),
        ],
      ),
    );
  }
}
6. Now, let’s navigate back to HomeContent. What do we have here?
6.1. _createExercisesList(): the list of suggested workouts, which will be scrolled horizontally.

Widget _createExercisesList(BuildContext context) {
    return Column(
      crossAxisAlignment: CrossAxisAlignment.start,
      children: [
        Padding(
          padding: const EdgeInsets.symmetric(horizontal: 20),
          child: Text(
            TextConstants.discoverWorkouts,
            style: TextStyle(
              color: ColorConstants.textBlack,
              fontSize: 18,
              fontWeight: FontWeight.bold,
            ),
          ),
        ),
        const SizedBox(height: 15),
        Container(
          height: 160,
          child: ListView(
            scrollDirection: Axis.horizontal,
            children: [
              const SizedBox(width: 20),
              WorkoutCard(
                  color: ColorConstants.cardioColor,
                  workout: DataConstants.workouts[0],
                  onTap: () => Navigator.of(context).push(MaterialPageRoute(
                      builder: (_) => WorkoutDetailsPage(
                          workout: DataConstants.workouts[0])))),
              const SizedBox(width: 15),
              WorkoutCard(
                color: ColorConstants.armsColor,
                workout: DataConstants.workouts[2],
                onTap: () => Navigator.of(context).push(
                  MaterialPageRoute(
                    builder: (_) => WorkoutDetailsPage(
                      workout: DataConstants.workouts[2],
                    ),
                  ),
                ),
              ),
              const SizedBox(width: 20),
            ],
          ),
        ),
      ],
    );
  }
When a particular container is tapped, the respective workout will be opened.
6.2. _showProgress() is a motivational message for the user that indicates their progress in the app. It appears only when a user has completed a few workouts. Otherwise, it will show the empty container.

Widget _showProgress(HomeBloc bloc) {
    return workouts.isNotEmpty ? _createProgress(bloc) : Container();
  }
6.3. Here goes the _createProgress() function:
Widget _createProgress(HomeBloc bloc) {
    return Container(
      width: double.infinity,
      margin: const EdgeInsets.symmetric(horizontal: 20),
      padding: const EdgeInsets.symmetric(horizontal: 20, vertical: 15),
      decoration: BoxDecoration(
        borderRadius: BorderRadius.circular(10),
        color: ColorConstants.white,
        boxShadow: [
          BoxShadow(
            color: ColorConstants.textBlack.withOpacity(0.12),
            blurRadius: 5.0,
            spreadRadius: 1.1,
          ),
        ],
      ),
      child: Row(
        children: [
          Image(image: AssetImage(PathConstants.progress)),
          SizedBox(width: 20),
          Flexible(
            child: Column(
              crossAxisAlignment: CrossAxisAlignment.start,
              children: [
                Text(TextConstants.keepProgress,
                    style:
                        TextStyle(fontSize: 18, fontWeight: FontWeight.bold)),
                const SizedBox(height: 3),
                Text(
                  '${TextConstants.profileSuccessful} ${bloc.getProgressPercentage()}% of workouts.',
                  style: TextStyle(fontSize: 16),
                  overflow: TextOverflow.ellipsis,
                  maxLines: 2,
                ),
              ],
            ),
          ),
        ],
      ),
    );
  }
6.4. Finally, take a look at the last function in the bloc — getProgressPercentage(). This is where we can check if currentProgress == progress and calculate the percentage of the completed workouts.
int getProgressPercentage() {
    final completed = workouts
        .where((w) =>
            (w.currentProgress ?? 0) > 0 && w.currentProgress == w.progress)
        .toList();
    final percent01 =
        completed.length.toDouble() / DataConstants.workouts.length.toDouble();
    final percent = (percent01 * 100).toInt();
    return percent;
  }
Workouts screen
The Home screen is all set; it’s time to move on! But first, we’d encourage you to grab a quick coffee or tea before starting the next chuck of work.
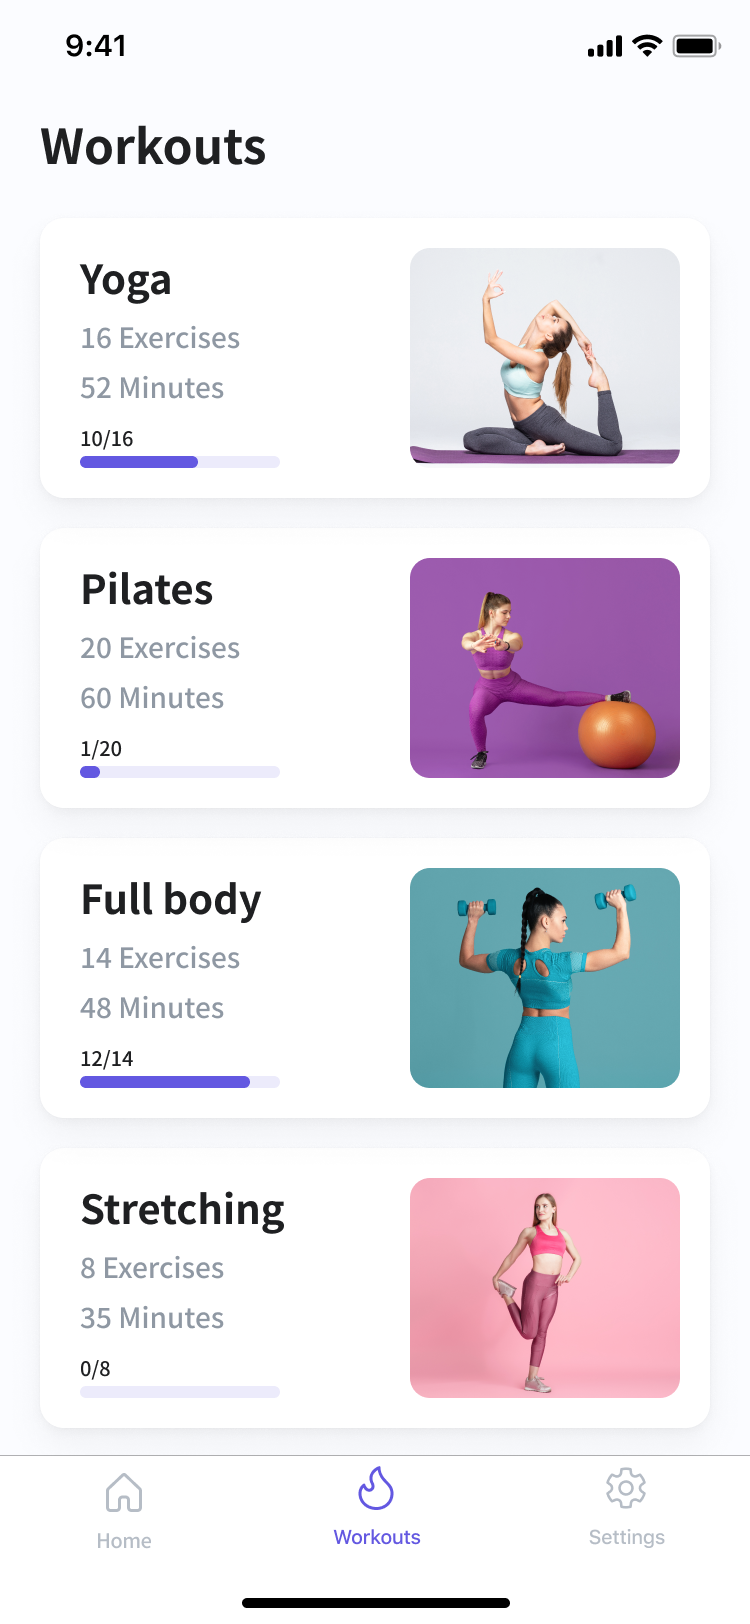
Ready? Now we can focus on our Workouts screen. This screen will contain all the information about workouts and the user’s progress in each of them. The Workout screen is closely connected to the Workout details being the latter includes the list of exercises, which are an integral part of the workouts.
Here is how the Workouts screen will look once we’re finished:

1. Inside the screens folder, create one more folder called workouts with the same folders we use for every screen: bloc, widget, and page.

2. Here is the workouts_page where, just like in the other screens, we attach the logic to the UI.
class WorkoutsPage extends StatelessWidget {
  const WorkoutsPage({Key? key}) : super(key: key);

  @override
  Widget build(BuildContext context) {
    return Scaffold(body: _buildContext(context));
  }

  BlocProvider<WorkoutsBloc> _buildContext(BuildContext context) {
    return BlocProvider<WorkoutsBloc>(
      create: (context) => WorkoutsBloc(),
      child: BlocConsumer<WorkoutsBloc, WorkoutsState>(
        buildWhen: (_, currState) => currState is WorkoutsInitial,
        builder: (context, state) {
          final bloc = BlocProvider.of<WorkoutsBloc>(context);
          bloc.add(WorkoutsInitialEvent());
          return WorkoutContent();
        },
        listenWhen: (_, currState) => currState is CardTappedState,
        listener: (context, state) async {
          if (state is CardTappedState) {
            await Navigator.of(context, rootNavigator: true).push(
              MaterialPageRoute(
                builder: (_) => WorkoutDetailsPage(workout: state.workout),
              ),
            );
            final bloc = BlocProvider.of<WorkoutsBloc>(context);
            bloc.add(WorkoutsInitialEvent());
          }
        },
      ),
    );
  }
}
These are the logic elements:
- workout_bloc.dart
class WorkoutsBloc extends Bloc<WorkoutsEvent, WorkoutsState> {
  WorkoutsBloc() : super(WorkoutsInitial());

  List<WorkoutData> workouts = DataConstants.workouts;

  @override
  Stream<WorkoutsState> mapEventToState(
    WorkoutsEvent event,
  ) async* {
    if (event is WorkoutsInitialEvent) {
      GlobalConstants.workouts = await DataService.getWorkoutsForUser();
      for (int i = 0; i < workouts.length; i++) {
        final workoutsUserIndex =
            GlobalConstants.workouts.indexWhere((w) => w.id == workouts[i].id);
        if (workoutsUserIndex != -1) {
          workouts[i] = GlobalConstants.workouts[workoutsUserIndex];
        }
      }
      yield ReloadWorkoutsState(workouts: workouts);
    } else if (event is CardTappedEvent) {
      yield CardTappedState(workout: event.workout);
    }
  }
}
- workout_event.dart
part of 'workouts_bloc.dart';

@immutable
abstract class WorkoutsEvent {}

class CardTappedEvent extends WorkoutsEvent {
  final WorkoutData workout;

  CardTappedEvent({required this.workout});
}

class WorkoutsInitialEvent extends WorkoutsEvent {}
- workout_state.dart
part of 'workouts_bloc.dart';

@immutable
abstract class WorkoutsState {}

class WorkoutsInitial extends WorkoutsState {}

class CardTappedState extends WorkoutsState {
  final WorkoutData workout;

  CardTappedState({required this.workout});
}

class ReloadWorkoutsState extends WorkoutsState {
  final List<WorkoutData> workouts;

  ReloadWorkoutsState({
    required this.workouts,
  });
}
3. Also, we created the WorkoutData class to separate the logic.
Let’s review an example of a workout that has all the variable data used in the WorkoutData model:

import 'dart:convert';

import 'package:fitness_flutter/data/exercise_data.dart';

class WorkoutData {
  String? id;
  String? title;
  String? exercises;
  String? minutes;
  int? currentProgress;
  int? progress;
  String? image;
  List<ExerciseData>? exerciseDataList;

  WorkoutData({
    required this.id,
    required this.title,
    required this.exercises,
    required this.minutes,
    required this.currentProgress,
    required this.progress,
    required this.image,
    required this.exerciseDataList,
  });

  WorkoutData.fromJson(Map<String, dynamic> json) {
    id = json['id'];
    title = json['title'];
    exercises = json['exercises'];
    minutes = json['minutes'];
    currentProgress = json['currentProgress'];
    progress = json['progress'];
    image = json['image'];
    if (json['exerciseDataList'] != null) {
      List<ExerciseData> exercises = [];
      json['exerciseDataList'].forEach((v) {
        exercises.add(ExerciseData.fromJson(v));
      });
      exerciseDataList = exercises;
    }
  }

  Map<String, dynamic> toJson() {
    final Map<String, dynamic> data = new Map<String, dynamic>();
    data['id'] = this.id;
    data['title'] = this.title;
    data['exercises'] = this.exercises;
    data['minutes'] = this.minutes;
    data['currentProgress'] = this.currentProgress;
    data['progress'] = this.progress;
    data['image'] = this.image;
    if (this.exerciseDataList != null) {
      data['exerciseDataList'] =
          this.exerciseDataList!.map((v) => v.toJson()).toList();
    }
    return data;
  }

  String toJsonString() {
    final str = json.encode(this.toJson());
    return str;
  }
}
4. Next, we need to create DataConstants in the lib/core/const folder, which will allow us to create the workout list. Then, we map, or in other words, transform, this list into the WorkoutCard widget.
The list will be extended as we add more workouts. For example, in this project, we will start with only four. You can see one of the workouts in the screenshot below. To eliminate chaos, each workout should have a unique ID. We chose to use the name of the exercise and a number.
Even more, each workout contains the currentProgress, which reflects the number of exercises the user has completed. Predictably, in the beginning, the currentProgress is always zero as the user hasn’t done any exercises yet. There is also progress, which is the maximum number the currentProgress can reach. In other words, the total number of available exercises.
You can see on the screenshot that the currentProgress equals one while progress is three. That means that the user has completed one exercise out of three.

// Workouts
  static final List<WorkoutData> workouts = [
    WorkoutData(
        id: 'workout1',
        title: TextConstants.yogaTitle,
        exercises: TextConstants.yogaExercises,
        minutes: TextConstants.yogaMinutes,
        currentProgress: 0,
        progress: 3,
        image: PathConstants.yoga,
        exerciseDataList: [
          ExerciseData(
            id: 'exercise1',
            title: TextConstants.reclining,
            minutes: TextConstants.recliningMinutes,
            progress: 0,
            video: PathConstants.recliningVideo,
            description: TextConstants.warriorDescription,
            steps: [
              TextConstants.warriorStep1,
              TextConstants.warriorStep2,
              TextConstants.warriorStep1,
              TextConstants.warriorStep2,
              TextConstants.warriorStep1,
              TextConstants.warriorStep2,
            ],
          ),
          ExerciseData(
            id: 'exercise2',
            title: TextConstants.cowPose,
            minutes: TextConstants.cowPoseMinutes,
            progress: 0,
            video: PathConstants.cowPoseVideo,
            description: TextConstants.warriorDescription,
            steps: [TextConstants.warriorStep1, TextConstants.warriorStep2],
          ),
          ExerciseData(
            id: 'exercise3',
            title: TextConstants.warriorPose,
            minutes: TextConstants.warriorPoseMinutes,
            progress: 0,
            video: PathConstants.warriorIIVideo,
            description: TextConstants.warriorDescription,
            steps: [TextConstants.warriorStep1, TextConstants.warriorStep2],
          ),
        ]),
    WorkoutData(
        id: 'workout2',
        title: TextConstants.pilatesTitle,
        exercises: TextConstants.pilatesExercises,
        minutes: TextConstants.pilatesMinutes,
        currentProgress: 0,
        progress: 4,
5. Each workout has one more list. This time, it is the list of exercises — ExerciseData. It also has its own model, which we discussed in the Home screen section. Just like in the previous list, there are two types of progress, a unique ID, and so on.
6. Let’s move on to the WorkoutContent class.
class WorkoutContent extends StatelessWidget {
  WorkoutContent({Key? key}) : super(key: key);

  @override
  Widget build(BuildContext context) {
    return Container(
      color: ColorConstants.homeBackgroundColor,
      height: double.infinity,
      width: double.infinity,
      child: _createHomeBody(context),
    );
  }
Widget _createHomeBody(BuildContext context) {
final bloc = BlocProvider.of<WorkoutsBloc>(context);
return BlocBuilder<WorkoutsBloc, WorkoutsState>(
buildWhen: (_, currState) => currState is ReloadWorkoutsState,
builder: (context, state) {
return Padding(
padding: const EdgeInsets.only(top: 50),
child: Column(
crossAxisAlignment: CrossAxisAlignment.start,
children: [
Padding(
padding: const EdgeInsets.symmetric(horizontal: 20.0),
child: Text(
TextConstants.workouts,
style: TextStyle(fontSize: 24, fontWeight: FontWeight.bold),
),
),
const SizedBox(height: 5),
Expanded(
child: ListView(
children:
bloc.workouts.map((e) => _createWorkoutCard(e)).toList(),
),
),
],
),
);
},
);
}The first widget is _createHomeBody. What is going on there?
6.1. We created a workout column and passed it to the ListView(...). We also made the List<WorkoutData> workouts = DataConstants.workouts; variable in the bloc. This is where we can access our workout data.
6.2. We also connected the BlocProvider, so the page can reload to show the most updated information.
Widget _createWorkoutCard(WorkoutData workoutData) {
    return Padding(
      padding: const EdgeInsets.only(bottom: 20),
      child: WorkoutCard(workout: workoutData),
    );
  }
}
6.3. _createWorkoutCard() is to let us pass the WorkoutCard data.
7. WorkoutCard is a widget receiving the workout data, passing it, and showing it on the screen.
7.1. The WorkoutCard class is a Stateless widget.
class WorkoutCard extends StatelessWidget {
  final WorkoutData workout;
  WorkoutCard({Key? key, required this.workout}) : super(key: key);
7.2. Here is the Container widget. It includes the decoration where we set the shadow, height, border radius, and so on.
 @override
  Widget build(BuildContext context) {
    final bloc = BlocProvider.of<WorkoutsBloc>(context);
    return Container(
      width: double.infinity,
      height: 140,
      margin: const EdgeInsets.symmetric(horizontal: 20),
      decoration: BoxDecoration(
        borderRadius: BorderRadius.circular(10),
        color: ColorConstants.white,
        boxShadow: [
          BoxShadow(
            color: ColorConstants.textBlack.withOpacity(0.12),
            blurRadius: 5.0,
            spreadRadius: 1.1,
          )
        ],
      ),
7.3. Material is a child of the Container. We need to add this one because the widget is clickable, and if we don’t add Material, we won’t get a ripple effect when tapped. We also use InkWell for catching the user taps.
7.3.1. When tapping on the card, we call the CardTappedEvent, where the data can be passed. What kind of data? Basically, it is the workout found by its index.
7.3.2. In fact, what we are doing now is creating the UI and organizing everything in such a way that our data would update when reloaded – depending on the number of exercises the user has completed.
7.3.3. To indicate the progress, we use LinearPercentIndicator from the percent_indicator library: (percent_indicator: *current version*).
  child: Material(
        color: Colors.transparent,
        child: BlocBuilder<WorkoutsBloc, WorkoutsState>(
          buildWhen: (_, currState) => currState is CardTappedState,
          builder: (context, state) {
            return InkWell(
              borderRadius: BorderRadius.circular(10),
              onTap: () {
                bloc.add(CardTappedEvent(workout: workout));
              },
              child: Container(
                padding: EdgeInsets.symmetric(horizontal: 20, vertical: 15),
                decoration: BoxDecoration(
                  borderRadius: BorderRadius.circular(10),
                ),
                child: Row(
                  children: [
                    Expanded(
                      child: Column(
                        crossAxisAlignment: CrossAxisAlignment.start,
                        children: [
                          Text(workout.title ?? "",
                              style: TextStyle(
                                  fontSize: 18, fontWeight: FontWeight.bold)),
                          const SizedBox(height: 3),
                          Text(
                              '${workout.exerciseDataList!.length} ${TextConstants.exercisesUppercase}',
                              style: TextStyle(
                                  fontSize: 16,
                                  fontWeight: FontWeight.w500,
                                  color: ColorConstants.grey),
                              overflow: TextOverflow.ellipsis,
                              maxLines: 2),
                          const SizedBox(height: 3),
                          Text(
                              '${_getWorkoutMinutes()}' +
                                  " " +
                                  TextConstants.minutes,
                              style: TextStyle(
                                  fontSize: 16,
                                  fontWeight: FontWeight.w500,
                                  color: ColorConstants.grey),
                              overflow: TextOverflow.ellipsis,
                              maxLines: 2),
                          Spacer(),
                          Text('${workout.currentProgress}/${workout.progress}',
                              style: TextStyle(fontSize: 10)),
                          SizedBox(height: 3),
                          Padding(
                            padding:
                                const EdgeInsets.only(right: 30.0, left: 2),
                            child: LinearPercentIndicator(
                              percent:
                                  workout.currentProgress! / workout.progress!,
                              progressColor: ColorConstants.primaryColor,
                              backgroundColor:
                                  ColorConstants.primaryColor.withOpacity(0.12),
                              lineHeight: 6,
                              padding: EdgeInsets.zero,
                            ),
                          )
                        ],
                      ),
                    ),
                    SizedBox(width: 60),
                    Expanded(
                      child: ClipRRect(
                        borderRadius: BorderRadius.circular(15),
                        child:
                            Image.asset(workout.image ?? "", fit: BoxFit.fill),
                      ),
                    ),
                  ],
                ),
              ),
            );
          },
        ),
      ),
    );
  }
8. Let’s take a look at _getWorkoutMinutes(). Here we are calculating how much time a user would spend on completing a particular workout. We check each workout, look it up on the exercise list, and get the minutes required for completing it.
int _getWorkoutMinutes() {
    var minutes = 0;
    final minutesList =
        workout.exerciseDataList!.map((e) => e.minutes).toList();
    minutesList.forEach((e) {
      minutes += e!;
    });
    return minutes;
  }
}
Workout Details Screen
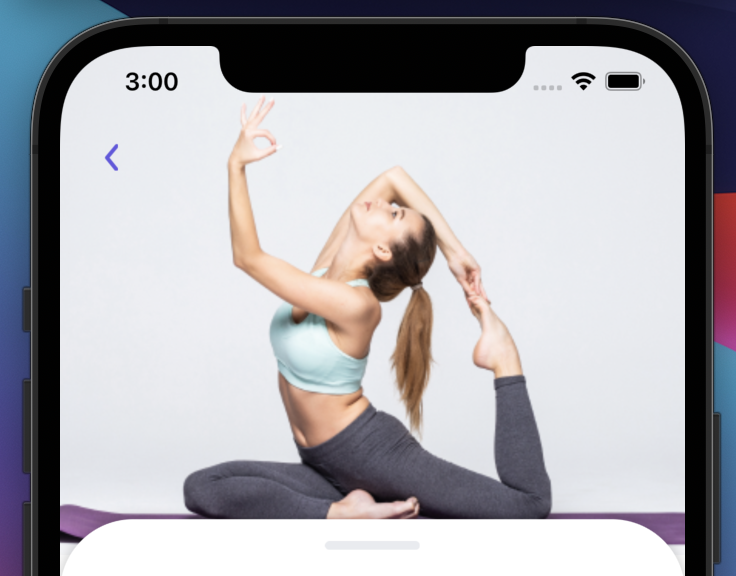
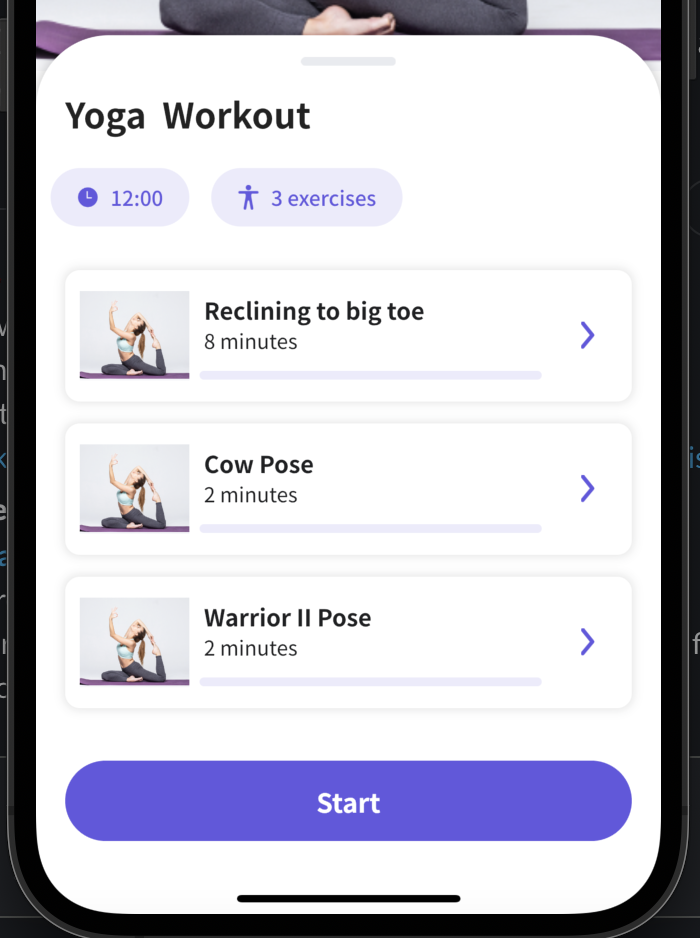
Onto the next screen we will complete today – the Workout Details screen. It will give us the details of each workout, for example, the number of exercises.
1. First, we need to get to the WorkoutsPage. When clicking on any of the workouts, we are redirected to the Workout Details screen, which contains the list of exercises for each of the workouts. These are recorded in the DataConstants.
On the screenshot, you can see a photo of the workout and a panel beneath it. The panel can be created via the Sliding up panel library (sliding_up_panel: current version).

2. Just like we did with every screen before, we need to create a few files for the workout_details_screen inside the screens folder.

- workout_details_bloc.dart
import 'dart:async';

import 'package:bloc/bloc.dart';
import 'package:fitness_flutter/data/workout_data.dart';
import 'package:meta/meta.dart';

part 'workout_details_event.dart';
part 'workout_details_state.dart';

class WorkoutDetailsBloc
    extends Bloc<WorkoutDetailsEvent, WorkoutDetailsState> {
  WorkoutDetailsBloc() : super(WorkoutDetailsInitial());

  late WorkoutData workout;

  @override
  Stream<WorkoutDetailsState> mapEventToState(
    WorkoutDetailsEvent event,
  ) async* {
    if (event is WorkoutDetailsInitialEvent) {
      workout = event.workout;
      yield ReloadWorkoutDetailsState(workout: workout);
    } else if (event is BackTappedEvent) {
      yield BackTappedState();
    } else if (event is StartTappedEvent) {
      yield StartTappedState(
        workout: event.workout ?? workout,
        index: event.index ?? 0,
        isReplace: event.isReplace,
      );
    }
  }
}
- Workout_details_event.dart
part of 'workout_details_bloc.dart';

@immutable
abstract class WorkoutDetailsEvent {}

class BackTappedEvent extends WorkoutDetailsEvent {}

class WorkoutDetailsInitialEvent extends WorkoutDetailsEvent {
  final WorkoutData workout;

  WorkoutDetailsInitialEvent({
    required this.workout,
  });
}

class StartTappedEvent extends WorkoutDetailsEvent {
  final WorkoutData? workout;
  final int? index;
  final bool isReplace;

  StartTappedEvent({
    this.workout,
    this.index,
    this.isReplace = false,
  });
}
- workout_details_state.dart
part of 'workout_details_bloc.dart';

@immutable
abstract class WorkoutDetailsState {}

class WorkoutDetailsInitial extends WorkoutDetailsState {}

class BackTappedState extends WorkoutDetailsState {}

class WorkoutExerciseCellTappedState extends WorkoutDetailsState {
  final WorkoutData workout;
  final int index;

  WorkoutExerciseCellTappedState({
    required this.workout,
    required this.index,
  });
}

class ReloadWorkoutDetailsState extends WorkoutDetailsState {
  final WorkoutData workout;

  ReloadWorkoutDetailsState({
    required this.workout,
  });
}

class StartTappedState extends WorkoutDetailsState {
  final WorkoutData workout;
  final int index;
  final bool isReplace;

  StartTappedState({
    required this.workout,
    required this.index,
    required this.isReplace,
  });
}
3. WorkoutDetailsPage
This class will be divided into a builder and a listener.
Here’s what the entire code looks like:
class WorkoutDetailsPage extends StatelessWidget {
 final WorkoutData workout;

 WorkoutDetailsPage({
   required this.workout,
 });

 @override
 Widget build(BuildContext context) {
   return _buildContext(context);
 }

 BlocProvider<WorkoutDetailsBloc> _buildContext(BuildContext context) {
   final workoutDetailsBloc = WorkoutDetailsBloc();
   return BlocProvider<WorkoutDetailsBloc>(
     create: (context) => workoutDetailsBloc,
     child: BlocConsumer<WorkoutDetailsBloc, WorkoutDetailsState>(
       buildWhen: (_, currState) => currState is WorkoutDetailsInitial,
       builder: (context, state) {
         final bloc = BlocProvider.of<WorkoutDetailsBloc>(context);
         bloc.add(WorkoutDetailsInitialEvent(workout: workout));
         return Scaffold(
           floatingActionButtonLocation:
               FloatingActionButtonLocation.centerFloat,
           floatingActionButton: Padding(
             padding: EdgeInsets.symmetric(horizontal: 20),
             child: FitnessButton(
               title: workout.currentProgress == 0
                   ? TextConstants.start
                   : TextConstants.continueT,
               onTap: () {
                 final index = workout.currentProgress ==
                         workout.exerciseDataList!.length
                     ? 0
                     : workout.currentProgress;
                 bloc.add(StartTappedEvent(index: index));
               },
             ),
           ),
           body: WorkoutDetailsContent(workout: workout),
         );
       },
       listenWhen: (_, currState) =>
           currState is BackTappedState ||
           currState is WorkoutExerciseCellTappedState ||
           currState is StartTappedState,
       listener: (context, state) async {
         if (state is BackTappedState) {
           Navigator.pop(context);
         } else if (state is StartTappedState) {
           final workout = state.isReplace
               ? await Navigator.of(context).pushReplacement(
                   MaterialPageRoute(
                     builder: (_) => BlocProvider.value(
                       value: BlocProvider.of<WorkoutDetailsBloc>(context),
                       child: StartWorkoutPage(
                         workout: state.workout,
                         index: state.index,
                       ),
                     ),
                   ),
                 )
               : await Navigator.of(context).push(
                   MaterialPageRoute(
                     builder: (_) => BlocProvider.value(
                       value: BlocProvider.of<WorkoutDetailsBloc>(context),
                       child: StartWorkoutPage(
                         workout: state.workout,
                         index: state.index,
                       ),
                     ),
                   ),
                 );
           if (workout is WorkoutData) {
             BlocProvider.of<WorkoutDetailsBloc>(context).add(
               WorkoutDetailsInitialEvent(workout: workout),
             );
           }
         }
       },
     ),
   );
 }
}
And this is what the code divided into a builder and listener looks like:
class WorkoutDetailsPage extends StatelessWidget {
  final WorkoutData workout;

  WorkoutDetailsPage({
    required this.workout,
  });

  @override
  Widget build(BuildContext context) {
    return _buildContext(context);
  }
3.1. Our first step is connecting the logic to the UI:
  BlocProvider<WorkoutDetailsBloc> _buildContext(BuildContext context) {
    final workoutDetailsBloc = WorkoutDetailsBloc();
    return BlocProvider<WorkoutDetailsBloc>(
      create: (context) => workoutDetailsBloc,
      child: BlocConsumer<WorkoutDetailsBloc, WorkoutDetailsState>(
        buildWhen: (_, currState) => currState is WorkoutDetailsInitial,
        builder: (context, state) {
          final bloc = BlocProvider.of<WorkoutDetailsBloc>(context);
          bloc.add(WorkoutDetailsInitialEvent(workout: workout));
          return Scaffold(
            floatingActionButtonLocation:
                FloatingActionButtonLocation.centerFloat,
            floatingActionButton: Padding(
              padding: EdgeInsets.symmetric(horizontal: 20),
              child: FitnessButton(
                title: workout.currentProgress == 0
                    ? TextConstants.start
                    : TextConstants.continueT,
                onTap: () {
                  final index = workout.currentProgress ==
                          workout.exerciseDataList!.length
                      ? 0
                      : workout.currentProgress;
                  bloc.add(StartTappedEvent(index: index));
                },
              ),
            ),
            body: WorkoutDetailsContent(workout: workout),
          );
        },
3.2. Now, we can work on the FitnessButton (we created it via Common widgets). In the video, you can see how the FitnessButton changes depending on the currentProgress. The workout’s button title transforms, as well.
rialPageRoute(
                      builder: (_) => BlocProvider.value(
                        value: BlocProvider.of<WorkoutDetailsBloc>(context),
                        child: StartWorkoutPage(
                          workout: state.workout,
                          index: state.index,
                        ),
                      ),
                    ),
                  )
                : await Navigator.of(context).push(
                    MaterialPageRoute(
                      builder: (_) => BlocProvider.value(
                        value: BlocProvider.of<WorkoutDetailsBloc>(context),
                        child: StartWorkoutPage(
                          workout: state.workout,
                          index: state.index,
                        ),
                      ),
                    ),
                  );
            if (workout is WorkoutData) {
              BlocProvider.of<WorkoutDetailsBloc>(context).add(
                WorkoutDetailsInitialEvent(workout: workout),
              );
            }
          }
        },
      ),
    );
  }
}
3.3. In the listener, we will link the transitions to the next pages as we did before.
4. Now, let’s review which actions we have to take in the WorkoutDetailsContent class.

class WorkoutDetailsContent extends StatelessWidget {
  final WorkoutData workout;

  const WorkoutDetailsContent({required this.workout});

  @override
  Widget build(BuildContext context) {
    return Container(
      height: double.infinity,
      width: double.infinity,
      color: ColorConstants.white,
      child: _createSlidingUpPanel(context),
    );
  }

  Widget _createSlidingUpPanel(BuildContext context) {
    return SlidingUpPanel(
      panel: WorkoutDetailsPanel(workout: workout),
      body: WorkoutDetailsBody(workout: workout),
      minHeight: MediaQuery.of(context).size.height * 0.65,
      maxHeight: MediaQuery.of(context).size.height * 0.87,
      isDraggable: true,
      borderRadius: BorderRadius.only(
        topLeft: Radius.circular(50),
        topRight: Radius.circular(50),
      ),
    );
  }
}
4.1. First of all, we have a body: WorkoutDetailsBody. Here, we need to pass the class that contains the workout photo and the Back icon, which takes the user to the previous screen (the Workouts one).
class WorkoutDetailsBody extends StatelessWidget {
  final WorkoutData workout;
  WorkoutDetailsBody({required this.workout});

  @override
  Widget build(BuildContext context) {
    return Container(
      height: double.infinity,
      width: double.infinity,
      color: ColorConstants.white,
      child: Stack(
        children: [
          _createImage(),
          _createBackButton(context),
        ],
      ),
    );
  }
4.2. We need to create a Stack because the Back icon overlays the photo.

Widget _createImage() {
    return Container(
      width: double.infinity,
      child: Image(
        image: AssetImage(workout.image ?? ""),
        fit: BoxFit.cover,
      ),
    );
  }
}
- width : double.infinity will expand the photo to the width of the screen. image: AssetImage(workout.image ?? “”) is needed in case the photo cannot be found for some reason. Then, an empty space will be shown instead. This is done to avoid displaying an error and the entire screen going red. The workout.image is optional: it might or might not have a value, so we need to assign any value, even the empty space.
Widget _createBackButton(BuildContext context) {
    final bloc = BlocProvider.of<WorkoutDetailsBloc>(context);
    return Positioned(
      child: SafeArea(
        child: BlocBuilder<WorkoutDetailsBloc, WorkoutDetailsState>(
          builder: (context, state) {
            return GestureDetector(
              child: Container(
                width: 30,
                height: 30,
                child: Image(
                  image: AssetImage(PathConstants.back),
                ),
              ),
              onTap: () {
                bloc.add(BackTappedEvent());
              },
            );
          },
        ),
      ),
      left: 20,
      top: 14,
    );
  }
- The Back icon needs to be wrapped in the GestureDetector, so the BackTappedEvent() could be called when we tap the icon. The BackTappedEvent() will be called in the WorkoutDetailsPage and get us to the next screen.
- left/top indicates where the icon should be placed in the Stack using the Positioned widget.Next, we have a panel: WorkoutDetailsPanel() that can be scrolled up.
class WorkoutDetailsPanel extends StatelessWidget {
  final WorkoutData workout;

  WorkoutDetailsPanel({required this.workout});

  @override
  Widget build(BuildContext context) {
    return _createPanelData(context);
  }

  Widget _createPanelData(BuildContext context) {
    return Column(
      children: [
        const SizedBox(height: 15),
        _createRectangle(),
        const SizedBox(height: 15),
        Expanded(
          child: Column(
            crossAxisAlignment: CrossAxisAlignment.start,
            children: [
              _createHeader(),
              const SizedBox(height: 20),
              _createWorkoutData(context),
              SizedBox(height: 20),
              _createExerciesList(),
            ],
          ),
        ),
      ],
    );
  }
4.3. Here are the _createRectangle() and _createHeader() widgets:
They help us give the exercise slip the shape we need, as well as add a header with a name.

 Widget _createRectangle() {
    return Image(image: AssetImage(PathConstants.rectangle));
  }

  Widget _createHeader() {
    return Padding(
      padding: const EdgeInsets.symmetric(horizontal: 20),
      child: Text(
        workout.title! + "  " + TextConstants.workout,
        style: TextStyle(
          fontSize: 24,
          fontWeight: FontWeight.bold,
        ),
      ),
    );
  }
4.4. In the _createWorkoutData(), we pass the general number of all the exercises and the time needed for completing them.
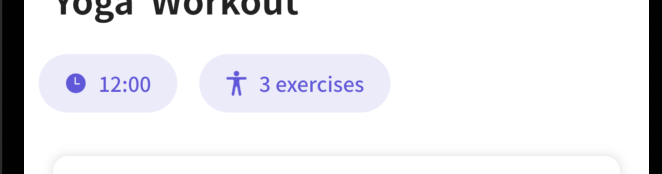
Widget _createWorkoutData(BuildContext context) {
    return Padding(
      padding: const EdgeInsets.symmetric(horizontal: 10),
      child: Row(
        children: [
          WorkoutTag(
            icon: PathConstants.timeTracker,
            content: "${_getExerciseTime()}:00",
          ),
          const SizedBox(width: 15),
          WorkoutTag(
            icon: PathConstants.exerciseTracker,
            content:
                '${workout.exerciseDataList!.length} ${TextConstants.exercisesLowercase}',
          ),
        ],
      ),
    );
  }
4.5. First, we pass the WorkoutTag class, where we can change the icon and the text.
We won’t assign the Container any width or height, so it can change its dimensions depending on what’s inside. We will add a little padding, though, so the text won’t go over 17 horizontally and 10 vertically. Even if the text is longer, an error won’t be displayed as the container will adapt to the suitable length.
import 'package:fitness_flutter/core/const/color_constants.dart';
import 'package:flutter/material.dart';

class WorkoutTag extends StatelessWidget {
  final String icon;
  final String content;

  WorkoutTag({required this.icon, required this.content});

  @override
  Widget build(BuildContext context) {
    return Container(
      padding: EdgeInsets.symmetric(horizontal: 17, vertical: 10),
      decoration: BoxDecoration(
        borderRadius: BorderRadius.circular(20),
        color: ColorConstants.primaryColor.withOpacity(0.12),
      ),
      child: Row(
        children: [
          Image.asset(icon, height: 17, width: 17, fit: BoxFit.fill),
          const SizedBox(width: 7),
          Text(content, style: TextStyle(color: ColorConstants.primaryColor, fontSize: 14, fontWeight: FontWeight.w500)),
        ],
      ),
    );
  }
}
4.6. The next task is _getExerciseTime(). We need to check each exercise in the exerciseDataList (using the map() ) method) and add the minutes for each.
int _getExerciseTime() {
    int time = 0;
    final List<int?> exerciseList =
        workout.exerciseDataList!.map((e) => e.minutes).toList();
    exerciseList.forEach((e) {
      time += e!;
    });
    return time;
  }
}
4.7. Now, let’s work on the _createExerciseList() widget. We attach it to the block for calling the state, so the data is reloaded and displayed in the UI.
Widget _createExerciesList() {
return BlocBuilder<WorkoutDetailsBloc, WorkoutDetailsState>(
buildWhen: (_, currState) => currState is ReloadWorkoutDetailsState,
builder: (context, state) {
return Expanded(
child: Padding(
padding: const EdgeInsets.symmetric(horizontal: 20),
child: ExercisesList(
exercises: workout.exerciseDataList ?? [],
workout: workout,
),
),
);
},
);
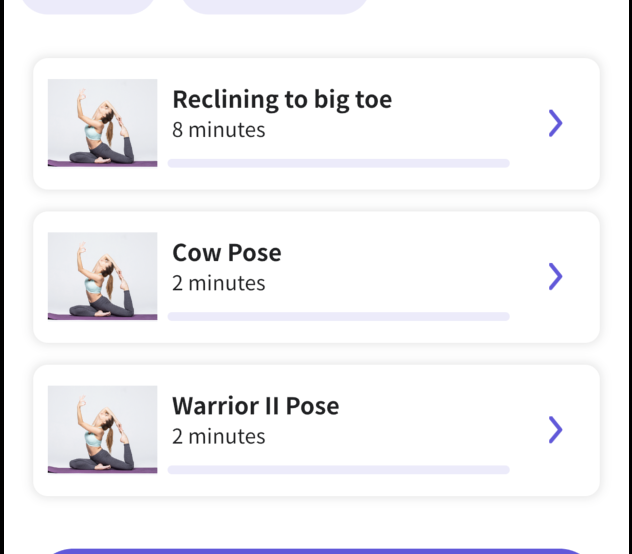
}4.8. Let’s create an additional ExercisesList() class. We need to make the ListView.separated(). (Here, you can read about its purpose).
class ExercisesList extends StatelessWidget {
  final WorkoutData workout;
  final List<ExerciseData> exercises;

  const ExercisesList({required this.exercises, required this.workout});

  @override
  Widget build(BuildContext context) {
    return ListView.separated(
      padding: EdgeInsets.only(top: 10),
      itemCount: exercises.length,
      itemBuilder: (context, index) {
        return ExerciseCell(
          currentExercise: exercises[index],
          nextExercise:
              index == exercises.length - 1 ? null : exercises[index + 1],
          workout: workout,
          index: index,
        );
      },
      separatorBuilder: (context, index) {
        return const SizedBox(height: 15);
      },
    );
  }
}
4.9. We are also making the ExerciseCell model, which has the index for determining which exercise should be on the screen.
class ExerciseCell extends StatelessWidget {
  final WorkoutData workout;
  final ExerciseData currentExercise;
  final ExerciseData? nextExercise;
  final int index;

  const ExerciseCell({
    required this.currentExercise,
    required this.workout,
    required this.nextExercise,
    required this.index,
  });

  @override
  Widget build(BuildContext context) {
    final bloc = BlocProvider.of<WorkoutDetailsBloc>(context);
    return BlocBuilder<WorkoutDetailsBloc, WorkoutDetailsState>(
      buildWhen: (_, currState) => currState is WorkoutExerciseCellTappedState,
      builder: (context, state) {
        return InkWell(
          borderRadius: BorderRadius.circular(40),
          onTap: () {
            bloc.add(
              StartTappedEvent(
                workout: workout,
                index: index,
              ),
            );
          },
          child: Container(
            width: double.infinity,
            padding:
                const EdgeInsets.only(left: 10, right: 25, top: 10, bottom: 10),
            decoration: BoxDecoration(
              color: ColorConstants.white,
              borderRadius: BorderRadius.circular(10),
              boxShadow: [
                BoxShadow(
                  color: ColorConstants.textBlack.withOpacity(0.12),
                  blurRadius: 5.0,
                  spreadRadius: 1.1,
                ),
              ],
            ),
            child: Row(
              children: [
                _createImage(),
                const SizedBox(width: 10),
                Expanded(
                  child: _createExerciseTextInfo(),
                ),
                const SizedBox(width: 10),
                _createRightArrow(),
              ],
            ),
          ),
        );
      },
    );
  }
4.10. Creating the _createImage() widget for our smaller workout photo:
Widget _createImage() {
    return Container(
      width: 75,
      height: 70,
      decoration: BoxDecoration(
        borderRadius: BorderRadius.circular(5),
        image: DecorationImage(
          image: AssetImage(workout.image ?? ""),
          fit: BoxFit.contain,
        ),
      ),
    );
  }
4.11. Right after, let’s create the _createExerciseTextInfo() widget.
Widget _createExerciseTextInfo() {
    final minutesStr = "${currentExercise.minutes} minutes";
    return Column(
      crossAxisAlignment: CrossAxisAlignment.start,
      children: [
        Text(
          currentExercise.title ?? "",
          style: TextStyle(
            color: ColorConstants.textColor,
            fontSize: 16,
            fontWeight: FontWeight.w700,
          ),
        ),
        Text(
          minutesStr,
          style: TextStyle(
            color: ColorConstants.textBlack,
            fontSize: 14,
            fontWeight: FontWeight.w400,
          ),
        ),
        const SizedBox(height: 11),
        Padding(
          padding: const EdgeInsets.only(right: 20),
          child: LinearPercentIndicator(
            percent: currentExercise.progress ?? 0,
            progressColor: ColorConstants.primaryColor,
            backgroundColor: ColorConstants.primaryColor.withOpacity(0.12),
            lineHeight: 6,
            padding: EdgeInsets.zero,
          ),
        ),
      ],
    );
  }
4.12. And our final widget for this screen is _createRigntArrow(). Pay attention to the quaterTurns element: it allows us to turn the arrow icon in the direction we need.

Widget _createRightArrow() {
    return RotatedBox(
      quarterTurns: 2,
      child: Image(
        image: AssetImage(PathConstants.back),
      ),
    );
  }
}
4.13. As always, when finishing the work on a screen, we need to take care of the transition to the next one. How can we do that in this particular case? When tapping the ExerciseCell, the state and event are called. We will be using those to go to the next screen, which is, by the way, the Start workout one where the exercise videos and descriptions can be found.
Start workout screen
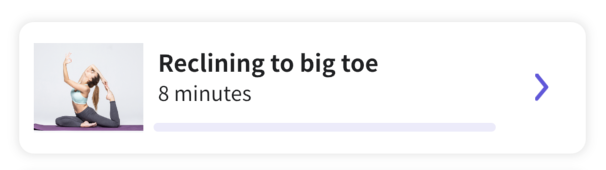
Ready for the final piece of work? There is only one screen left to take care of today, so let’s begin.
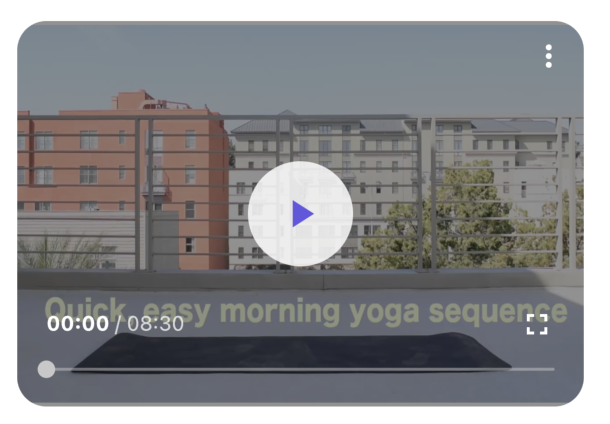
As you already know, the Start workout screen will contain the most valuable information of the entire app — the exercises themselves. And this is how it will look:

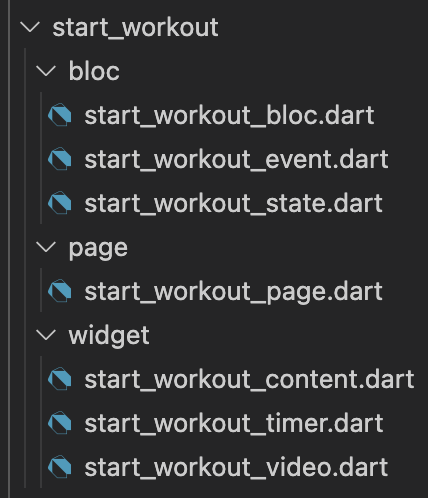
1. The first step is to create the start_workout folder in the screens one.
2. Next up, we add the BLoC with the bloc, event, and state:
- start_workout_bloc.dart
class StartWorkoutBloc extends Bloc<StartWorkoutEvent, StartWorkoutState> {
  StartWorkoutBloc() : super(StartWorkoutInitial());

  int time = 0;

  @override
  Stream<StartWorkoutState> mapEventToState(
    StartWorkoutEvent event,
  ) async* {
    if (event is BackTappedEvent) {
      yield BackTappedState();
    } else if (event is PlayTappedEvent) {
      time = event.time;
      yield PlayTimerState(time: event.time);
    } else if (event is PauseTappedEvent) {
      time = event.time;
      yield PauseTimerState(currentTime: time);
    }
  }
}
- start_workout_event.dart
part of 'start_workout_bloc.dart';

@immutable
abstract class StartWorkoutEvent {}

class BackTappedEvent extends StartWorkoutEvent {}

class PlayTappedEvent extends StartWorkoutEvent {
  final int time;

  PlayTappedEvent({
    required this.time,
  });
}

class PauseTappedEvent extends StartWorkoutEvent {
  final int time;

  PauseTappedEvent({
    required this.time,
  });
}

class ChangeTimerEvent extends StartWorkoutEvent {}
- start_workout_state.dart
part of 'start_workout_bloc.dart';

@immutable
abstract class StartWorkoutState {}

class StartWorkoutInitial extends StartWorkoutState {}

class BackTappedState extends StartWorkoutState {}

class PlayTimerState extends StartWorkoutState {
  final int time;

  PlayTimerState({
    required this.time,
  });
}

class PauseTimerState extends StartWorkoutState {
  final int currentTime;

  PauseTimerState({
    required this.currentTime,
  });
}
3. The StartWorkoutPage class has the index that helps us check which exercise is the current one and which will be next.
class StartWorkoutPage extends StatelessWidget {
  final WorkoutData workout;
  final int index;

  StartWorkoutPage({
    required this.workout,
    required this.index,
  });

  @override
  Widget build(BuildContext context) {
    return Scaffold(
      body: _buildContext(context),
    );
  }

  BlocProvider<StartWorkoutBloc> _buildContext(BuildContext context) {
    return BlocProvider<StartWorkoutBloc>(
      create: (context) => StartWorkoutBloc(),
      child: BlocConsumer<StartWorkoutBloc, StartWorkoutState>(
        buildWhen: (_, currState) => currState is StartWorkoutInitial,
        builder: (context, state) {
          final currentExercise = workout.exerciseDataList![index];
          final nextExercise = index + 1 < workout.exerciseDataList!.length
              ? workout.exerciseDataList![index + 1]
              : null;
          return StartWorkoutContent(
            workout: workout,
            exercise: currentExercise,
            nextExercise: nextExercise,
          );
        },
        listenWhen: (_, currState) => currState is BackTappedState,
        listener: (context, state) {
          if (state is BackTappedState) {
            Navigator.pop(context, workout);
          }
        },
      ),
    );
  }
}
4. Now, let’s move on to the StartWorkoutContent class.

class StartWorkoutContent extends StatelessWidget {
  final WorkoutData workout;
  final ExerciseData exercise;
  final ExerciseData? nextExercise;

  StartWorkoutContent({
    required this.workout,
    required this.exercise,
    required this.nextExercise,
  });

  @override
  Widget build(BuildContext context) {
    return Container(
      height: double.infinity,
      width: double.infinity,
      color: ColorConstants.white,
      child: SafeArea(
        child: _createDetailedExercise(context),
      ),
    );
  }

  Widget _createDetailedExercise(BuildContext context) {
    return Container(
      padding: const EdgeInsets.symmetric(horizontal: 20, vertical: 20),
      child: Column(
        crossAxisAlignment: CrossAxisAlignment.start,
        children: [
          _createBackButton(context),
          const SizedBox(height: 23),
          _createVideo(context),
          const SizedBox(height: 8),
          Expanded(
            child: ListView(children: [
              _createTitle(),
              const SizedBox(height: 9),
              _createDescription(),
              const SizedBox(height: 30),
              _createSteps(),
            ]),
          ),
          _createTimeTracker(context),
        ],
      ),
    );
  }
4.1. First, we have the _createBackButton() widget where we attach the bloc. With this in place, we can call the event when tapping on the Back button and return to the previous screen.

 Widget _createBackButton(BuildContext context) {
    final bloc = BlocProvider.of<StartWorkoutBloc>(context);
    return Padding(
      padding: const EdgeInsets.only(left: 10, top: 8),
      child: GestureDetector(
        child: BlocBuilder<StartWorkoutBloc, StartWorkoutState>(
          builder: (context, state) {
            return Row(
              children: [
                Image(image: AssetImage(PathConstants.back)),
                const SizedBox(width: 17),
                Text(
                  TextConstants.back,
                  style: TextStyle(fontSize: 18, fontWeight: FontWeight.w500),
                ),
              ],
            );
          },
        ),
        onTap: () {
          bloc.add(BackTappedEvent());
        },
      ),
    );
  }
4.2. Then, we have the _createVideo() widget, which helps us play the exercise video. For this, we will be using the Video player library (video_player: current version).
Widget _createVideo(BuildContext context) {
    final bloc = BlocProvider.of<StartWorkoutBloc>(context);
    return Container(
      height: 264,
      width: double.infinity,
      decoration: BoxDecoration(
          borderRadius: BorderRadius.circular(20), color: ColorConstants.white),
      child: StartWorkoutVideo(
        exercise: exercise,
        onPlayTapped: (time) async {
          bloc.add(PlayTappedEvent(time: time));
        },
        onPauseTapped: (time) {
          bloc.add(PauseTappedEvent(time: time));
        },
      ),
    );
  }
4.3. We can now create the StartWorkoutVideo() class. This class is a Stateful widget as it will change depending on whether the user presses play or stop.
4.4. Next, we make the exercise variable along with two functions onPlayTapped and onPauseTapped.
import 'dart:async';

import 'package:chewie/chewie.dart';
import 'package:fitness_flutter/core/const/color_constants.dart';
import 'package:fitness_flutter/data/exercise_data.dart';
import 'package:flutter/cupertino.dart';
import 'package:flutter/services.dart';
import 'package:video_player/video_player.dart';
import 'package:flutter/material.dart';

class StartWorkoutVideo extends StatefulWidget {
  final ExerciseData exercise;
  final Function(int) onPlayTapped;
  final Function(int) onPauseTapped;

  StartWorkoutVideo({
    required this.exercise,
    required this.onPlayTapped,
    required this.onPauseTapped,
  });
  @override
  _StartWorkoutVideoState createState() => _StartWorkoutVideoState();
}

class _StartWorkoutVideoState extends State<StartWorkoutVideo> {
  late VideoPlayerController _controller;
  // late Future<void> _initializeVideoPlayerFuture;
  late bool isPlayButtonHidden = false;
  late ChewieController _chewieController;
  Timer? timer;
  Timer? videoTimer;
  // bool _isVideoPlaying = false;

  @override
  void initState() {
    _controller = VideoPlayerController.asset(widget.exercise.video ?? "");

    _controller.initialize();

    _chewieController = ChewieController(
        videoPlayerController: _controller,
        looping: true,
        autoPlay: false,
        deviceOrientationsAfterFullScreen: [DeviceOrientation.portraitUp],
        aspectRatio: 15 / 10,
        placeholder: Center(child: CupertinoActivityIndicator()),
        materialProgressColors:
            ChewieProgressColors(playedColor: ColorConstants.primaryColor));
    super.initState();
  }

  @override
  void dispose() {
    _controller.dispose();
    _chewieController.dispose();
    super.dispose();
  }

  @override
  Widget build(BuildContext context) {
    return AspectRatio(
        aspectRatio: _controller.value.aspectRatio,
        child: _createVideoContainer());
  }

  Widget _createVideoContainer() {
    return ClipRRect(
      borderRadius: BorderRadius.circular(20),
      child: Theme(
          data: Theme.of(context).copyWith(platform: TargetPlatform.android),
          child: Chewie(controller: _chewieController)),
    );
  }
4.5. The next thing on our list is two text widgets: _createTitle() and _createDescription().

Widget _createTitle() {
    return Text(exercise.title ?? "",
        style: TextStyle(fontSize: 24, fontWeight: FontWeight.bold));
  }

  Widget _createDescription() {
    return Text(exercise.description ?? "",
        style: TextStyle(fontSize: 14, fontWeight: FontWeight.w500));
  }
4.6. One more important widget is _createSteps(). It is the list of steps the user has to complete according to the video. This is basically the text description of the exercise.
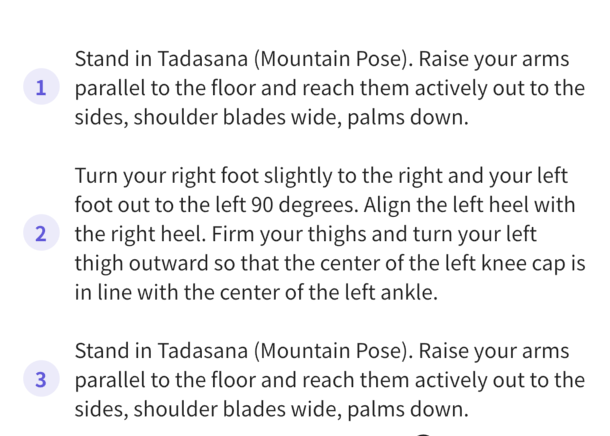
 Widget _createSteps() {
    return Column(
      children: [
        for (int i = 0; i < exercise.steps!.length; i++) ...[
          Step(number: "${i + 1}", description: exercise.steps![i]),
          const SizedBox(height: 20),
        ],
      ],
    );
  }
To create this list, we need to take a few steps:
4.6.1. Outside the StartWorkoutContent class, we create one more: Step.

4.6.2. Inside this class, we create the number variable. It is the ordinal number that will grow by one depending on the exercise index. One more variable we need is the description. It will help us find the required exercise description using the index.
class Step extends StatelessWidget {
  final String number;
  final String description;

  Step({required this.number, required this.description});
  @override
  Widget build(BuildContext context) {
    return Row(
      children: [
        Container(
          height: 25,
          width: 25,
          decoration: BoxDecoration(
            borderRadius: BorderRadius.circular(20),
            color: ColorConstants.primaryColor.withOpacity(0.12),
          ),
          child: Center(
            child: Text(
              number,
              style: TextStyle(
                fontSize: 14,
                fontWeight: FontWeight.bold,
                color: ColorConstants.primaryColor,
              ),
            ),
          ),
        ),
        const SizedBox(width: 10),
        Expanded(child: Text(description)),
      ],
    );
  }
}
4.7. Let’s talk about time. Our _createTimeTracker() widget will be placed above the Next button and indicate how much time the user must dedicate to the exercise.
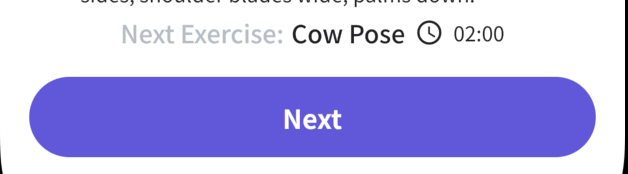
Widget _createTimeTracker(BuildContext context) {
    return Container(
      width: double.infinity,
      color: ColorConstants.white,
      child: Column(
        children: [
          nextExercise != null
              ? Row(
                  mainAxisAlignment: MainAxisAlignment.center,
                  children: [
                    Text(
                      TextConstants.nextExercise,
                      style: TextStyle(
                        color: ColorConstants.grey,
                        fontSize: 17,
                        fontWeight: FontWeight.w600,
                      ),
                    ),
                    const SizedBox(width: 5),
                    Text(
                      nextExercise?.title ?? "",
                      style: TextStyle(
                        color: ColorConstants.textBlack,
                        fontSize: 17,
                        fontWeight: FontWeight.w600,
                      ),
                    ),
                    const SizedBox(width: 6.5),
                    Icon(Icons.access_time, size: 20),
                    const SizedBox(width: 6.5),
                    Text(
                        '${nextExercise!.minutes! > 10 ? nextExercise!.minutes : '0${nextExercise!.minutes}'}:00')
                    // BlocBuilder<StartWorkoutBloc, StartWorkoutState>(
                    //   buildWhen: (_, currState) => currState is PlayTimerState || currState is PauseTimerState,
                    //   builder: (context, state) {
                    //     return StartWorkoutTimer(
                    //       time: bloc.time,
                    //       isPaused: !(state is PlayTimerState),
                    //     );
                    //   },
                    // ),
                  ],
                )
              : SizedBox.shrink(),
          const SizedBox(height: 18),
          _createButton(context),
        ],
      ),
    );
  }
4.8. Now, we need to check whether the next exercise takes more or less than 10 minutes. If it’s less than 10 minutes long, we need to put zero in the beginning. For example, if the exercise lasts for one minute, the duration will be shown as 01:00.
Text('${nextExercise!.minutes! >= 10 ? nextExercise!.minutes : '0${nextExercise!.minutes}'}:00')
5. The final widgets for our last screen for today are the _createButton() and _saveWorkout() ones.
Here, we pass the FitnessButton, which can have two title options and, when pressed, calls the _saveWorkout. It uses the index to pass the exercise. Then, we add the information in the local database.
When saved in the database, the currentProgress in the exercise changes and equals progress.
 Widget _createButton(BuildContext context) {
    final bloc = BlocProvider.of<workout_bloc.WorkoutDetailsBloc>(context);
    return FitnessButton(
      title: nextExercise != null ? TextConstants.next : TextConstants.finish,
      onTap: () async {
        if (nextExercise != null) {
          List<ExerciseData>? exercisesList = bloc.workout.exerciseDataList;
          int currentExerciseIndex = exercisesList!.indexOf(exercise);

          await _saveWorkout(currentExerciseIndex);

          if (currentExerciseIndex < exercisesList.length - 1) {
            bloc.add(workout_bloc.StartTappedEvent(
              workout: workout,
              index: currentExerciseIndex + 1,
              isReplace: true,
            ));
          }
        } else {
          await _saveWorkout(workout.exerciseDataList!.length - 1);

          Navigator.pop(context, workout);
        }
      },
    );
  }

  Future<void> _saveWorkout(int exerciseIndex) async {
    if (workout.currentProgress! < exerciseIndex + 1) {
      workout.currentProgress = exerciseIndex + 1;
    }
    workout.exerciseDataList![exerciseIndex].progress = 1;

    await DataService.saveWorkout(workout);
  }
}
That’s it!
And just like that, the second chapter of our tutorial is finished! Basically, the main part of the app is done as our users can now register, log in, check out the home screen, choose the workout, complete it, and even track their progress.
What are the results of today's work?
- Tab bar
- Home screen
- The local database
- Workouts screen
- Workout details screen
- Start workout screen
Quite a lot, isn’t it? Take a look at the final outcome:
There are only a few, small tasks left for the third part of our tutorial. We will finalize our project by adding the Settings, Edit account, Change password, and Reminder screens. See you next time!
Feel free to check out this project on Github. If you have any questions concerning this project or implementing your own ideas with our help, please contact us. We will be glad to talk with you!