For more than three months, Ukraine has been protecting its freedom and fighting back Russian aggression. While the media might be talking less about the war, it is not over, and we shouldn’t allow the world to get silent about this.
For Ukrainians, hearing air raid alerts has become normal. We know the drill — you hear a siren or see an alarm message, take your stuff, and go to the closest shelter or at least a room two walls away from the street. Sometimes, the sirens might not be loud enough, so many use a Ukraine air alert app, social media, and websites to stay alert and find out about the situation in other regions.
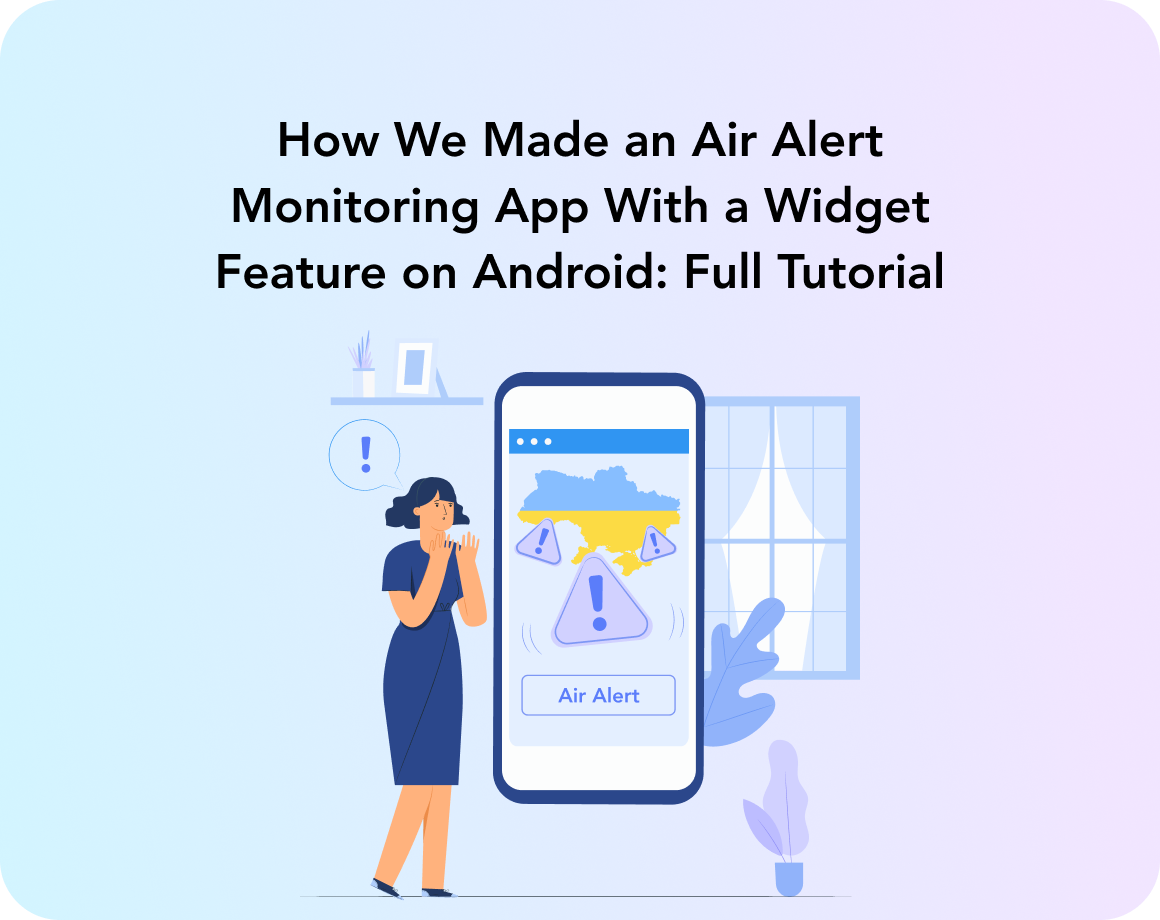
Some apps offer sound notifications and some websites have a map view of the current alerts, so we decided to combine these two features in one air alert monitoring app as well as add a widget. Today, we will work on a full-cycle mobile app development project to create such a solution. As a result, users can see the map on their home screen at all times without opening the application. Let us show you how to make an air alert monitoring app.
Defining project tasks and coming up with the app’s UI
The main tasks we drew for this Android project are:
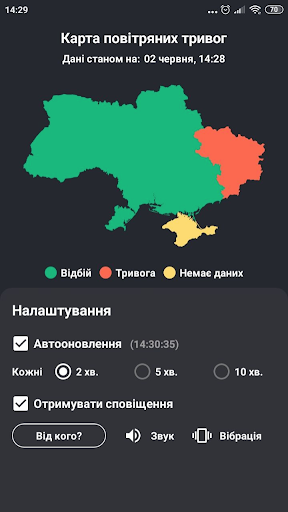
- Reflecting the current state of the air raid alarms in Ukraine through the in-app map
- Realizing the map feature as a stand-alone widget
- Monitoring chosen regions and informing about any updates
- Offering users flexibility in setting up the app's functioning and preferences. These include:
- Turning the automatic map updates on and off
- Choosing the update regularity
- Turning the notifications on and off
- Setting up the sounds and vibrations for notifications
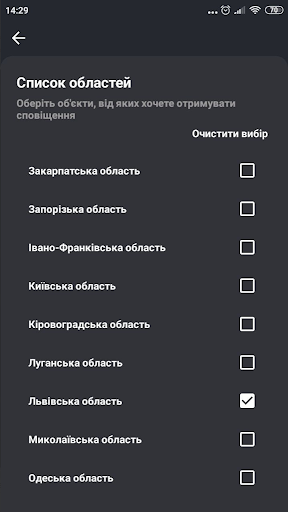
- Choosing the regions to get updates about
Now, when our plan is set and clear, let’s start with showing how to make an air alert app and defining what our UI will look like.
Our air alert app only consists of two pages. The main page contains the map with air-raid alarms and general app settings. The second page has the list of Ukrainian regions and notification settings. A widget that can be added to the home screen is a separate component.
Before starting out with the process of how to create an air alert app and writing the very code, we should decide where to get the necessary data. We will be working with the Air Raid Alert API for making an air alert app.
To get up-to-date information about the current situation in each region, we will be using the GET /api/states method with the X-API-Key key in the request headline.
private const val BASE_URL = "https://alerts.com.ua/"

private val apiService: AirAlertApi by lazy {
    val okHttpClient = OkHttpClient.Builder()
        .addInterceptor { chain ->
            val request: Request =
                chain.request().newBuilder().addHeader(
                    API_KEY_HEADER, API_KEY
                ).build()
            chain.proceed(request)
        }
        .build()

    val retrofit = Retrofit.Builder()
        .baseUrl(BASE_URL)
        .client(okHttpClient)
        .addConverterFactory(GsonConverterFactory.create())
        .build()

    retrofit.create(AirAlertApi::class.java)
}

fun getAlertApiService() = apiService

interface AirAlertApi {
    @GET("/api/states")
    suspend fun getStates(): StatesInfoModel
}
Drawing the alerts map
Great! Now we have all the air alarm information we need, so half of the job as to how to build an air alert app is done. The only thing we have to come up with is how to demonstrate this data on a map. We discussed several options of how to make an air alert monitoring app and decided that the best way is to create a map via Canvas.

To complete this task, we took separate images of every region in Ukraine. After setting up the coordinates of each region, we could make a complete map and color the regions according to the current situation there.
fun drawMap(
    states: List<StateModel>,
    context: Context
): Bitmap {
    val calmPaint = getPaint(R.color.calm, context)
    val alertPaint = getPaint(R.color.alert, context)
    val noInfoPaint = getPaint(R.color.noInfo, context)
    val canvas = Bitmap.createBitmap(
        Map.width, Map.height, Bitmap.Config.ARGB_8888
    )
    Canvas(canvas).apply {
        Map.areas.forEach { area ->
            area.apply {
                val image = getBitmap(imageResId, context)
                val isAlert = states.find { state ->
                    state.id == id
                }?.isAlert
                val paint = when (isAlert){
                    null -> noInfoPaint
                    true -> alertPaint
                    else -> calmPaint
                }
                draw(image, pos.x, pos.y, paint)
            }
        }
    }
    return canvas
}
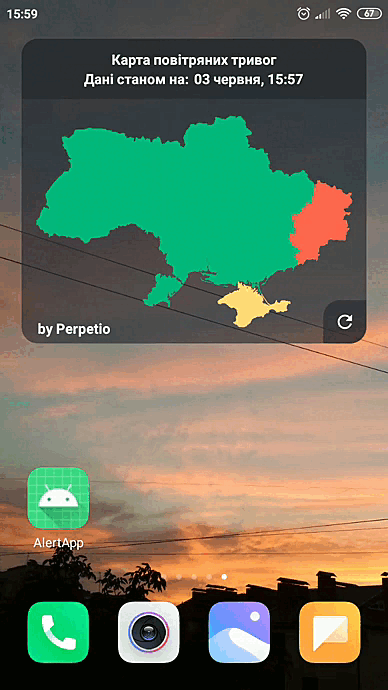
Our map is a Bitmap image, so we can easily display it via ImageView on our widget. Widget? Yes, actually, we need to build a widget first.
Creating a widget
First, we are creating a widget_map.xml file in a res/layout/ folder. In this file, we will describe the design of our widget.
Next, we will write the settings for the widget in the widget_map_settings.xml file, which is located in the res/xml/ folder.
<appwidget-provider xmlns:android="http://schemas.android.com/apk/res/android"
    android:description="@string/app_name"
    android:minWidth="@dimen/widget_width"
    android:minHeight="@dimen/widget_height"
    android:previewImage="@layout/widget_map"
    android:initialLayout="@layout/widget_map"
    android:resizeMode="horizontal|vertical"
    android:widgetCategory="home_screen" />
Now, let’s add the BroadCast Receiver description in the AndroidManifest.xml file. That’s how our widget will be updated.
<receiver
    android:name=".receivers.WidgetUpdateReceiver"
    android:exported="false">
    <intent-filter>
        <action android:name="android.appwidget.action.APPWIDGET_UPDATE" />
    </intent-filter>

    <meta-data
        android:name="android.appwidget.provider"
        android:resource="@xml/widget_map_settings" />
</receiver>
Setting up the logic of the widget
Hooray, the basic settings of the widget are all done! Now, let’s work on its logic.
The main method of the widget is the onUpdate method in the WidgetUpdateReceiver class. That’s exactly where the widget’s interface is updated.
class WidgetUpdateReceiver : AppWidgetProvider() {

    ...

    override fun onUpdate(
        context: Context,
        appWidgetManager: AppWidgetManager,
        appWidgetIds: IntArray
    ) {
        appWidgetIds.forEach { widgetId ->
            val views = RemoteViews(
                context.packageName,
                R.layout.widget_map
            ).apply {
                setOnClickPendingIntent(R.id.btn_refresh, getRefreshWidgetIntent(context))
                statesInfo?.apply {
                    setTextViewText(R.id.tv_refresh_date, Formatter.getShortFormat(refreshTime!!))
                    setImageViewBitmap(R.id.img_map_holder, MapDrawer.drawMap(states, context))
                }
            }
            appWidgetManager.updateAppWidget(widgetId, views)
        }
    }
    ...
}
Hmm, seems nice, right? But how can we pass the data to the widget? It’s all very simple — let’s add the data to the intent and ping the WidgetUpdateReceiver.
fun checkUpdate(
    statesInfo: StatesInfoModel,
    context: Context
) {
    val refreshIntent = getRefreshIntent(context)
    refreshIntent.putExtra(STATES_INFO, statesInfo)
    context.sendBroadcast(refreshIntent)
}
To receive the data, we need to slightly update the logic of the basic method onReceive() in the very same WidgetUpdateReceiver.
private var statesInfo: StatesInfoModel? = null

override fun onReceive(context: Context, intent: Intent) {
    statesInfo = intent.getParcelableExtra(STATES_INFO)
    ...
    super.onReceive(context, intent)
}
And our widget is all ready! Let’s continue with the next task for our phone app to alert users about air threats.

Setting up regular widget updates
Sadly, air raid sirens occur quite often, so the app needs to respond to frequent changes in the situation. Thus, an app for air alert should regularly request an update from the API. That will be the next step of our effort to make an air alert app.
To realize the update every two minutes, let’s use BroadcastReceiver + Service (WorkManager won’t suit in this case).
BroadcastReceiver will be planning its updates with a set interval through the AlarmManager and launch Service with each update to get the fresh data.
class WidgetRefreshReminder : BroadcastReceiver() {

    @SuppressLint("UnsafeProtectedBroadcastReceiver")
    override fun onReceive(context: Context, intent: Intent) {
        WidgetRefreshService.startSelf(context)
        ...
        startWithDelay(minutesRepeatInterval, context)
    }
}


class WidgetRefreshService : Service() {

    ...

    override fun onStartCommand(intent: Intent?, flags: Int, startId: Int): Int {
        startOnForeground()
        val repository = Repository(getAlertApiService())
        CoroutineScope(Job()).launch {
            val statesInfo = refreshStates(repository)
            ...
            WidgetUpdateReceiver.checkUpdate(
                statesInfo, this@WidgetRefreshService
            )
            stopSelf()
        }

        return START_STICKY
    }
    ...
}
Like this, the widget will receive an update every two minutes.
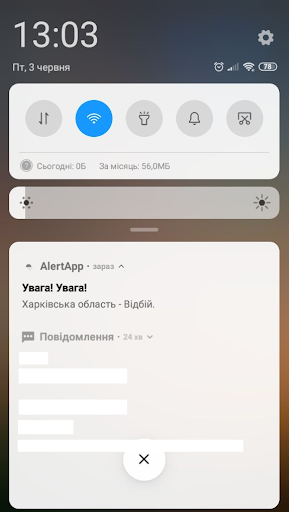
Setting up notifications
Perfect, but we are not checking our phones all the time, so it’s better if we can get notifications. The next step in our tutorial on how to build an Ukraine air alert app is to set up notifications.
fun buildNotification(
    title: String,
    content: String,
    withSound: Boolean,
    withOpenAppLogic: Boolean
): Notification {

    return NotificationCompat.Builder(context, channelId)
        .setSmallIcon(R.drawable.ic_launcher_foreground)
        .setContentTitle(title)
        .setStyle(NotificationCompat.BigTextStyle().bigText(content))
        .setPriority(NotificationCompat.PRIORITY_DEFAULT)
        .apply {
            if (withSound) setSound(alertSound)
            if (withOpenAppLogic) setContentIntent(getOpenAppIntent())
        }.build()
}
For Android 8.0 Oreo (API 26) onwards, working with notifications means creating a new channel.
fun createNotificationChannel() {
    if (Build.VERSION.SDK_INT >= Build.VERSION_CODES.O) {
        val importance = NotificationManager.IMPORTANCE_DEFAULT
        val channel = NotificationChannel(
            channelId, channelName, importance
        )
        val notificationManager: NotificationManager =
            context.getSystemService(Context.NOTIFICATION_SERVICE) as NotificationManager
        notificationManager.createNotificationChannel(channel)
    }
}
We will be using the following method for sending notifications:
private fun showNotification(
    id: Int,
    title: String,
    content: String,
    withSound: Boolean,
    vibrate: Boolean
) {
    createNotificationChannel()
    val notification = buildNotification(
        title, content, withSound, true
    )
    val notificationManager =
        context.getSystemService(Context.NOTIFICATION_SERVICE) as NotificationManager
    notificationManager.notify(id, notification)

    ...
}
The final result
And that’s it — we went through all the important aspects of developing an air alert app. You can view this project in more detail on our GitHub.

We ask you to remember that the war in Ukraine is still going on and we need your support to continue the resistance. You can share information on social media, donate to reliable organizations, help those fleeing war in your community, and collaborate with Ukrainian businesses. Together to victory!
FAQ
How to make an air alert app?
This tutorial explains how to build an air alert app from scratch on Android.
Can I create an air alert monitoring app for Android?
Yes, you can create your own air alert monitoring app for Android by following this tutorial step-by-step or by hiring a professional mobile app development team.
What is an air alert app used for?
An air alert app is used to notify users about potential threats. Ukrainians are using such solutions to stay aware during the war.