Taking care of oneself doesn’t come down to working out and dieting. Our mental well-being is as important. While keeping up your physical health is more or less clear — one should maintain a balanced diet, stay active, and exercise when possible, taking care of the psychological health and positive mindset is a bit harder.
Among the popular self-care methods are
- Journaling and other mindfulness practices
- Meditations and breathing exercises
- Therapy and counseling
- Work-life balance
- Being physically active and eating healthy
- A support system, like family and friends
The last one is especially important — a person should know that they are not alone and can get words of encouragement at any time. The support can come not only from your close ones but also from a community united by the desire to grow. That’s why our Android team decided to create an app where users can exchange their thoughts and have each other’s backs.
The WellBe app by Perpetio
We at Perpetio specialize in fitness & wellness applications. Of course, we don’t only have workout apps in our focus but those for mental well-being too. For example, our team worked on a meditation and sleeping app as well as a solution for practicing breathing exercises.
Perpetio’s Android team is open to new projects
This time, we thought of the communal aspect of well-being and decided to design an application that could serve as a safe space for the users to share their thoughts and experiences.


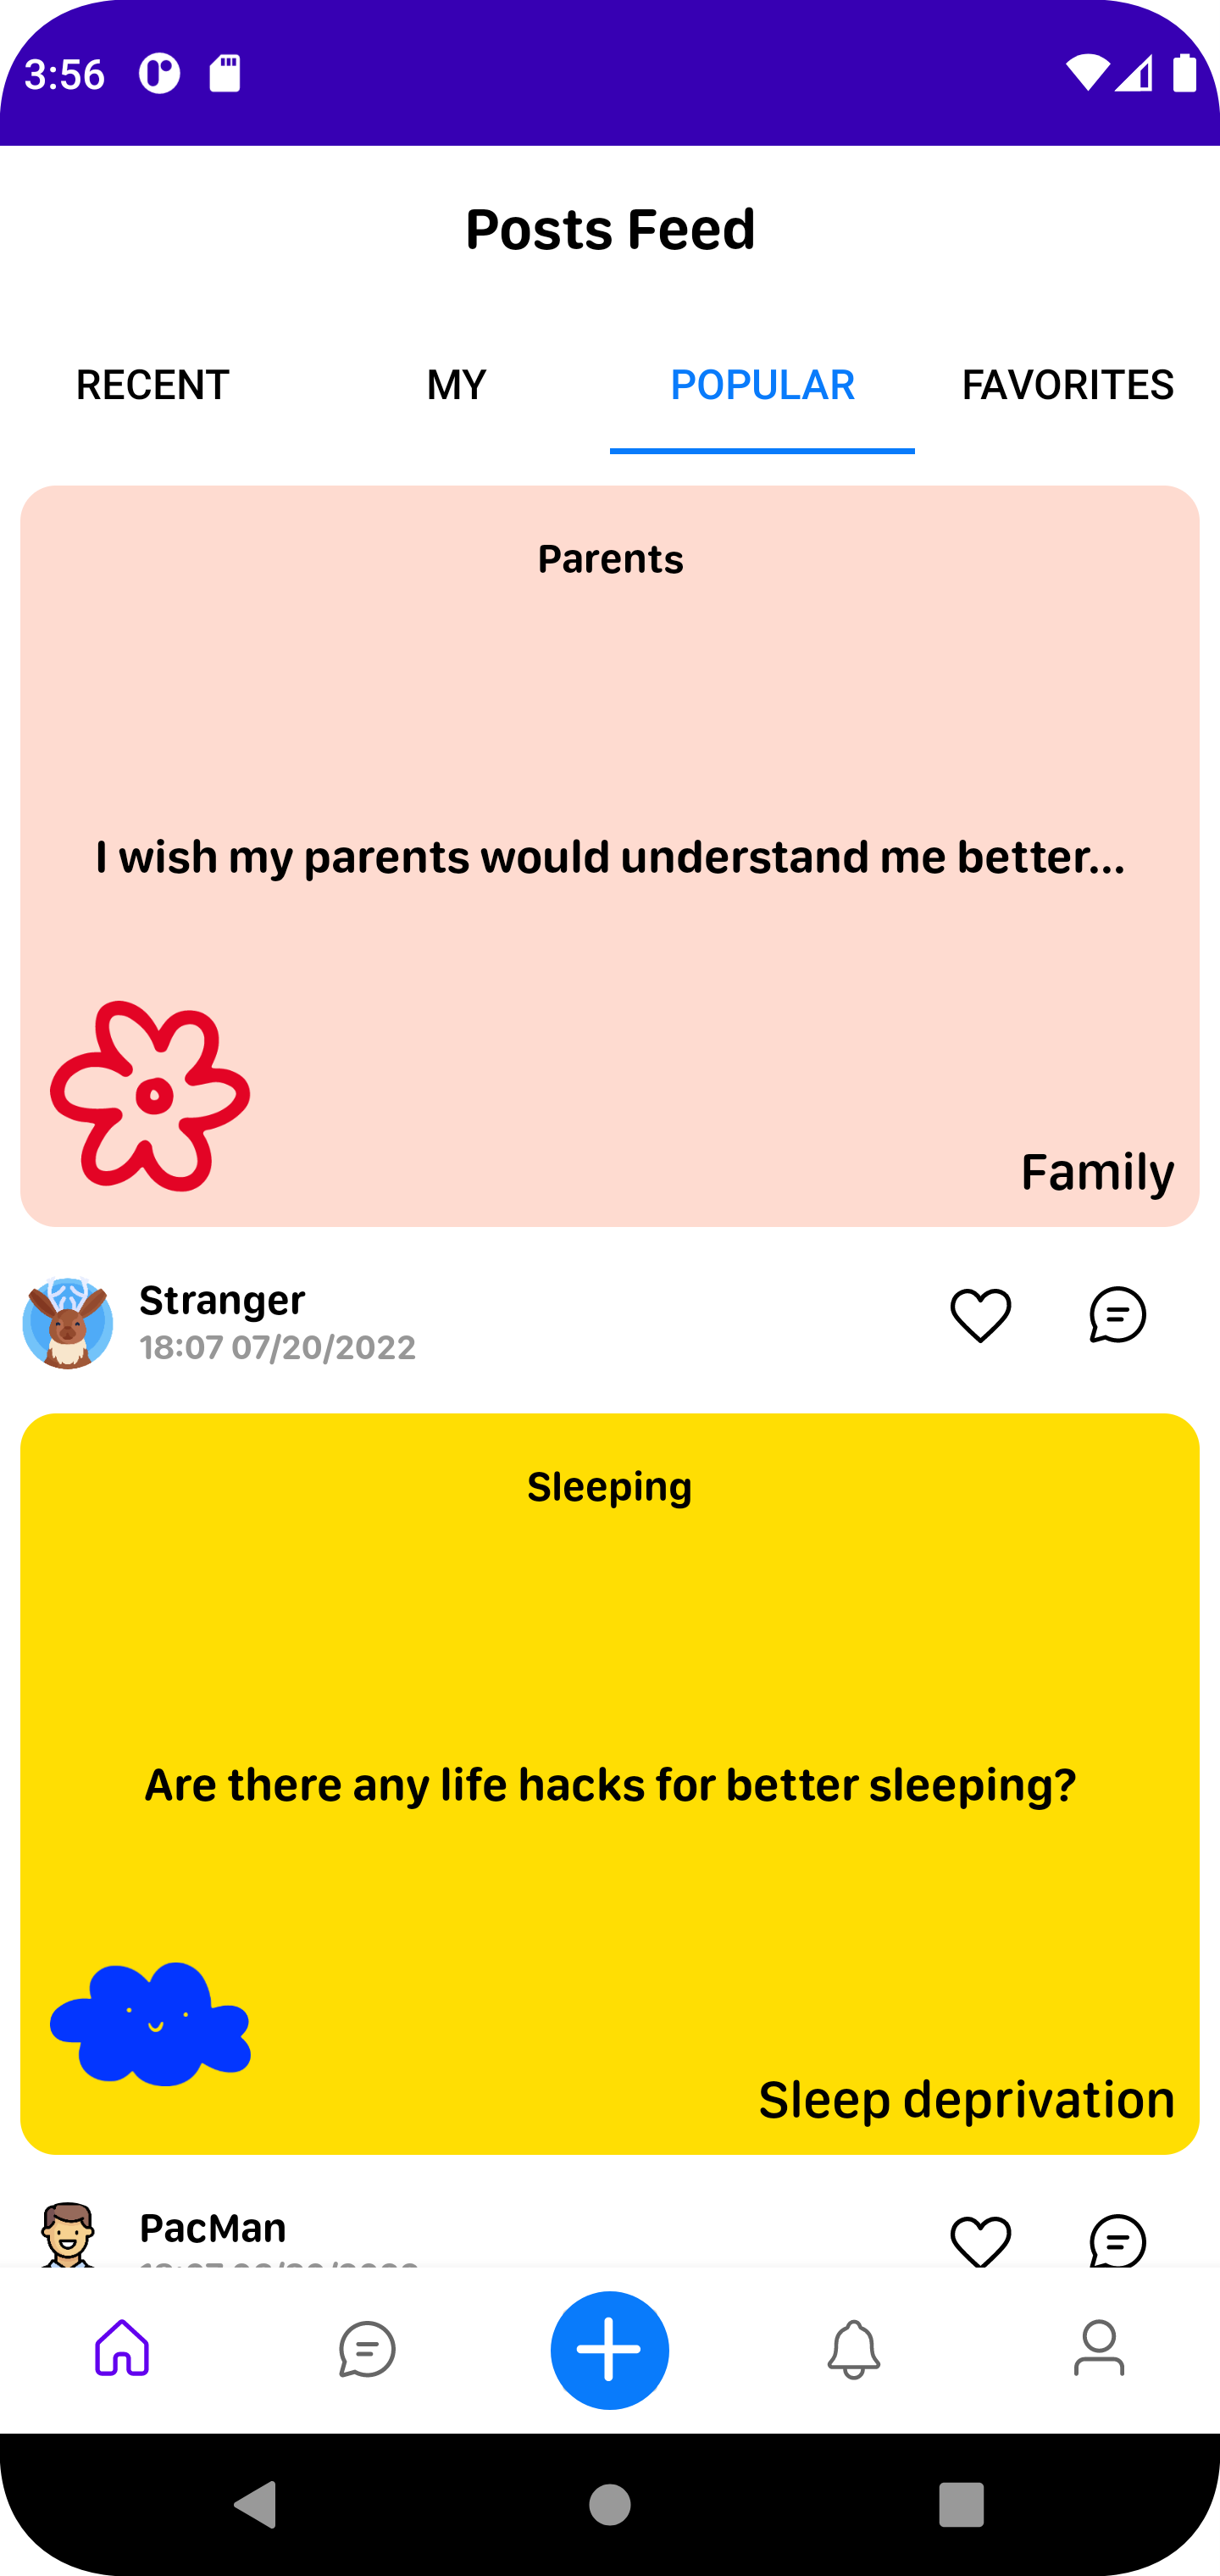
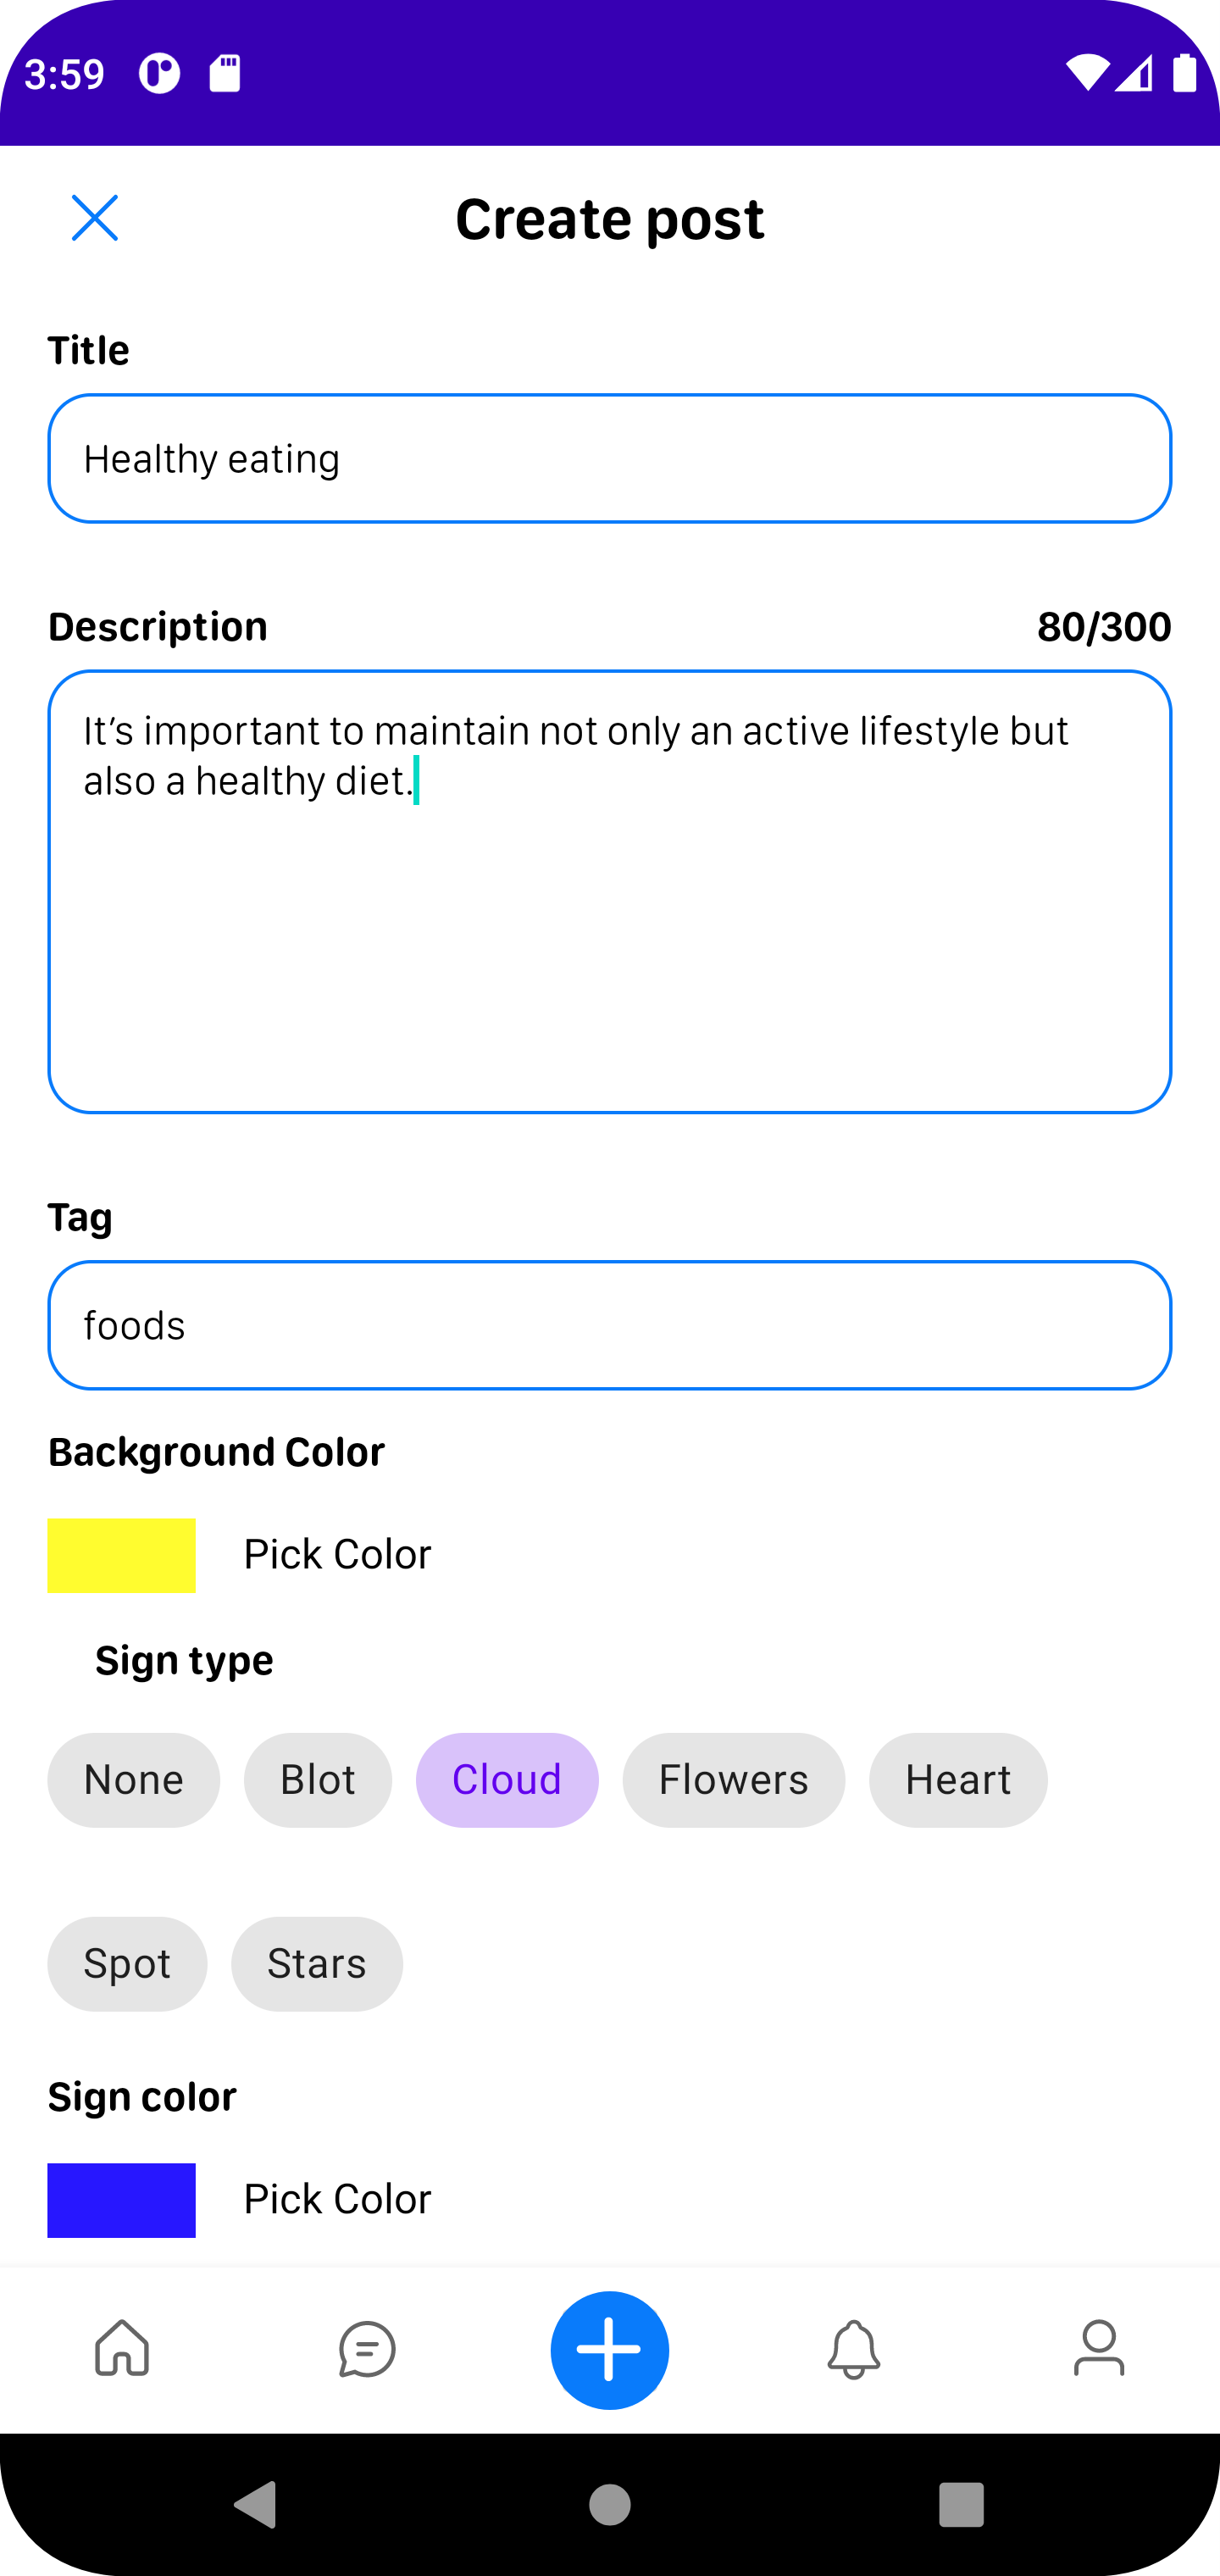
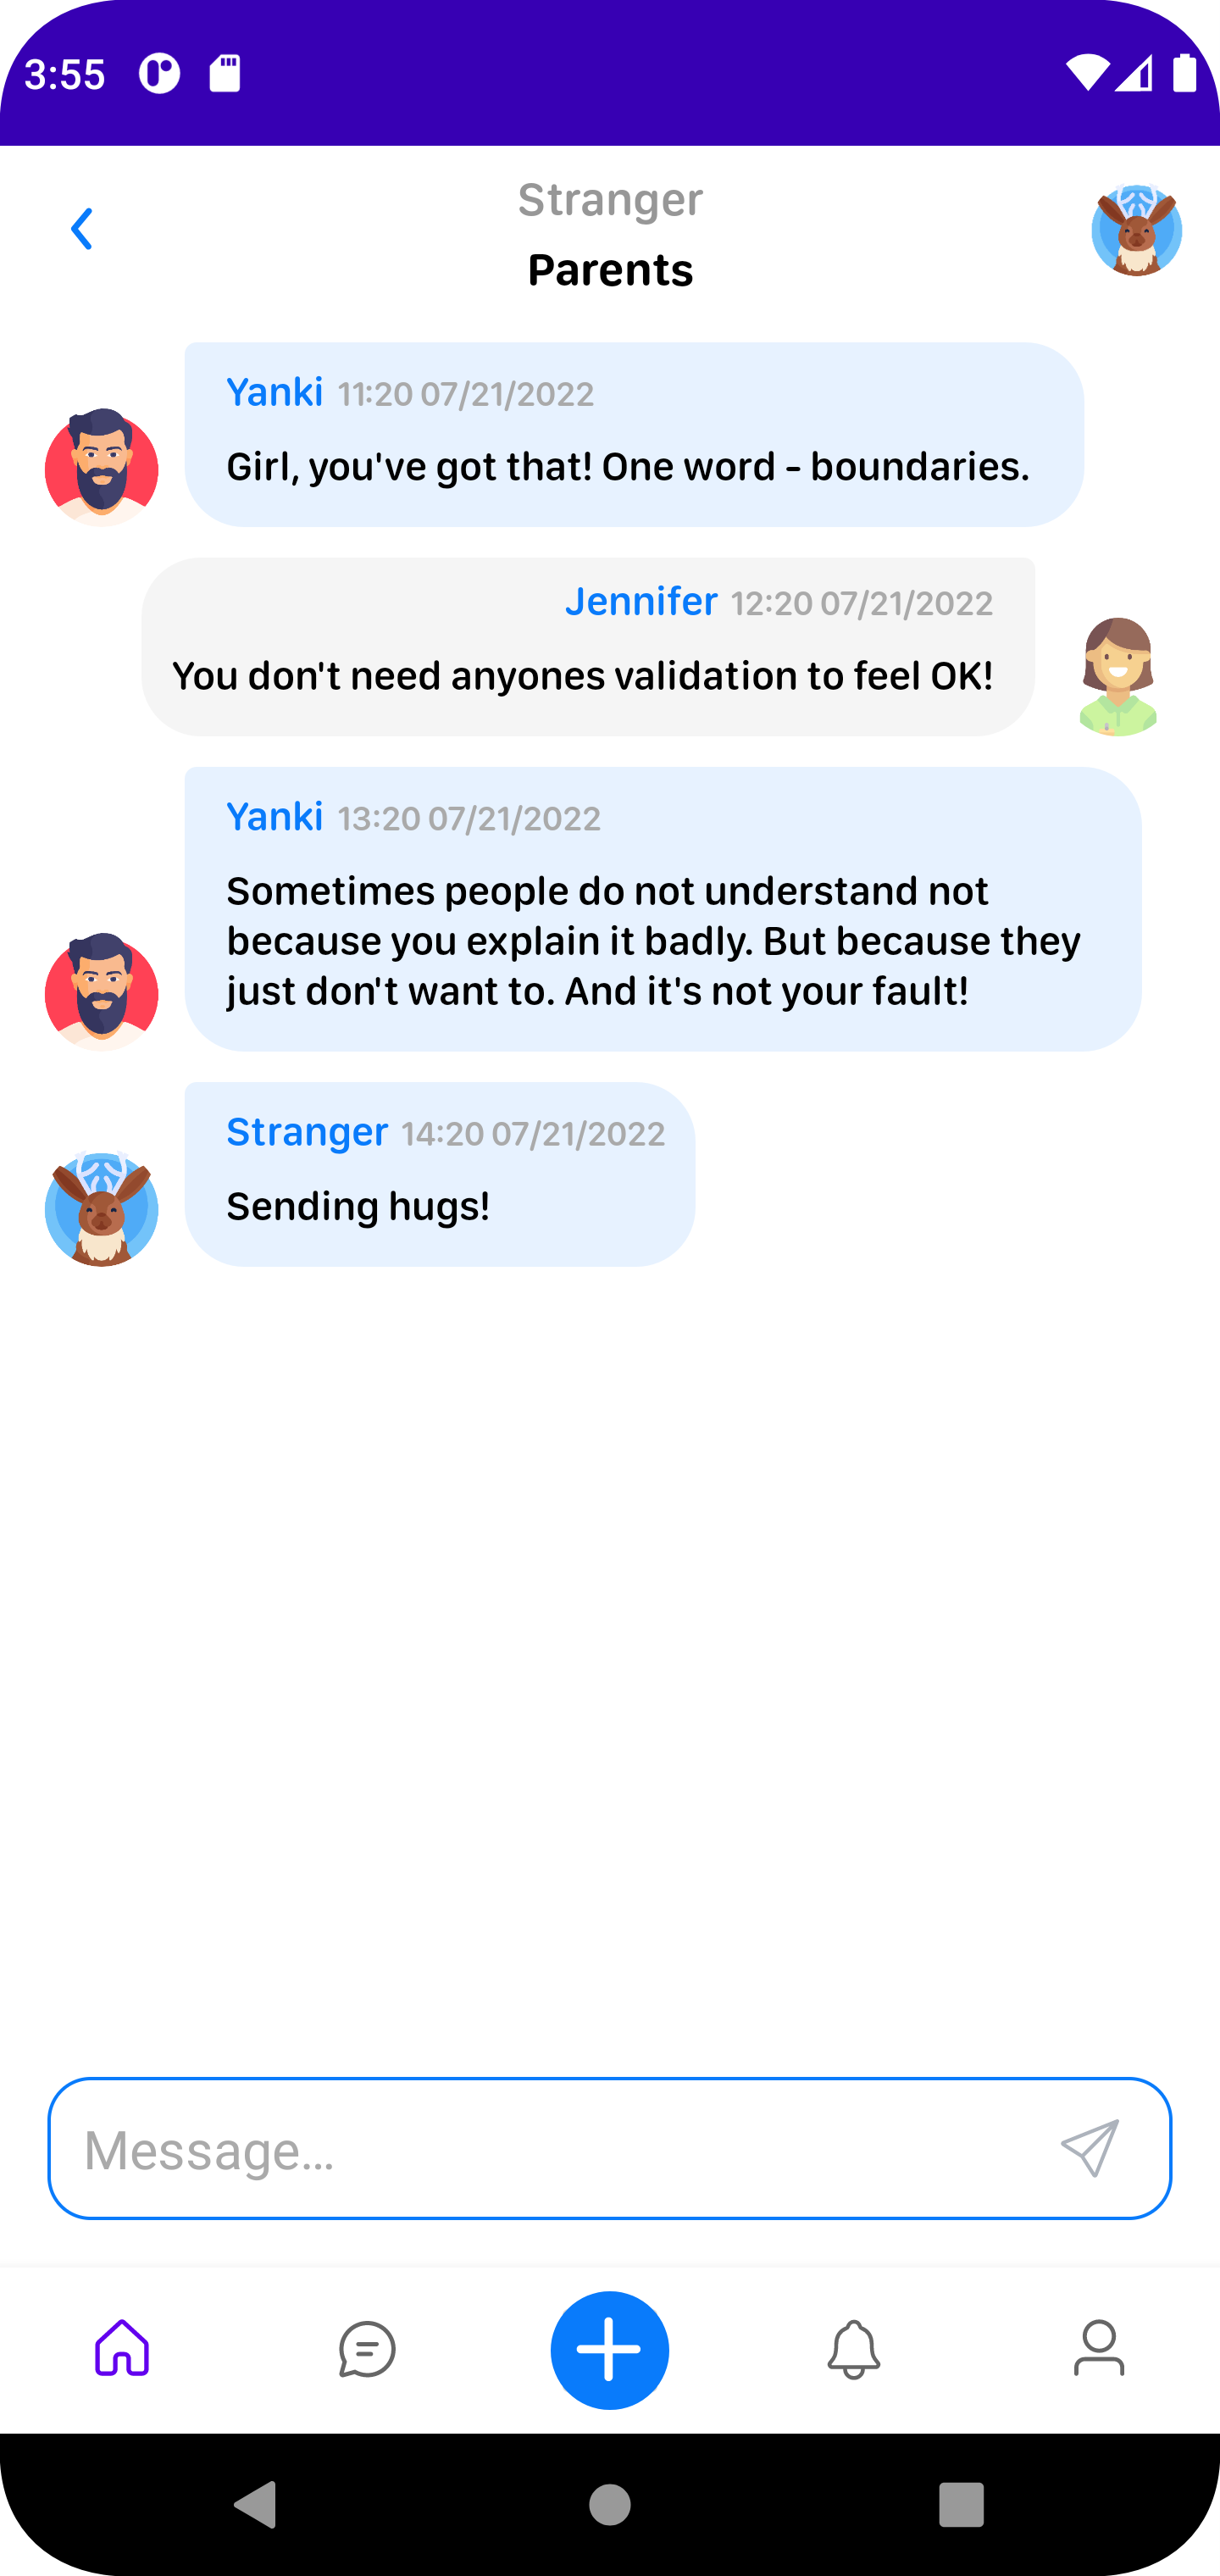
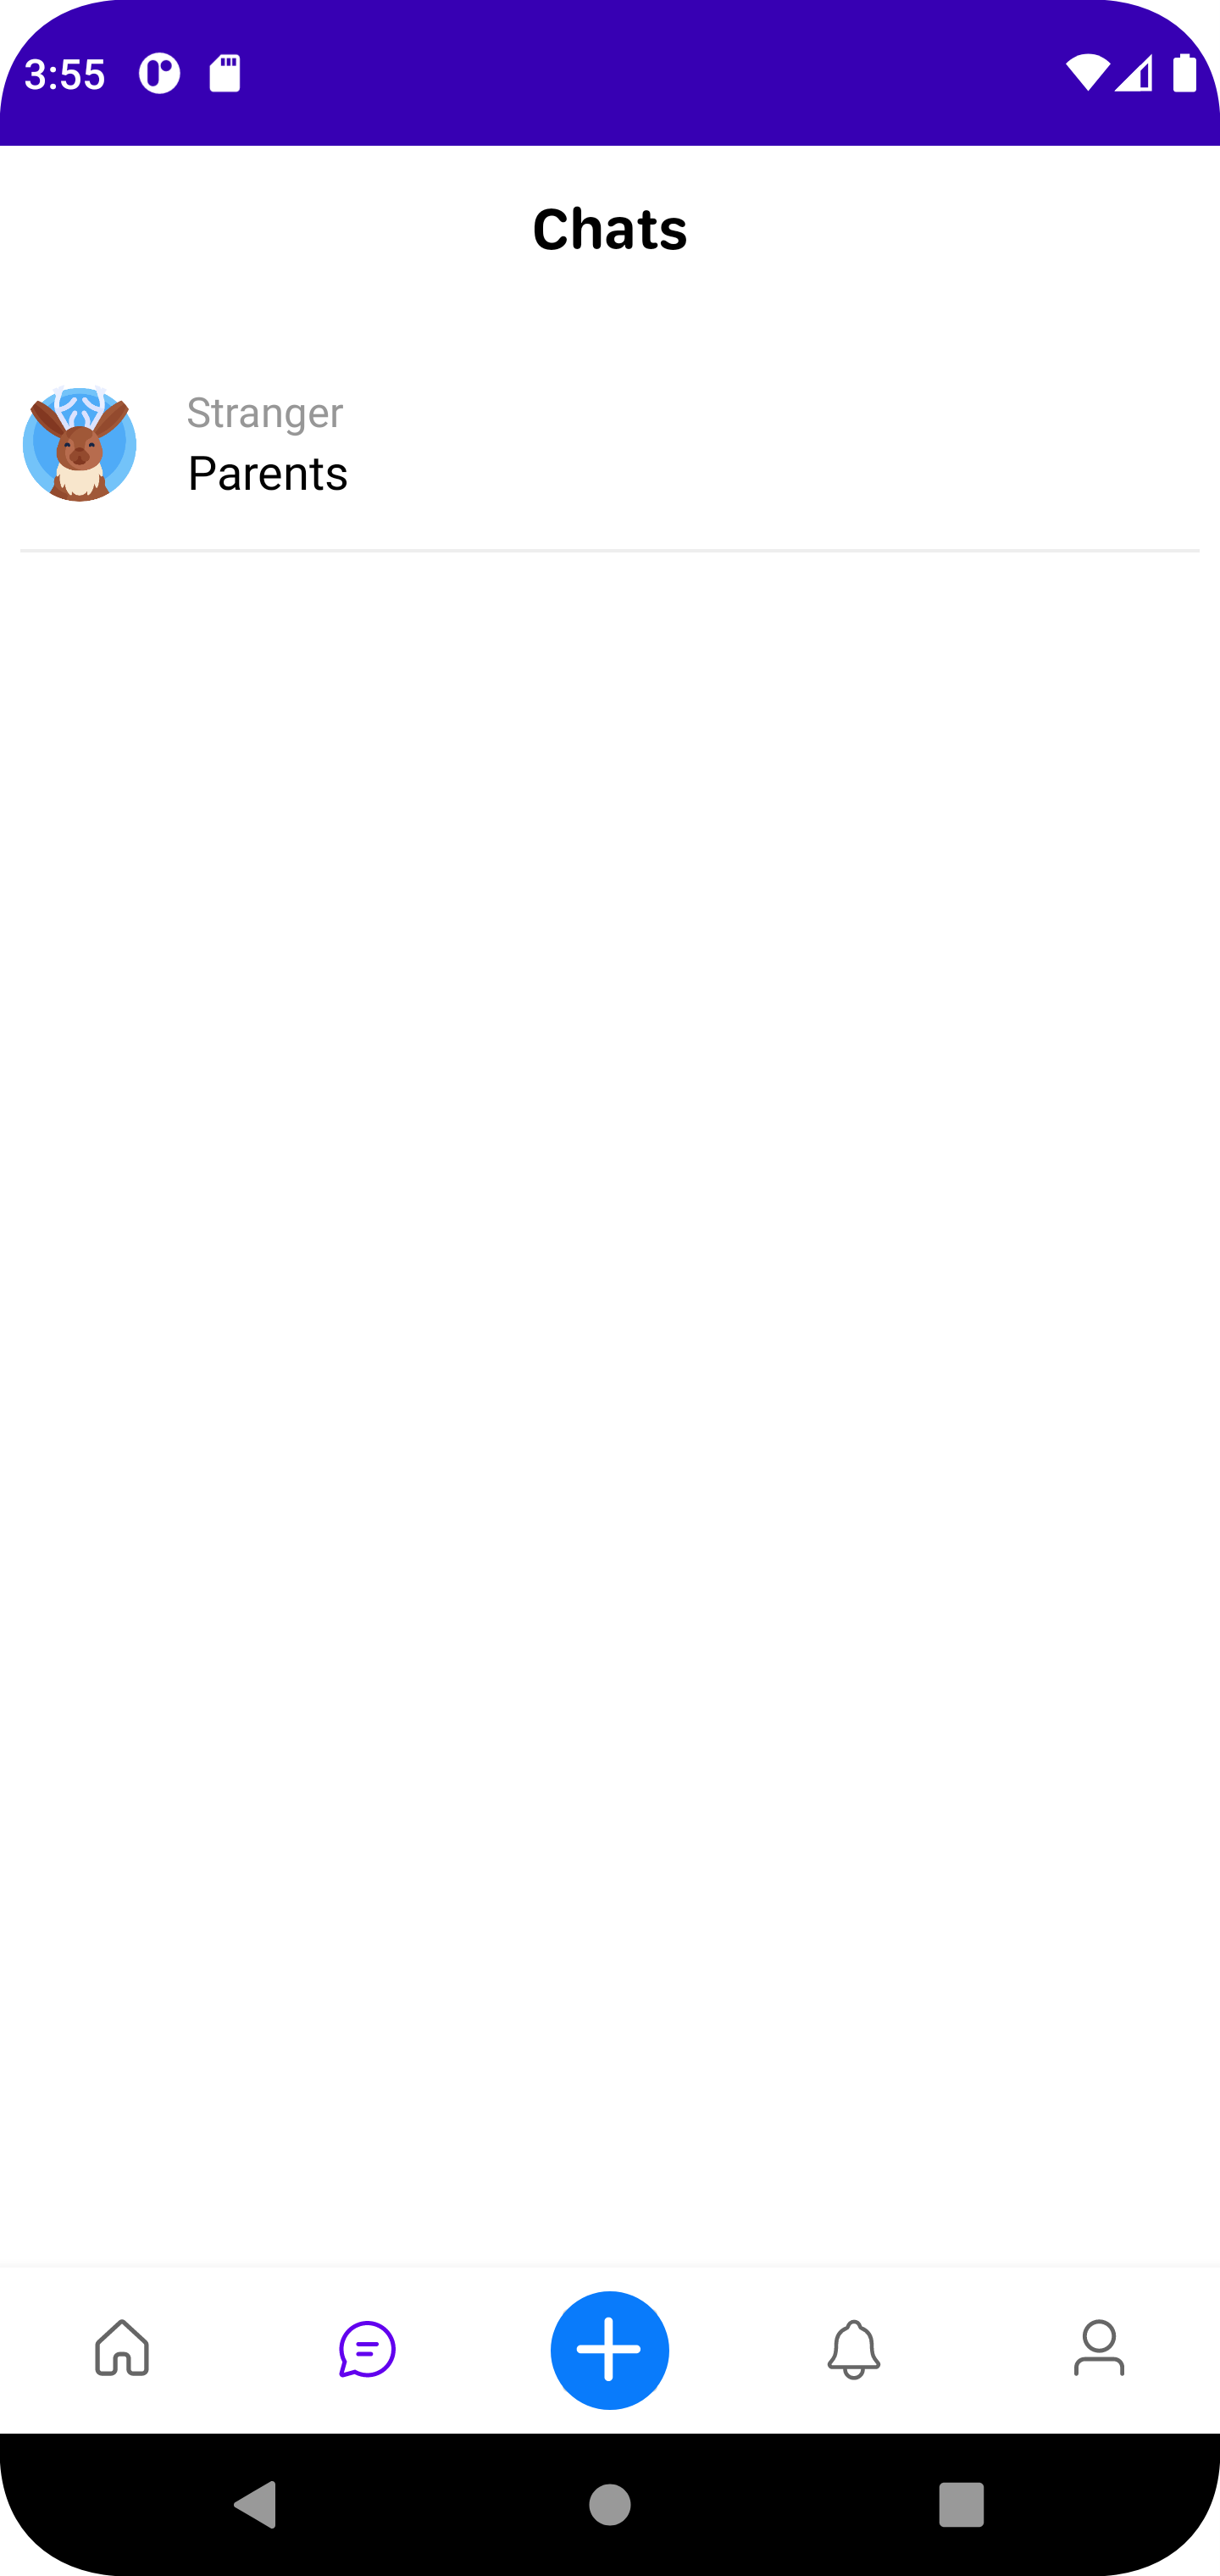
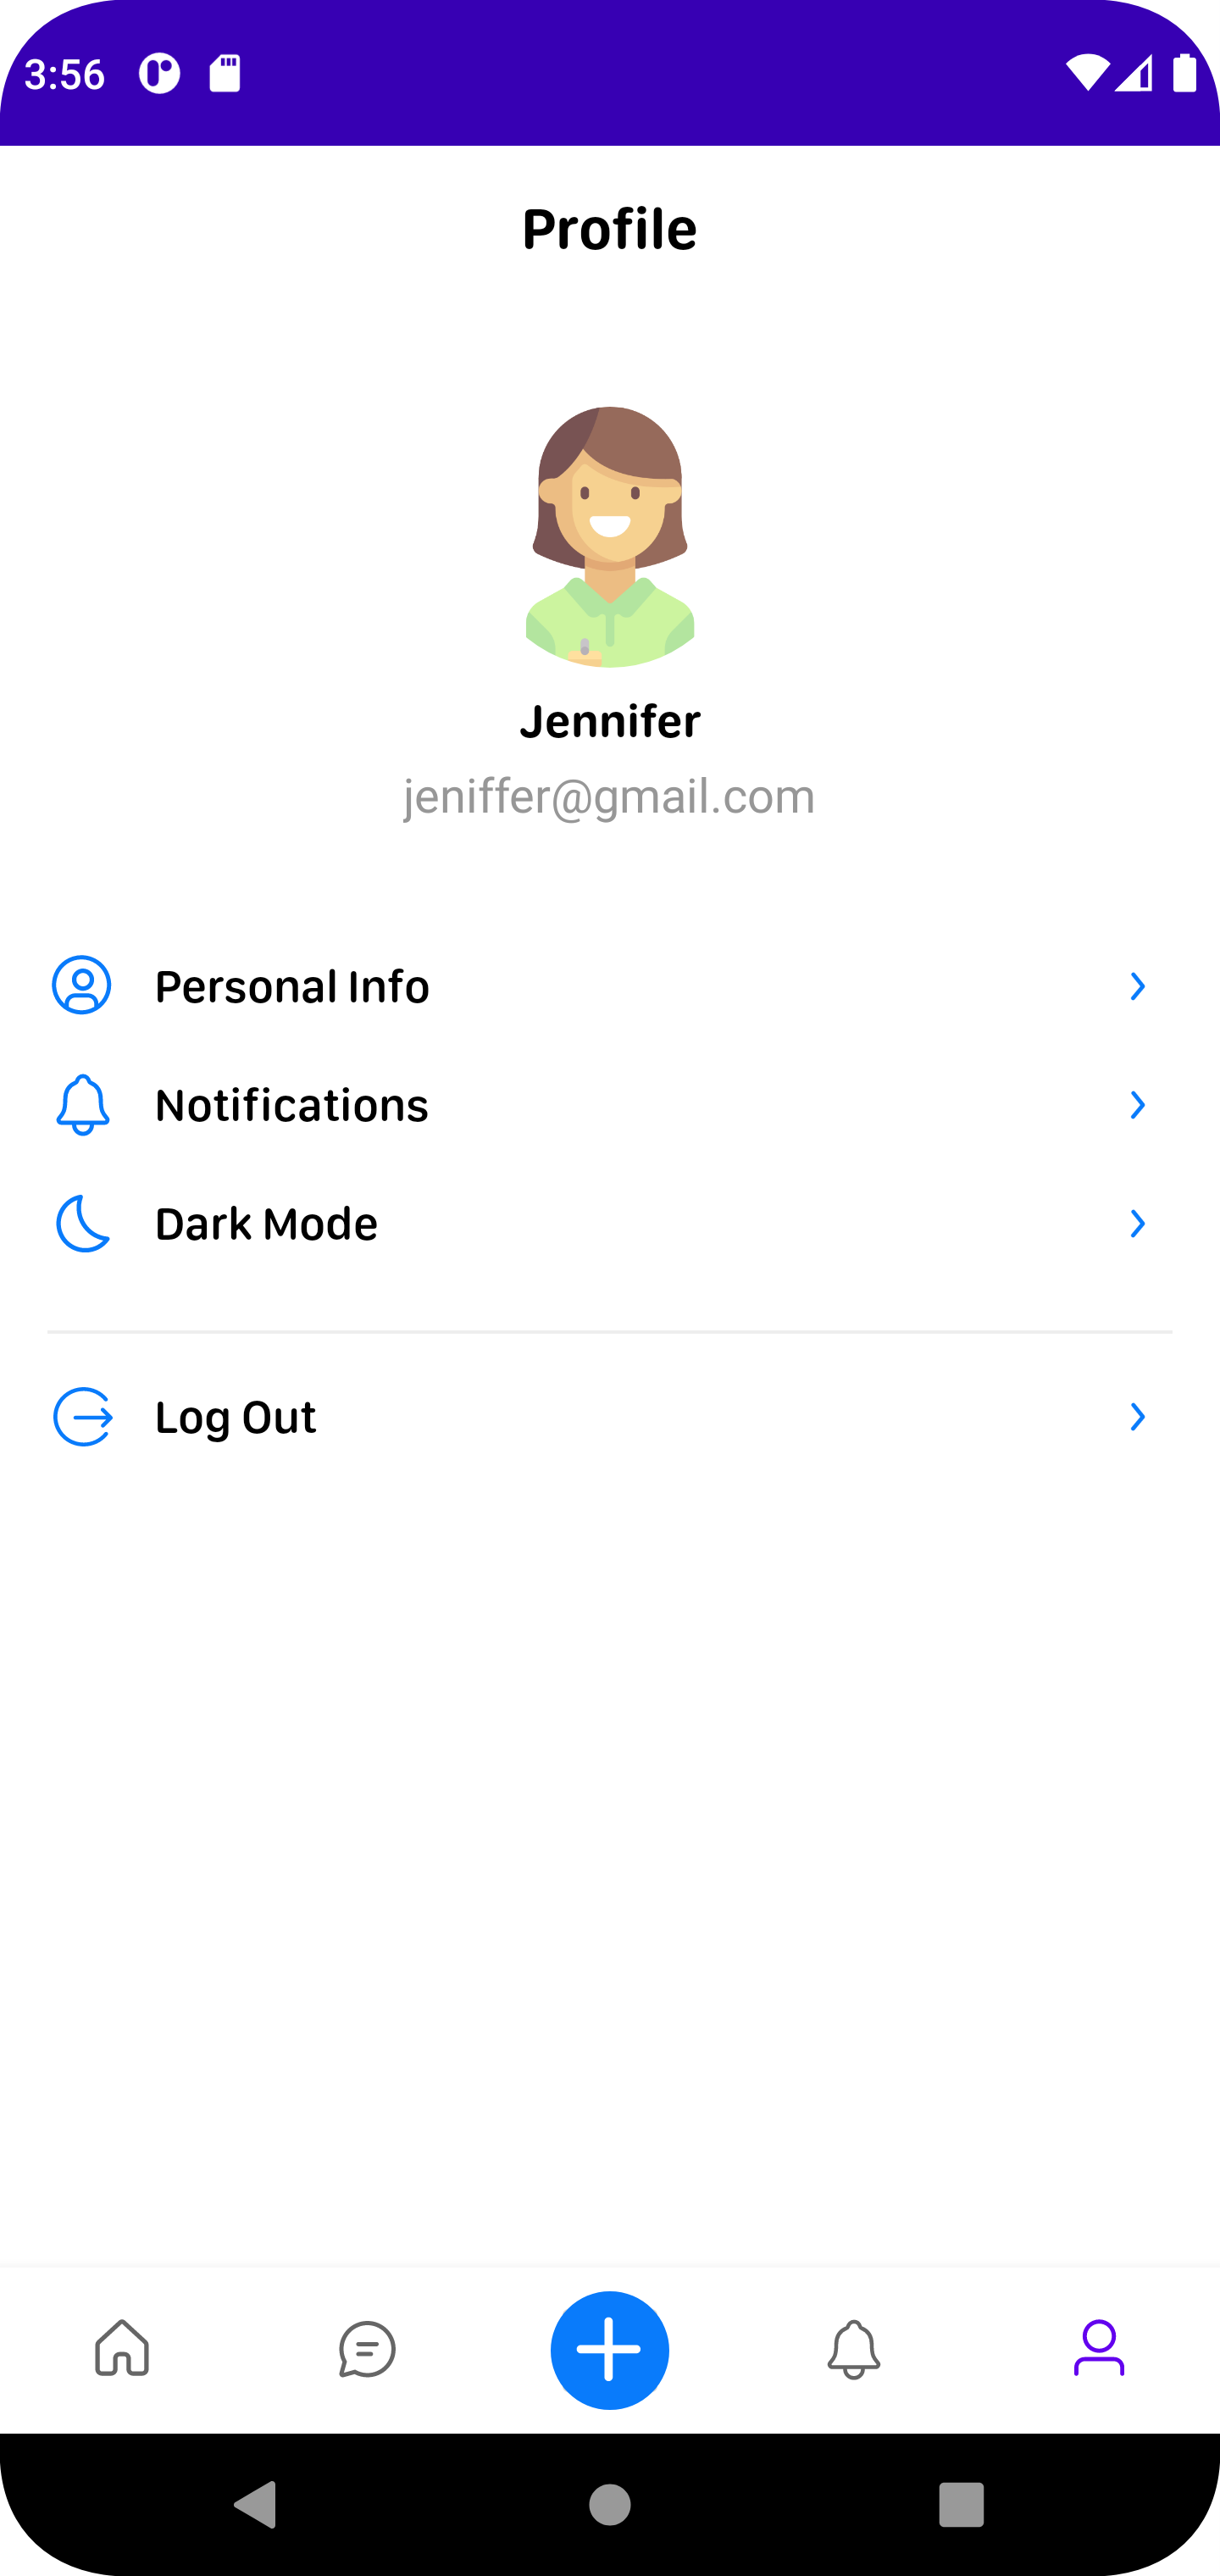
The WellBe application is a social media-type app that allows users to exchange various content connected with mental health, motivation, psychology, and improving oneself. Users can share posts with texts, images, and links, as well as discuss the content in the comment section. That’s what the application looks like:

As for now, let’s move on to the technical side of the matter: look into our tech stack choice and, of course, share how to create backend using Ktor server and Android using Ktor Client for HTTP requests.
Our tech stack: why did we choose Ktor
Before we dive into the coding, let us explain what stands behind our tech stack choice. We decided to use the Ktor framework for our backend. Ktor is built with Kotlin and Coroutines and is mainly used for creating connected applications. Because the framework uses Coroutines, it is asynchronous in its nature. Just what we need. There are several reasons why we opted for Ktor:
- It is easy to set up with Security, Serialization, embeddedServer or EngineMain(Netty, Jetty, Tomcat,CIO), WebSockets plugins, and others.
- Ktor ensures simple deployment and maintenance (via Heroku, Amazon, and Docker)
- This framework features a set of free services for databases and deployment for the MVP projects
- It is a scalable, flexible system
- The Ktor’s microsystem is well-integrated with Android development (similar libraries, like Koin, for dependency injection, Ktor allows HTTP requests, etc.)
- Ktor features a lightweight and efficient ORM Framework for Kotlin directly based on pure JDBC (Ktorm, Exposed, Ebean)
- Multiplatform
- There is no annotation like on Spring or any required hidden settings
- Ktor can fully replace Spring Boot
- Ktor features on-demand support of Java libraries
- The community of Ktor is growing, and there is sufficient documentation
Additionally, in most cases, we need a solution for the mobile backend with REST architecture and the capability to scale the application.
You might ask, “Why didn’t you go with Firebase instead?” The choice of Ktor was easy for us when compared with Firebase: Ktor offers simpler implementation and maintenance from a long-term perspective. A system with Firestore can be massive and hardly supportable.
Your second question might be, “Why not Spring?” True, Spring can give better solutions when it comes to parameters like database connectivity, aspect-oriented programming, configuration management, and so on. Still, our mobile app project isn’t of an enterprise scale, and Ktor is more than enough for creating this application as well as MVP project when you need to build a solution in short terms or any small and mid-size projects.
There is one more advantage to Ktor: we will be using one ecosystem (Kotlin) on Android frontend and backend, so there is no need to have two teams working on the solution. In general, Android developers always work closely with the backend team, so their background knowledge would be sufficient for building backend apps. Ktor has a low-level entry point along with good documentation.
Ktor defines a pipeline without a subject and the ApplicationCall as a context defining five phases to be executed in order
- Setup (like the CallId plugin)
- Monitoring (like CallLogging plugin)
- Plugins (like Authentication plugin)
- Call (like Routing plugin)
- Fallback ( like StatusPages plugin)
Generally, Ktor works on plugins that sit between the request and response. Here’s what Ktor application’s logic looks like:

In Ktor, you can install plugins not only globally but also to specific routes. It might be useful if you need different plugin configurations for various application resources.
You can view all plugins on Ktor Project Generator.
How to build backend for a wellness application from scratch using Ktor
That was a quick explanation of why we think Ktor works perfectly for smaller-scale Android development projects. Let’s now see it in action and begin building our application.
1. For initializing the application, we will use Generate Ktor project service. Firstly, we need to choose all the plugins for our project. As we said earlier, Ktor centers around the plugins between request and response.

Which plugins will we choose? We need
- Authentication JWT with Authentication plugins for setting up our security token manager
- Routing plugin for handling the request and response
- Status Pages plugin allows responding to thrown exceptions
- ContentNegotiation plugin provides automatic conversion according to Content-Type and Accept headers
- Kotlinx.serialiation plugin for handles JSON serializationWebSockets plugin to support bidirectional communication in our chats
2. Additionally, we need to add libraries to work with database and dependency injection. Unlike Spring, Ktor doesn't feature a built-in dependency injection mechanism. If you need to utilize DI, you can choose any framework you like, such as Guice, Koin, Kodein, or others.
3. For image storage, we are using Amazon v3 with the possibility to create a presigned URL (it gives some time to get an image by HTTP URL without any restrictions). Kotlin library for Amazon does not support presigned URLs, but we can use Java AWS dependency for our MVP stage.
This is how our Gradle dependencies look like after the steps we completed:
dependencies {
    implementation("io.ktor:ktor-server-core-jvm:$ktor_version")
    implementation("io.ktor:ktor-server-websockets-jvm:$ktor_version")
    implementation("io.ktor:ktor-server-content-negotiation-jvm:$ktor_version")
    implementation("io.ktor:ktor-serialization-kotlinx-json-jvm:$ktor_version")
    implementation("io.ktor:ktor-server-auth-jvm:$ktor_version")
    implementation("io.ktor:ktor-server-auth-jwt-jvm:$ktor_version")
    implementation("io.ktor:ktor-server-netty-jvm:$ktor_version")
    implementation("io.ktor:ktor-server-status-pages-jvm:$ktor_version")
    implementation("ch.qos.logback:logback-classic:$logback_version")
    testImplementation("io.ktor:ktor-server-tests-jvm:$ktor_version")
    testImplementation("org.jetbrains.kotlin:kotlin-test-junit:$kotlin_version")
    //Database
    implementation ("org.ktorm:ktorm-core:$ktorm_version")
    implementation ("org.ktorm:ktorm-support-mysql:$ktorm_version")
    implementation("mysql:mysql-connector-java:8.0.29")
    // Koin core features
    implementation("io.insert-koin:koin-core:$koin_version")
    implementation("io.insert-koin:koin-ktor:$koin_version")
    implementation("io.insert-koin:koin-logger-slf4j:$koin_version")
    //AWS
    implementation("com.amazonaws:aws-java-sdk:1.12.230")
    implementation("javax.xml.bind:jaxb-api:2.3.1")
}
4. For communicating with the database, we are using Ktor ORM. This ORM does not support DDL (Data Definition Language commands), so we need to create our database and tables in manual mode (if you want to create it automatically, you might use, for example, Exposed ORM).
You can find statements for creating tables in our repository.
As we are working on the MVP stage, we can absolutely use free services to store our MySQL database. For example, we chose JawsDB MySQL add-ons from heroku.com. It has a free plan for up to 5 MB of data, which is enough for us now.

Afterward, you can find your database setting and connect to it via MySQL Workbench or another app to invoke creating statements for tables. You can find the scripts for creating the tables in our repository.
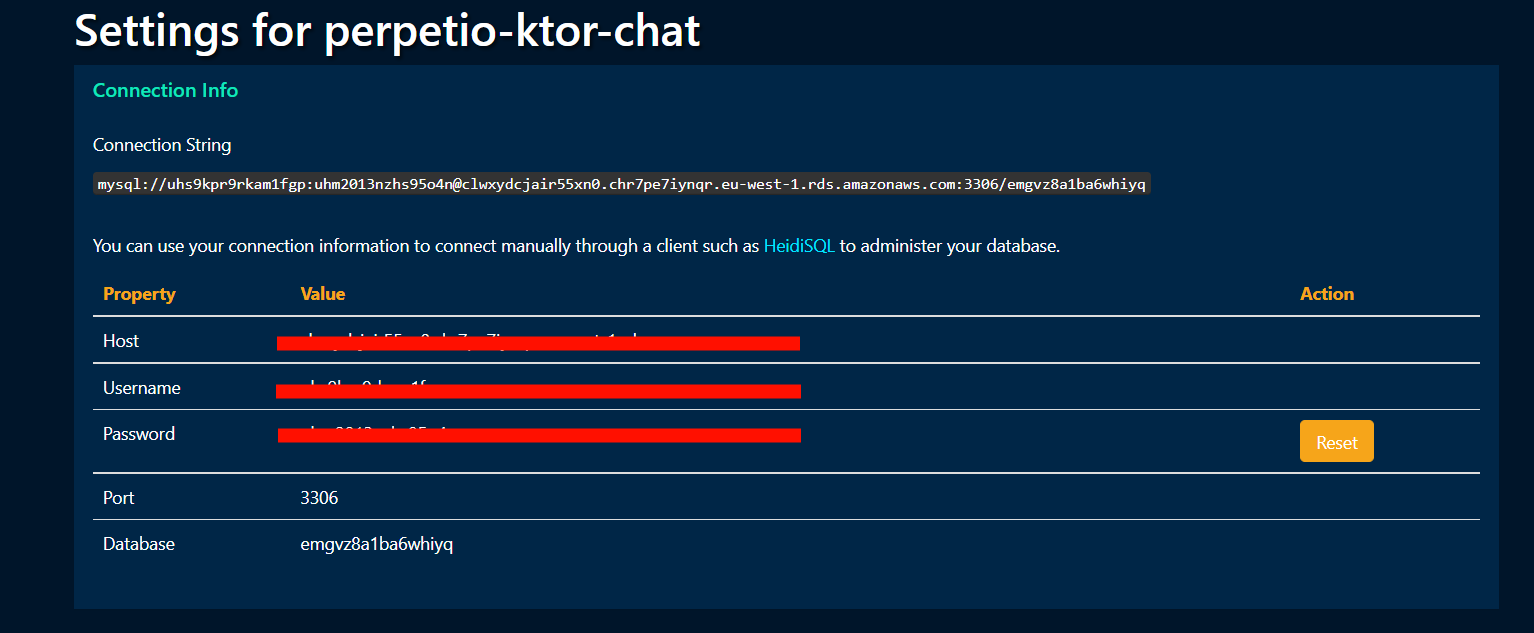
Do not forget to set the database credentials to our application.conf file.
db {
   jdbcUrl = "jdbc:mysql://***********"
   jdbcDriver = "com.mysql.cj.jdbc.Driver"
   dbUser = "***********"
   dbPassword = "***********"
}
That’s a complete setup for our project, so let's take a closer look at the code now.
5. The first thing we see when opening the project is the Application.class.
fun Application.module() {

    install(Koin) {
        modules(mainModule, userModule, postModule, roomModule)
    }

    configureSecurity()
    configureSocketsPlugin()
    configureRoutingPlugin()
    configureSerializationPlugin()
    configureStatusPagesPlugin()
}
It contains dependency injection setup modules for Koin and the plugins, which we will add to the project generator.
The most important thing in the DI is the mainModule which provides DatabaseConnection, Token Manager, and HoconApllicationConfig (for getting project credentials from our application.conf file).
Other modules provide repositories and controllers dependent on main modules; for example, UserRepositiryImpl needs DatabaseConnection.
6. Here’s our Security Configuration; looking all neat and clear.
The validate function allows us to perform additional validations on the JWT payload.
To play with the payload and see what information your token contains, you can always use free services like https://jwt.io/ and play with the content of this payload to check if it works in the proper way.
 val tokenManager: TokenManager by inject()

    authentication {
        jwt {
            val jwtAudience = this@configureSecurity.environment.config.property("jwt.audience").getString()
            realm = this@configureSecurity.environment.config.property("jwt.realm").getString()
            verifier(
                tokenManager.verifyJWTToken()
            )
            validate { credential ->
                if (credential.payload.audience.contains(jwtAudience)) JWTPrincipal(credential.payload) else null
            }
            challenge { _, _ ->
                call.respond(HttpStatusCode.Unauthorized, "Token is not valid or has expired")
            }
        }
    }
7. Via the token management, we check our JWToken and secret key with the proper audience and issuer, which we set in our application class. Then, we create a token on the login or registration request.
   fun generateJWTToken(user: UserCredModel): String? {
        return JWT.create()
            .withAudience(audience)
            .withIssuer(issuer)
            .withClaim("id", user.id)
            .withClaim("email", user.mail)
            .withExpiresAt(Date.from(expirationDate.atStartOfDay().atZone(ZoneId.systemDefault()).toInstant()))
            .sign(Algorithm.HMAC256(secret))
}8. The challenge function allows us to configure a response to be sent if authentication fails. In our case, it is a standard 401 error with an additional description. Token validation will be applied for all routing that we marked as authenticate.
  authenticate {
        route("/post") {
            post {
                val post = call.receive<CreateEditPostModel>()
                call.respond(HttpStatusCode.OK, postController.createPost(UserInfo.getId(call.principal()), post))
            }

            put {
                val post = call.receive<CreateEditPostModel>()
                postController.editPost(UserInfo.getId(call.principal()), post)
                call.respond(HttpStatusCode.OK, true)
            }


            delete("/{postId}") {
                call.parameters["postId"]?.let {
                    postController.removePost(UserInfo.getId(call.principal()), it.toLong())
                } ?: throw PostEditException()
                call.respond(HttpStatusCode.OK, true)
            }
        }
9. You can apply a security check for all the scope; just add the route function inside of the authenticate block, for example, post, put, delete methods for posting.
10. Now, time to configure the WebSockets plugin; it’s pretty easy. We just need to provide the ping period, timeout, and the maximum size of a message to be received and sent along with the security masking flag.
fun Application.configureSocketsPlugin() {
    install(WebSockets) {
        pingPeriod = Duration.ofSeconds(15)
        timeout = Duration.ofSeconds(15)
        maxFrameSize = Long.MAX_VALUE
        masking = false
    }
}
11. In the Routing plugin, we structurize our routes and provide DI injection for each one. In total, we have
- UserRoutes for login/registration requests and manipulating with the user profile
- PostRoutes for manipulating post entity RoomController where we keep our work with WebSockets chats,messages and other chat functionality
fun Application.configureRoutingPlugin() {

    val userController: UserController by inject()
    val postController: PostController by inject()
    val roomController: ChatController by inject()

    install(Routing) {
        userRoutes(userController)
        postRoutes(postController)
        chatSocket(roomController)
    }
}
12. Content Negotiation plugin is there to provide negotiating media types between the client and server. Ktor supports the following formats
- JSON
- XML
- CBOR
We are using JSON; its initialization takes only one line of code.
fun Application.configureSerializationPlugin() {
    install(ContentNegotiation) {
        json()
    }
}
13. In the Status Pages plugin, we create our custom exception from the RunTimeException() and define a suitable error code and message for each case.
fun Application.configureStatusPagesPlugin() {
    install(StatusPages) {
        exception<RegistrationNameException> { call, _ ->
            call.respond(HttpStatusCode.BadRequest, "Username already has taken")
        }
        exception<RegistrationFieldLengthException> { call, _ ->
            call.respond(HttpStatusCode.BadRequest, "Username length must be > 3 and password > 5")
        }
        exception<LoginException> { call, _ ->
            call.respond(HttpStatusCode.BadRequest, "Invalid username or password")
        }
        exception<PostEditException> { call, _ ->
            call.respond(HttpStatusCode.BadRequest, "Invalid post id")
        }
Now, we can just throw these errors on the controller or router level when we face some problems.
14. If we look at our application structure, every request goes through the authentication manager, then reaches the route level, parses the request body from JSON with the serialization plugin, and then might invoke WebSockets or the Status Page plugin.
In general we have Routes - > Controller -> Repository chain for our request - > response. Like in all the REST architecture standard styles, our code is simplified, standardized, scaled, and stateless. We have the get, post, put, patch, delete commands for our route. For creating any methods, we only need to define a path for them; no need to create methods with a name and return types.
Additionally, it’s highly convenient that we can compose different methods for one route in one block and not repeat ourselves in writing them.
15.
route("chat/{room}") {
            post {
                call.parameters["room"]?.toLong()?.let {
                    roomController.addUserToRoom(UserInfo.getId(call.principal()), it)
                    call.respond(HttpStatusCode.OK, true)
                } ?: throw ChatNotFindException()
            }

            delete {
                call.parameters["room"]?.toLong()?.let {
                    roomController.removeUserFromRoom(UserInfo.getId(call.principal()), it)
                    call.respond(HttpStatusCode.OK, true)
                } ?: throw ChatNotFindException()
            }
        }
In the code above, we use the same routes but different methods for adding users to the chat rooms and vice versa.
16. One more important thing is that in the PipelineContext, we can run Сorotines to suspend Function A. Suspending a function means a function can be paused and resumed later. As a result, we can execute a long-running operation and wait for it to complete without blocking.
As our PipelineContext is implemented in the CoroutineScope, we can run Ktor functions for receiving data from the response call.receive<T>() and sending responses call.responds() which is suspended too. If you are using IntelliJ IDEA, the function will be marked as suspended.
post("/register") {
        val userCredentials = call.receive<UserRegistrationModel>()
        call.respond(HttpStatusCode.OK, userController.register(userCredentials))
    }

post("/login") {
        val userCredentials = call.receive<UserLoginModel>()
        call.respond(HttpStatusCode.OK, userController.login(userCredentials))
    }
17. The Controllers level is a mediator between Route and Repository. On this level, we perform manipulation with data and then provide it to the Repository; from it the data is passed to Route level for the response to the client.
fun login(model: UserLoginModel): UserCredModel {

        val userByEmail = userRepo.getUserByEmail(model.email)

        if (userByEmail == null || userByEmail.password.decryptCBC() != model.password) {
            throw LoginException()
        }

        val token = tokenManager.generateJWTToken(UserCredModel(userByEmail.id, userByEmail.mail))

        return UserCredModel.fromUserEntity(userByEmail).apply {
            this.token = token
            avatarModel = getAvatar(userByEmail.id)
        }
    }
For example, in the code above, we have a login method that should return a userModel (information about the user: email, username, and so on) with a JWT Token inside.
First of all, we need to find the user by email and then check if the password matches; if something is wrong, we throw an Exception which we created early in the Status Pages plugin.
Finally, we create our JWT token by Token manager and return this data in the UserCredModel.
In the UseController, we have injected our UserRepo, TokenManager, and AmazonS3Manager; we will utilize this object for the necessary methods.
class UserController(
    private val userRepo: UserRepository,
    private val tokenManager: TokenManager,
    private val amazonClient: AmazonS3Client
)
18. On the repository level, we have to work with our database. For example, PostRepository contains all manipulation with the Posts Entity.
interface PostRepository {

    fun editPost(userId: Long, post: CreateEditPostModel)

    fun createPost(userId: Long, post: CreateEditPostModel): Long

    fun removePost(userId: Long, postId: Long)

    fun selectUserPosts(userId: Long, pagination: Pagination, search: SearchFilter?): PaginationResult<PostModel>

    fun selectUserFavouritePosts(
        userId: Long,
        pagination: Pagination,
        search: SearchFilter?
    ): PaginationResult<PostModel>

    fun selectFeedPosts(userId: Long, pagination: Pagination, search: SearchFilter?): PaginationResult<PostModel>

    fun selectPopularPosts(userId: Long, pagination: Pagination, search: SearchFilter?): PaginationResult<PostModel>

    fun incrementLikeCounter(postId: Long)

    fun decrementLikeCounter(postId: Long)
}
19. It is always a good approach to return list value with Pagination. Ktor doesn’t have a Pagination interface (like Pageable in Spring) or Search Filter (like JpaSpecification in Spring), but it is easy to create your own realization. We hope for these features to become available in future releases.
interface Pagination {
val page: Int
val size: Int
}
val Pagination.firstIndex: Int
get() = page * size
fun calculatePagesNumber(datasetSize: Long, pageSize: Int): Int {
return ceil(datasetSize.toDouble() / pageSize).toInt()
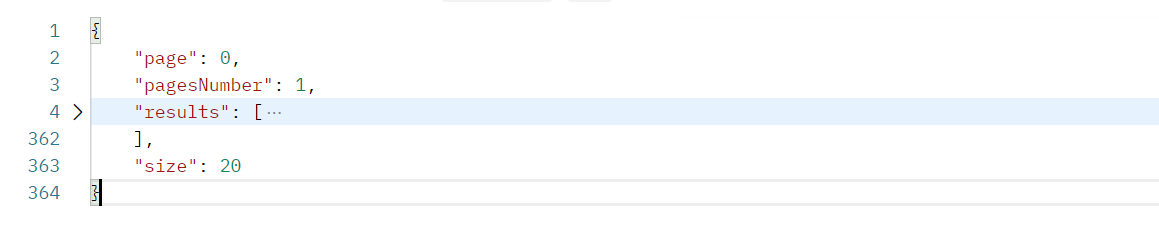
}We have just created an interface for Pagination, which waits for a user request page number and item size on one page. Then, we can calculate the first index to set the Offset command to the SQL query and calculePagesNumbes() methods for defining all available pages for the response. This is how our Pageable result looks like:
@Serializable
data class PaginationResult<T>(
    override val page: Int,
    val pagesNumber: Int,
    val results: List<T>,
    override val size: Int
) : Pagination
For example, you have 17 records and want to fetch the first page with 20 elements on it. Your response should look like this:
20. Let's take a closer look at our ORM library Ktorm. First of all, we would like to point out that this library has sufficient documentation; you can find it here.
The Entity class looks similar to Android Room or Hibernate ORM for Spring, just with some adjustments.
object Posts : Table<Post>("post") {

    val id = long("id").primaryKey().bindTo { it.id }
    val userId = long("userId").references(Users) { it.user }
    val title = varchar("title").bindTo { it.title }
    val text = varchar("text").bindTo { it.text }
    val visible = boolean("visible").bindTo { it.visible }
    val tag = varchar("tag").bindTo { it.tag }
    val createdTime = datetime("createdTime").bindTo { it.createdTime }
    val backColor = varchar("backColor").bindTo { it.backColor }
    val likes = long("likes").bindTo { it.likes }
    val sign = int("sign").bindTo { it.sign }
    val signColor = varchar("signColor").bindTo { it.signColor }
}
21.
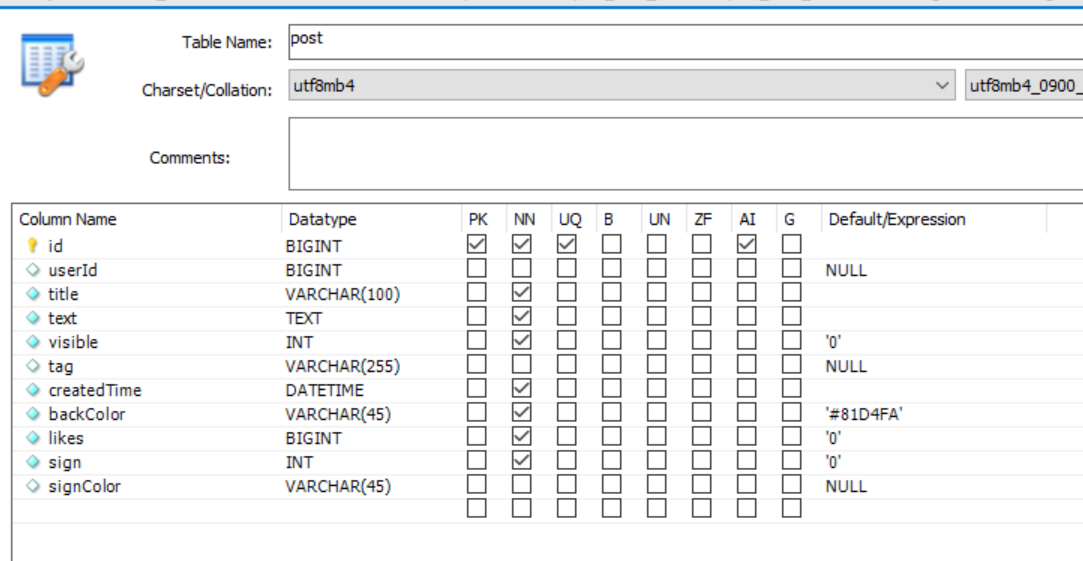
If we look at our SQL Post table, it is very easy to understand which field is related to the SQL row and define this value type. We need the bindTo{ } method to retrieve data from a database and get it as a Kotlin object. The purpose of the bindTo{ } method after the field name is mapping and creating a Kotlin object from the database row when performing our query source and mapping it as a response in the Query.map() method.
22. Let's look at an easy data function with Ktor. In the example below we created a new post.
override fun createPost(userId: Long, post: CreateEditPostModel): Long {
        return db.insertAndGenerateKey(Posts) {
            set(it.userId, userId)
            set(it.title, post.title)
            set(it.text, post.text)
            set(it.visible, post.visible)
            set(it.tag, post.tag)
            set(it.createdTime, LocalDateTime.now())
            set(it.backColor, post.backColor)
            set(it.sign, post.sign)
            set(it.signColor, post.signColor)
        } as Long
    }
After creating a record in the database, this method returns the ID of the post, and then we can apply this ID for the Post Object and return the fully created object.
It is good to consider joining the tables for some more complicated functions. We can do this in two ways: either by using the joining field in the Entity or by the Joining command when performing the SQL query. For joining a field from another table, we just need to set references to another table on the join ID column; in our case, we have the userId column, and by it, we have references to the User table.
object Messages : Table<Message>("message") {
    val id = long("id").primaryKey().bindTo { it.id }
    val userId = long("userId").references(Users) { it.user }
    val roomId = long("roomId").bindTo { it.roomId }
    val text = varchar("text").bindTo { it.text }
    val createdTime = datetime("createdTime").bindTo { it.createdTime }
}
In the repository, we just receive a User object together with a Messages object.
val list = db.from(Messages)
            .joinReferencesAndSelect()
            .where { condition }
            .orderBy(Messages.id.asc())
            .limit(pagination.size)
            .offset(pagination.firstIndex)
            .map {
                val message = Messages.createEntity(it)
                MessageModel(
                    message.id,
                    message.user.id,
                    roomId,
                    message.text,
                    message.createdTime.format(DateTimeFormatter.ISO_DATE_TIME),
                    UserMessageModel(
                        message.user.id, message.user.username,
                        AvatarModel(message.user.avatarUrl)
                    )
                )
            }
Joining in QuerySource looks like this:
val list = db.from(PostUserLikes)
            .leftJoin(Posts, on = PostUserLikes.postId eq Posts.id)
            .leftJoin(Users, on = PostUserLikes.userId eq Users.id)
            .leftJoin(RoomsToUsers, on = Posts.id eq RoomsToUsers.roomId and (RoomsToUsers.userId eq userId))
            .select()
            .where { condition }
            .orderBy(Posts.id.desc())
            .limit(pagination.size)
            .offset(pagination.firstIndex)
            .map {
                PostModel(
                    it[Posts.id]!!,
                    UserPostModel(it[Users.id], it[Users.username], it[Users.avatarUrl]),
                    it[Posts.title]!!,
                    it[Posts.text]!!,
                    it[Posts.visible]!!,
                    it[Posts.tag]!!,
                    it[Posts.backColor]!!,
                    it[Posts.likes]!!,
                    PostMemberModel(it[RoomsToUsers.id] != null, it[PostUserLikes.id] != null),
                    it[Posts.createdTime]!!.format(DateTimeFormatter.ISO_DATE_TIME),
                    it[Posts.sign]!!,
                    it[Posts.signColor]
                )
            }
23. We can get a field of any object which we have joined by table names and their names. Everything we shared about Ktorm shows that the default query builder has great functionality and can solve virtually any task with the database entities. It is easy to read because it’s very similar to what it looks like in the clear SQL.
One more thing we want to show you about this ORM is how to implement a search filter for posts by their title and content.
var condition = PostUserLikes.userId eq userId
if (search != null) {
    condition = condition and (Posts.title like (search.search) or (Posts.text like (search.search)))
}
Some final words about the Ktor framework and our experience
That’s it: the backend for our wellness app is finished. In this article, we wanted to show how to easily create a backend application using the Ktor framework, which is based on Kotlin. Brevity combined with a modern approach to development containing all new features makes up a satisfying and effective coding process. There is no reason to worry that Ktor cannot replace Spring Boot.
Remember that we are looking at the process from a mobile development team’s view. Using one ecosystem for Android and backend programming brings the advantage of one person handling both frontend and backend projects (we will discuss using Ktor for frontend in the next part of this tutorial) without long onboarding and while utilizing new technologies. Almost all things we covered in this tutorial are familiar to the Android developers with 1-2 years of experience.
With a convenient build system, you can easily deploy your demo server. It is a good boost to start, agree? You don't need to pay anything to support your MVP stage on Heroku and Amazon Elastic Beanstalk. You can use various plugins and libraries to assemble the project to your liking. Documentation and monitoring plugins are included in our project too.
As for now, we are sure that developing your own service on Ktor is better than using Firestore DB because it is easy to read and support, works faster, and is simpler to maintain if you have two and more clients. Additionally, the performance with a custom backend always will be finer, and it can resolve more challenging tasks, like migrations.Ktor Client is a part of Multiplatform development. We can consume microservices on Android, iOS, or JS with it. We will share more details about the Ktor client in the next chapter.
In the second part of this tutorial, we will work on the frontend of our application, so stay tuned to see the final results of our work!
Review the full project on our Github repository: Backend repository