When someone says e-commerce app, what do you imagine? An online shop? A marketplace? A booking platform? Yes, all of the above are e-commerce apps. But e-commerce is not limited to these. For example, we came up with an idea of how to develop eCommerce app in Android that doesn’t sell anything but rather helps users with making informed choices.
Sounds interesting? Then, we can show how to create an eCommerce grocery price comparison app on Android. You might simply choose to check out our results and think (we hope so), “That’s pretty cool,” find out something new about creating an eCommerce application from scratch using Jetpack Compose, or maybe go all in and actually build an eCommerce app.

Why create an Ecommerce app
Before we get down to business, let’s take some time to explore the world of mobile e-commerce and answer the question of why it is a great idea to create eCommerce app and, more precisely, make a price comparison app for online shopping.
These days people shop for groceries online more than ever before. There are many reasons for that — starting from the increasing convenience of the web and mobile shopping solutions and ending with the pandemic-related offline shopping restrictions. At some point, we got used to making purchases from our smartphones so much that the popularity of such solutions is only rising.
It seems like there is no better time to create an e-commerce application than now — users have enough reasons to switch to an app and are already familiar with the convenience of it. That’s why today we will be building an eCommerce comparison app from scratch.

Pricey: an app for comparing prices
We love a good experiment here at Perpetio. While working on projects for clients, we always combine the set requirements and our professional vision. To develop this vision and constantly master our skills, we play around with pet projects and tutorials like this one.
Not so long ago, we came up with an idea to build an online price comparison app called Pricey. It is not your usual online market but rather an aggregator that unities numerous shops to help users make a better choice when it comes to the retail price or freshness of a product.
How to build an Android e-commerce app from scratch
Now that you know all about our Pricey app, let’s get started and develop an Android eCommerce price comparison app. By following this tutorial step by step, you can fully create an eCommerce price comparison app for Android on your own. We will also attach the link to the code, so you can peak on it when needed.
Setting up the project and creating the main page
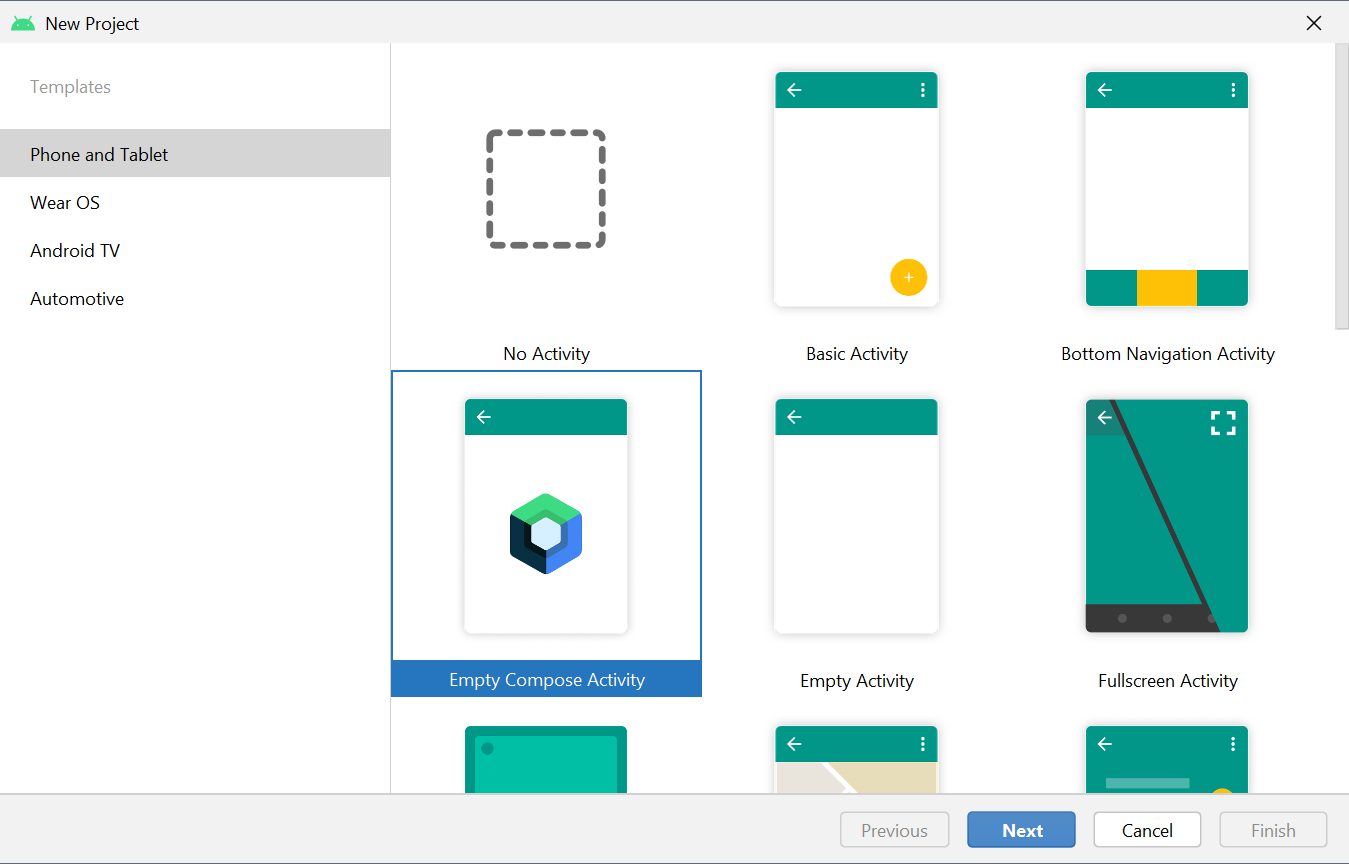
To build a mobile eCommerce comparison app, we will be using Jetpack Compose, which is a tool for building native UIs. Let’s create a new project and choose ComposeActivity.
Next on, we will enter some information about our future app, like its name and location.

Our goal with this project is to demonstrate how to work with declarative UI, so we will be using a mock database to make things easier for ourselves. Our choice is DataProvider.
The database will include the following objects:
- Store
- StoreChain
- FoodCategories
- ProductArticle
- Product
Like in many other projects, we are using MVVM architecture to build the app. We explained the perks of it here. Our architecture includes two ViewModels:
- FilterViewModel (for setting up filters and product search)
- BasketViewModel (for products in the basket)
All the pages of our app are composable functions, and MainActivity is a host for displaying those.
Here’s how to write the interface of our main page:
@Composable
private fun AppUi(
    filterViewModel: FilterViewModel,
    basketViewModel: BasketViewModel,
    isDarkTheme: Boolean,
    onThemeChange: (isDarkTheme: Boolean) -> Unit,
) {
    val navController = rememberNavController()
    val backstackEntry = navController.currentBackStackEntryAsState()
    val currentPage = AppPage.fromRoute(backstackEntry.value?.destination?.route)

    Scaffold(
        bottomBar = {
            BottomBar(
                allPages = AppPage.values().toList(),
                currentPage = currentPage,
                onTabSelected = { page ->
                    navController.navigate(page.name)
                },
                isDarkTheme = isDarkTheme,
                onThemeChange = onThemeChange
            )
        }
    ) { innerPadding ->
        NavigationHost(
            filterViewModel = filterViewModel,
            basketViewModel = basketViewModel,
            navController = navController,
            modifier = Modifier.padding(innerPadding)
        )
    }
}
The bottom navigation panel
To create a bottom navigation panel, we described the BottomBar component and passed it the list of all the app’s pages defined in the AppPage.

enum class AppPage(
    val iconResId: Int? = null
) {
    ListPage(
        iconResId = R.drawable.ic_home
    ),
    ComparisonPage,
    FilterPage,
    BasketPage(
        iconResId =R.drawable.ic_basket
    );
    ...
}
Let’s take a look at the Navigation file. Here, we describe how to connect all the app’s pages and pass the required dependencies.
@Composable
fun NavigationHost(
    filterViewModel: FilterViewModel,
    basketViewModel: BasketViewModel,
    navController: NavHostController,
    modifier: Modifier,
) {
    NavHost(
        navController = navController,
        startDestination = AppPage.ListPage.name,
        modifier = modifier
    ) {
        composable(
            route = AppPage.ListPage.name
        ) {...}
        composable(
            route = AppPage.ComparisonPage.name
        ) {...}
        composable(
            route = AppPage.FilterPage.name
        ) {...}
        composable(
            route = AppPage.BasketPage.name
        ) {...}
    }
}
The List Page
Now, moving on to the List Page. Here, users can view the list of items in a certain category and use search to look up a particular product.

fun searchOfProductArticles(
    partOfProductName: String,
    foodCategory: FoodCategory
): List<ProductArticle> {
    val result = mutableListOf<ProductArticle>()
    DataProvider.productArticles.forEach { article ->
        article.apply {
            if (this.foodCategory != foodCategory) return@apply
            if (!this.name.startsWith(partOfProductName, true)) return@apply
            result.add(article)
        }
    }
    return result
}
Jetpack Compose uses a declarative approach, so when calling the Composable function, our interface gets updated right away. We don’t want to call the recomposition manually each time, so let’s ask the framework to do it. The mutableStateOf() method allows us to track the changes in the needed value and, when any change is noticed, update the interface.
composable(
    route = AppPage.ListPage.name
) {
    var searchQuery by remember {
        mutableStateOf("")
    }
    var selectedCategory by remember {
        mutableStateOf(DataProvider.foodCategories[0])
    }
    var productArticles by remember {
        mutableStateOf(
            filterViewModel.searchOfProductArticles(
                searchQuery, selectedCategory
            )
        )
    }
    ListPage(...)
}
We are using the remember method for saving the current value state during recomposition.
The app opens the list of available stores after the user enters the product they are looking for.
Users can adjust the filters to find the best price for a particular product.
fun sortProducts(
    products: List<Product>,
    sortValue: SortValue,
    sortType: SortType
): List<Product> {
    val sortedList = products.toMutableList()
    when (sortValue) {
        SortValue.Price -> sortedList.sortBy { it.price }
        SortValue.Rating -> sortedList.sortBy { it.rating }
        SortValue.Expiration -> sortedList.sortBy { it.expirationDate }
    }
    if (sortType == SortType.Descending) {
        sortedList.reverse()
    }
    return sortedList
}
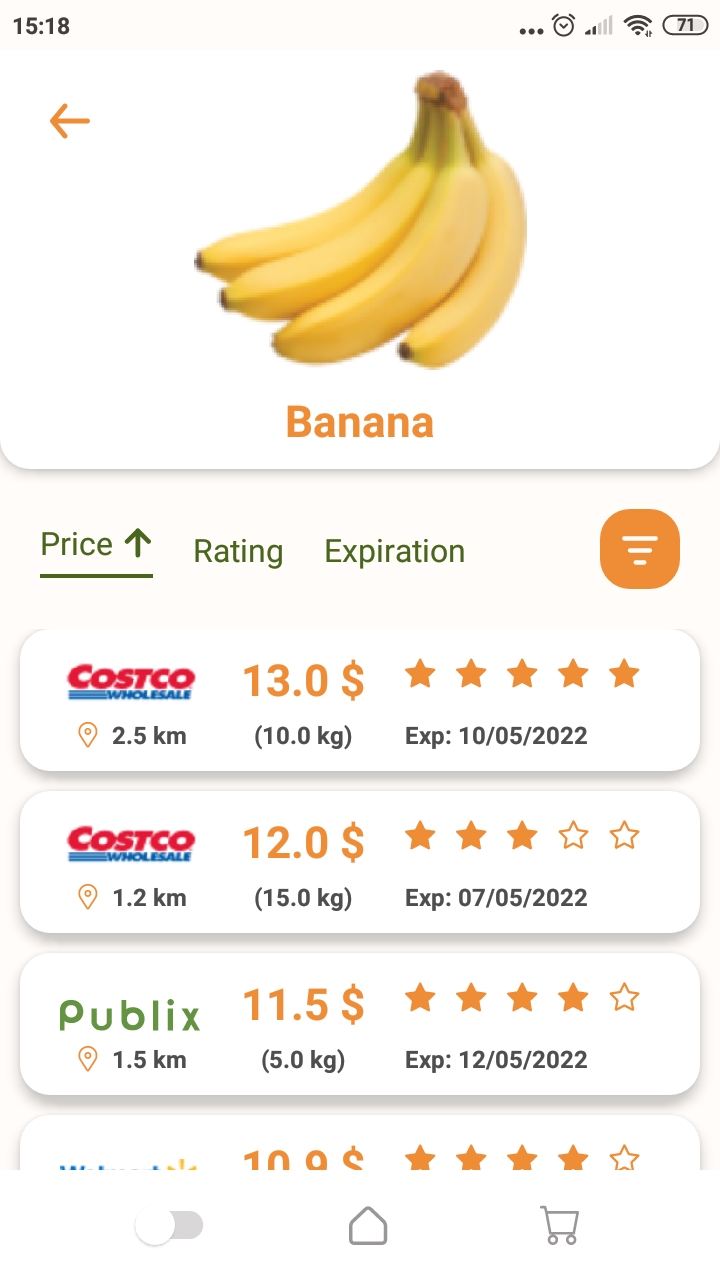
The Filter and Comparison Pages
The Filter Page contains all the necessary tools for sorting products by price, rating, or expiration date.
After saving the filters, they will be applied to the list on the Comparison Page.
fun filterProducts(
    productArticle: ProductArticle,
    priceFilter: ClosedFloatingPointRange<Float>,
    ratingFilter: Int,
    expirationFilter: ExpirationPeriod
): List<Product> {
    val filteredList = mutableListOf<Product>()
    getProducts(productArticle.name).forEach { product ->
        product.apply {
            if (price < priceFilter.start) return@apply
            if (price > priceFilter.endInclusive) return@apply
            if (rating < ratingFilter) return@apply
            val days = DateManager.getDaysToDate(expirationDate)
            if (!expirationFilter.contains(days)) return@apply
            filteredList.add(this)
        }
    }
    return filteredList
}
The Basket Page
After selecting the best suiting products and adding them to the basket, users can view all the items on the Basket Page.
To organize the list of products in the basket, we used the LazyColumns component (it is an alternative to RecyclerView in Compose).
@Composable
private fun BasketList(
    basketList: List<BasketProduct>,
    onProductRemove: (BasketProduct) -> Unit
) {
    LazyColumn(
        contentPadding = PaddingValues(
            horizontal = Dimen.Space.max
        )
    ) {
        var store: Store? = null
        var products = mutableListOf<BasketProduct>()
        basketList.sortedWith(
            compareBy(
                { it.store.chain.name },
                { it.store.remoteness }
            )
        ).forEach { product ->
            if (store != product.store) {
                store?.let {
                    storeItem(
                        store = it,
                        products = products,
                        onProductRemove = onProductRemove,
                        scope = this
                    )
                    products = mutableListOf()
                }
                store = product.store
            }
            products.add(product)
        }
        store?.let {
            storeItem(
                store = it,
                products = products,
                onProductRemove = onProductRemove,
                scope = this
            )
        }
    }
}
LazyColumns has an incredibly flexible functionality, so it is easy to create embedded lists just like we need.
private fun storeItem(
    store: Store,
    products: List<BasketProduct>,
    onProductRemove: (BasketProduct) -> Unit,
    scope: LazyListScope
) {
    var total by mutableStateOf(getTotal(products))
    scope.apply {
        item {
            Spacer(modifier = Modifier.padding(Dimen.Space.main))
            StoreTitle(store)
            Spacer(modifier = Modifier.height(Dimen.Space.main))
        }
        products.forEach { product ->
            var basketAmount by mutableStateOf(product.basketAmount)
            item {
                ProductItem(
                    product = product,
                    basketAmount = basketAmount,
                    onAmountUpdate = { newAmount ->
                        total -= basketAmount * product.price
                        total += newAmount * product.price
                        basketAmount = newAmount
                        product.basketAmount = newAmount
                    },
                    onProductRemove = onProductRemove
                )
                Spacer(modifier = Modifier.height(Dimen.Space.main))
            }
        }
        item {
            TotalCost(total)
            Spacer(modifier = Modifier.padding(Dimen.Space.main))
        }
    }
}
Changing the app’s theme
Before we finish to create an ecommerce price comparison app, a few words about changing the theme of the app. Each of us has preferences when it comes to using either light or dark themes on our phones. We are giving this choice to our users too so that they can easily switch between two themes.
All the elements in Jetpack Compose are using the MaterialTheme settings. So, for changing the color theme (light or dark) we just need to replace the color list.
@Composable
fun PriceyTheme(
    isDarkTheme: Boolean,
    content: @Composable () -> Unit
) {
    val colors = if (isDarkTheme) {
        DarkColorPalette
    } else LightColorPalette

    val systemUiController = rememberSystemUiController()
    systemUiController.setSystemBarsColor(colors.background)

    MaterialTheme(
        colors = colors,
        typography = Typography,
        shapes = Shapes,
        content = content
    )
}
The final results
And that’s it! These are all the steps we took to create an e-commerce app for looking up products and choosing the best store to get them. As a result, we learned how to make an eCommerce app from scratch. Now, we can launch a mobile ecommerce comparison app that helps users with their inquiries in just a few taps.
Jetpack Compose is a great tool for creating vivid and clear UIs with no extra effort, which is exactly what we need to create an ecommerce app. You see for yourself how smooth and straightforward the process is. Page by page, you can follow our tutorial, test your skills with Jetpack Compose, and build eCommerce app from scratch too.
You can find the full project’s code on our GitHub.
FAQ
How much does it cost to make e-commerce app?
An eCommerce app development can cost anything between $20-40 000.
What makes up the cost of a retail app?
The price of an e-commerce app depends on the feature set, its complexity level, the number of screens, chosen platforms and tech stack, and other factors.
How to build an eCommerce app?
Building an eCommerce app is no trouble for an experienced developer. You can view the detailed instructions in this tutorial or collaborate with a dedicated team to get your app developed.