Welcome back to Perpetio’s Clubhouse clone app tutorial! In Part 1, we did quite a bit of work. But, thanks to our efforts, the core of the app is complete. We can move on to our next task: Firebase integration. Throughout these steps, we will add our project to Firebase, set up authentication via a phone number, and, last, construct Firestore for our database.
Remember – while we chose Firebase, you can also use any other back-end for handling authentication and storing rooms.
Let’s go!
Step 1: Firebase Authentication setup
For our app, we picked verification via a mobile phone. How does it work? Firebase sends an OTP (One Time Password) to a user’s device automatically, which the user will then enter to access the app.
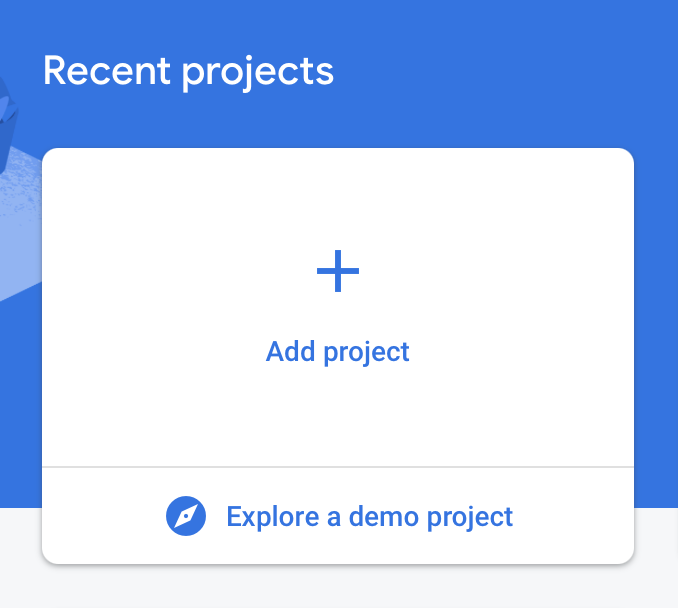
First, we need to create a new Firebase Project from the Firebase console and integrate it with our Flutter application. Let’s explore how to do this step by step:
- Visit Firebase’s official website: https://firebase.google.com.
- Create a new project by tapping on the Add project box.
3. Enter your Project name, select Analytics location, and tap on Create project. Firebase will set up a new project for you.
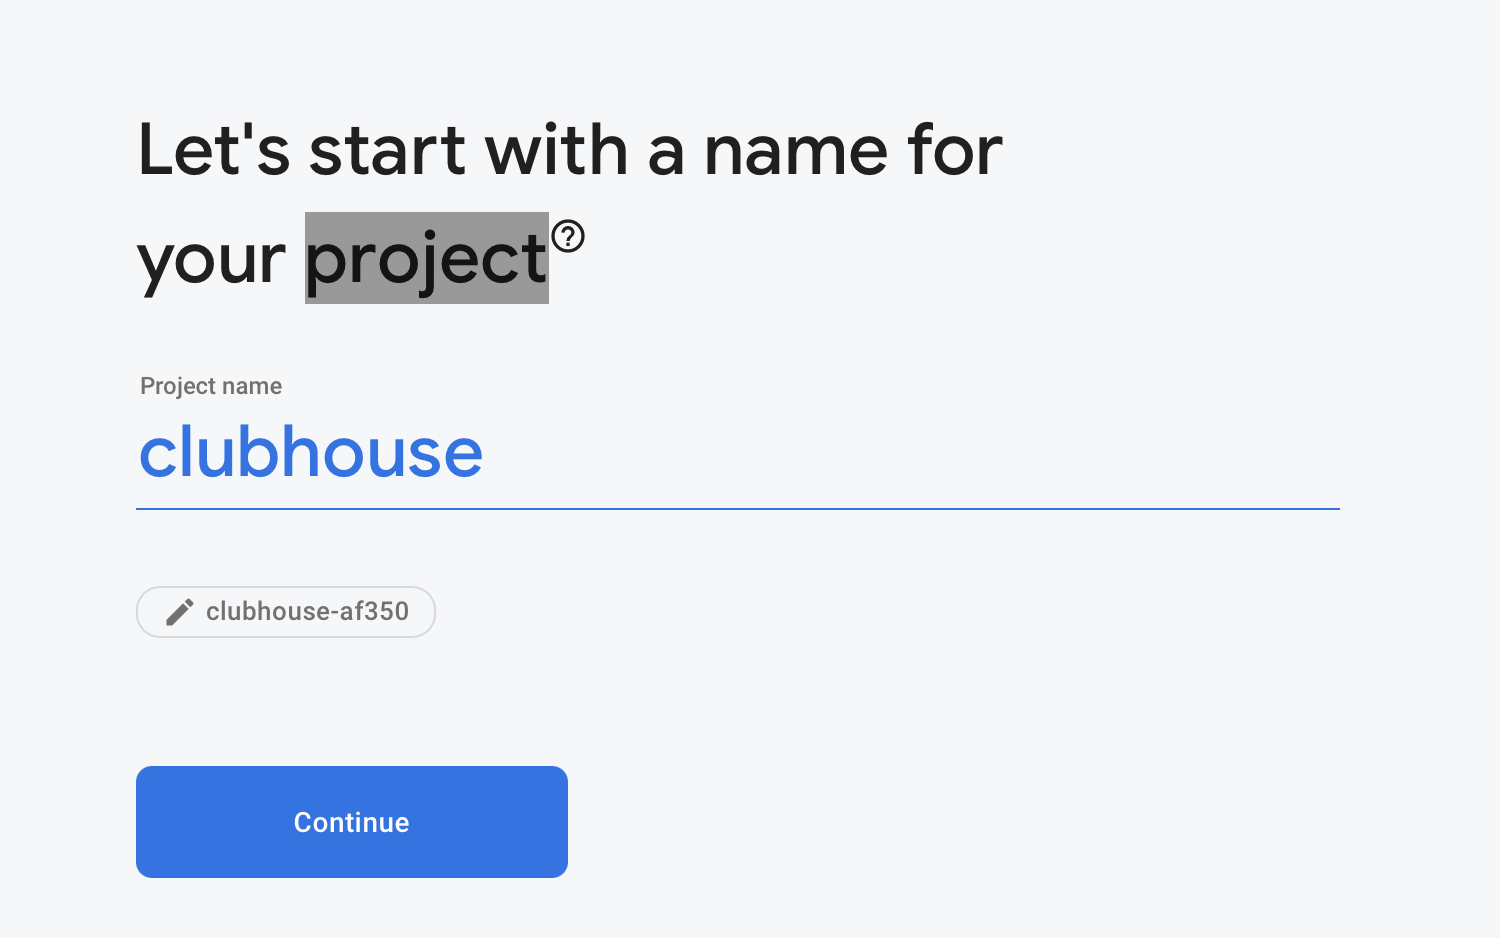
4. After your project is created, Firebase will display the following message – Your new project is ready – to confirm you are good to go.

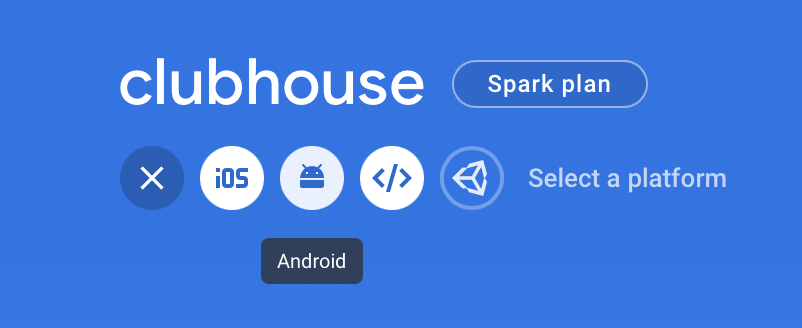
Configuring an Android app
Now, if you are working with an Android app, you will need to add a few configurations:
- Click on the Android icon.
2. Enter your Android package name and app nickname, then click on Register App. The app package name is usually the applicationId in the app-level build.gradle file.
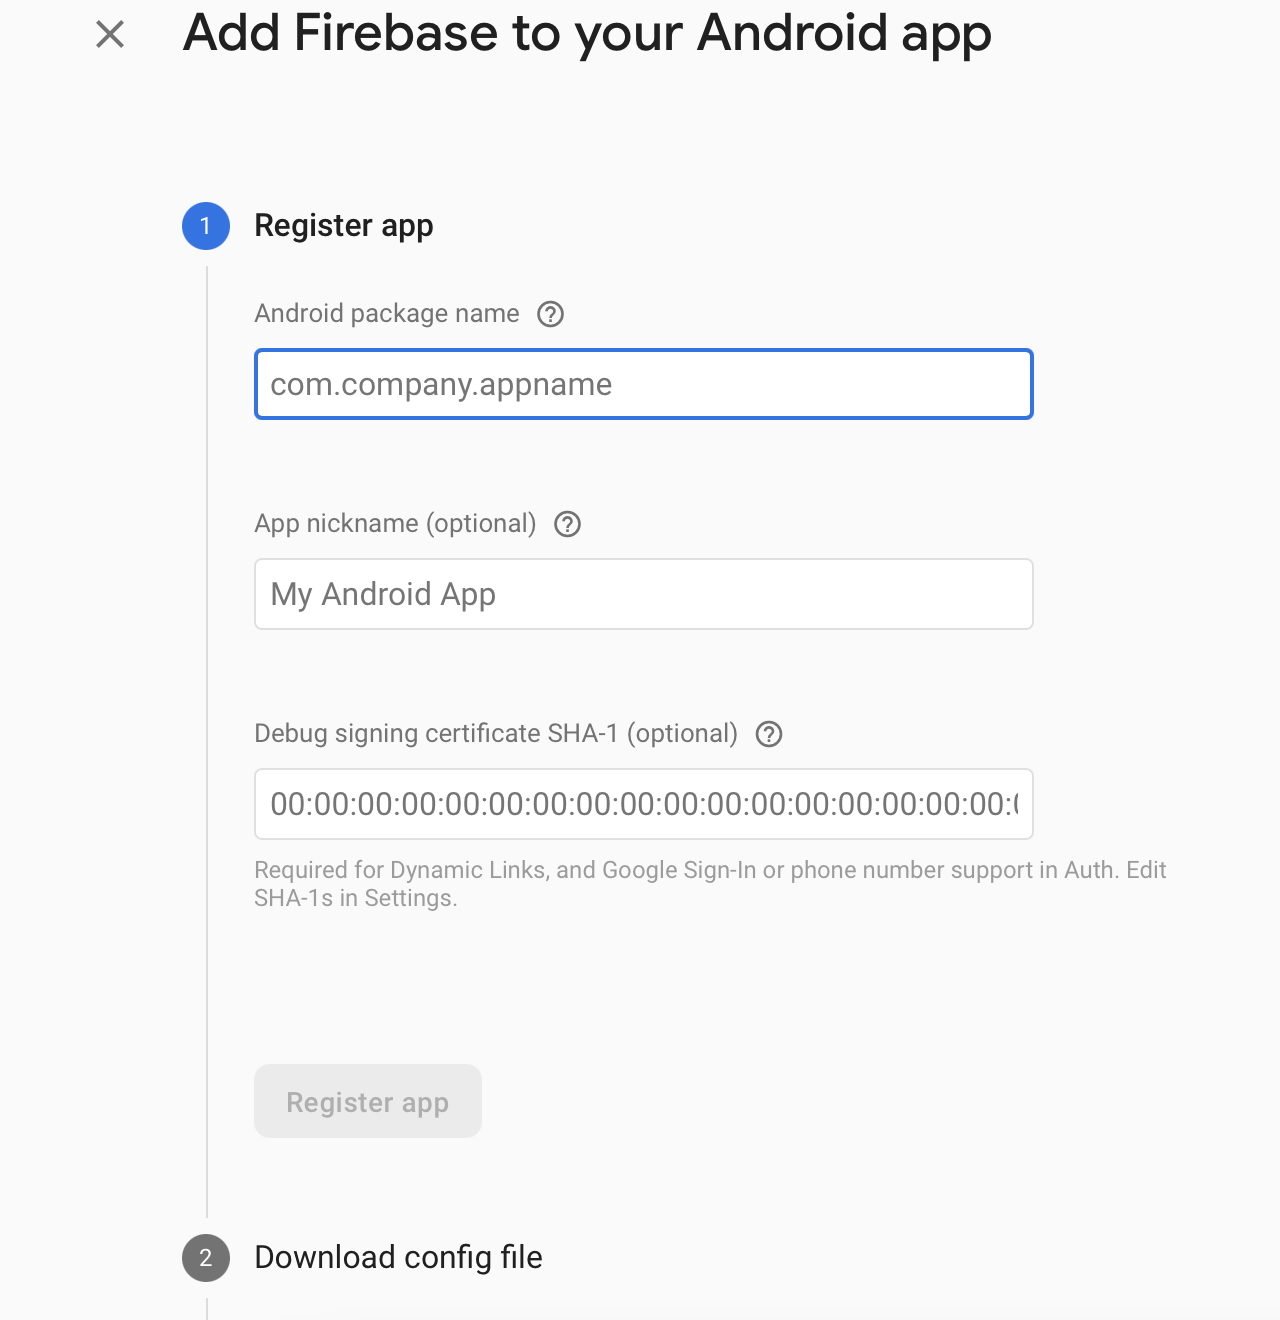
3. Download the google-services.json file and place it in the project’s app root directory.

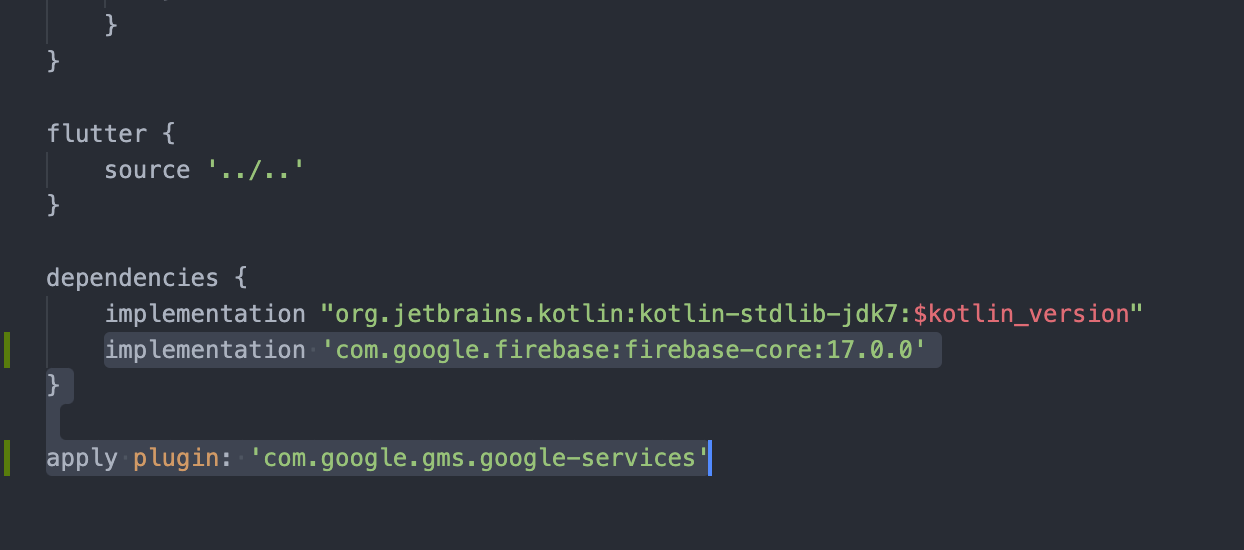
4. Modify your build.gradle files to use the plugin. Here’s how to do this for each file:
- Project-level build.gradle (<project>/build.gradle):

- App-level build.gradle (<project>/<app-module>/build.gradle):
5. And, finally, run flutter packages get. Well done!
Configuring an iOS app
If you chose an iOS app, the process is quite different. Here’s what you need to do:
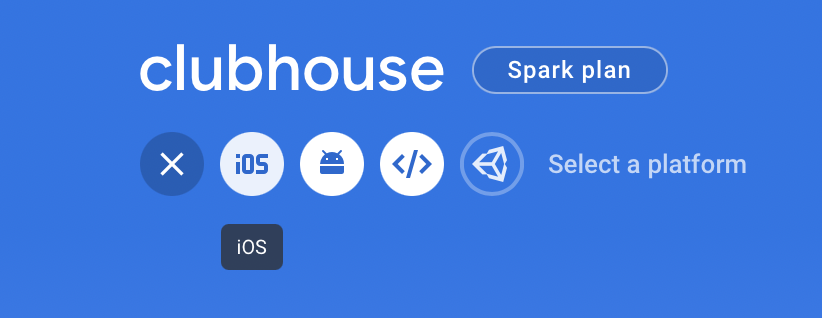
- Click on the iOS icon.
2. Enter your iOS bundle ID and app nickname and click on Register App. You can find your Bundle Identifier in the General tab for your app’s primary target in Xcode.
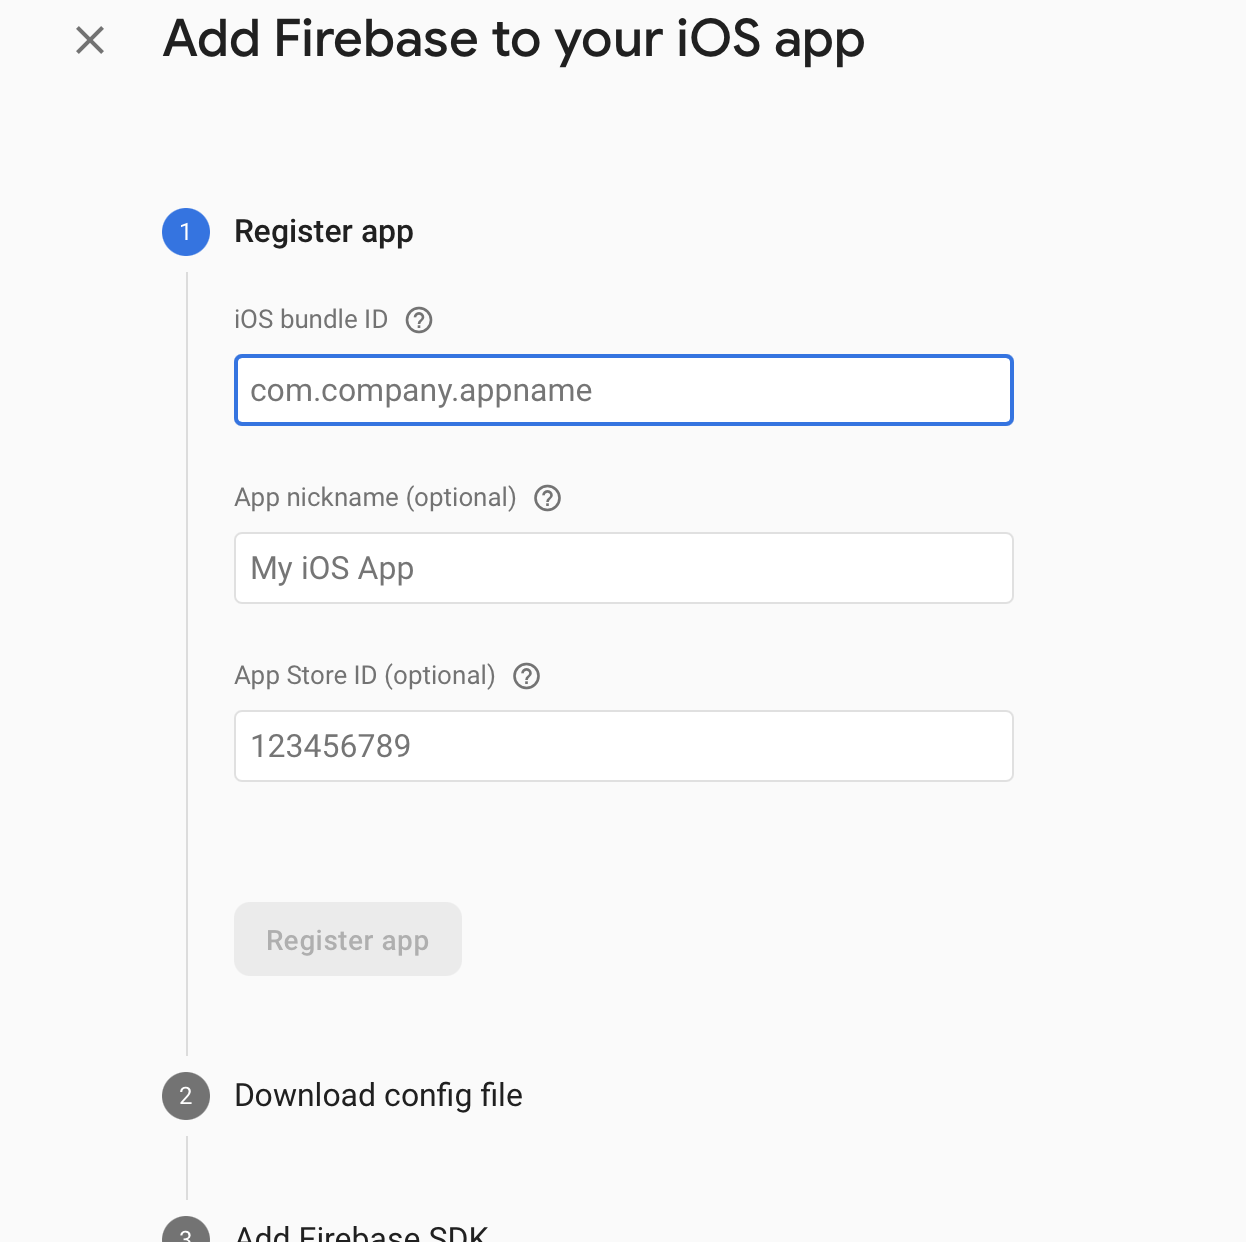
3. Download the GoogleService-Info.plist file, move it into the root of your Xcode project, and add it to all targets.

4. The same as with the Android app, run flutter packages get.
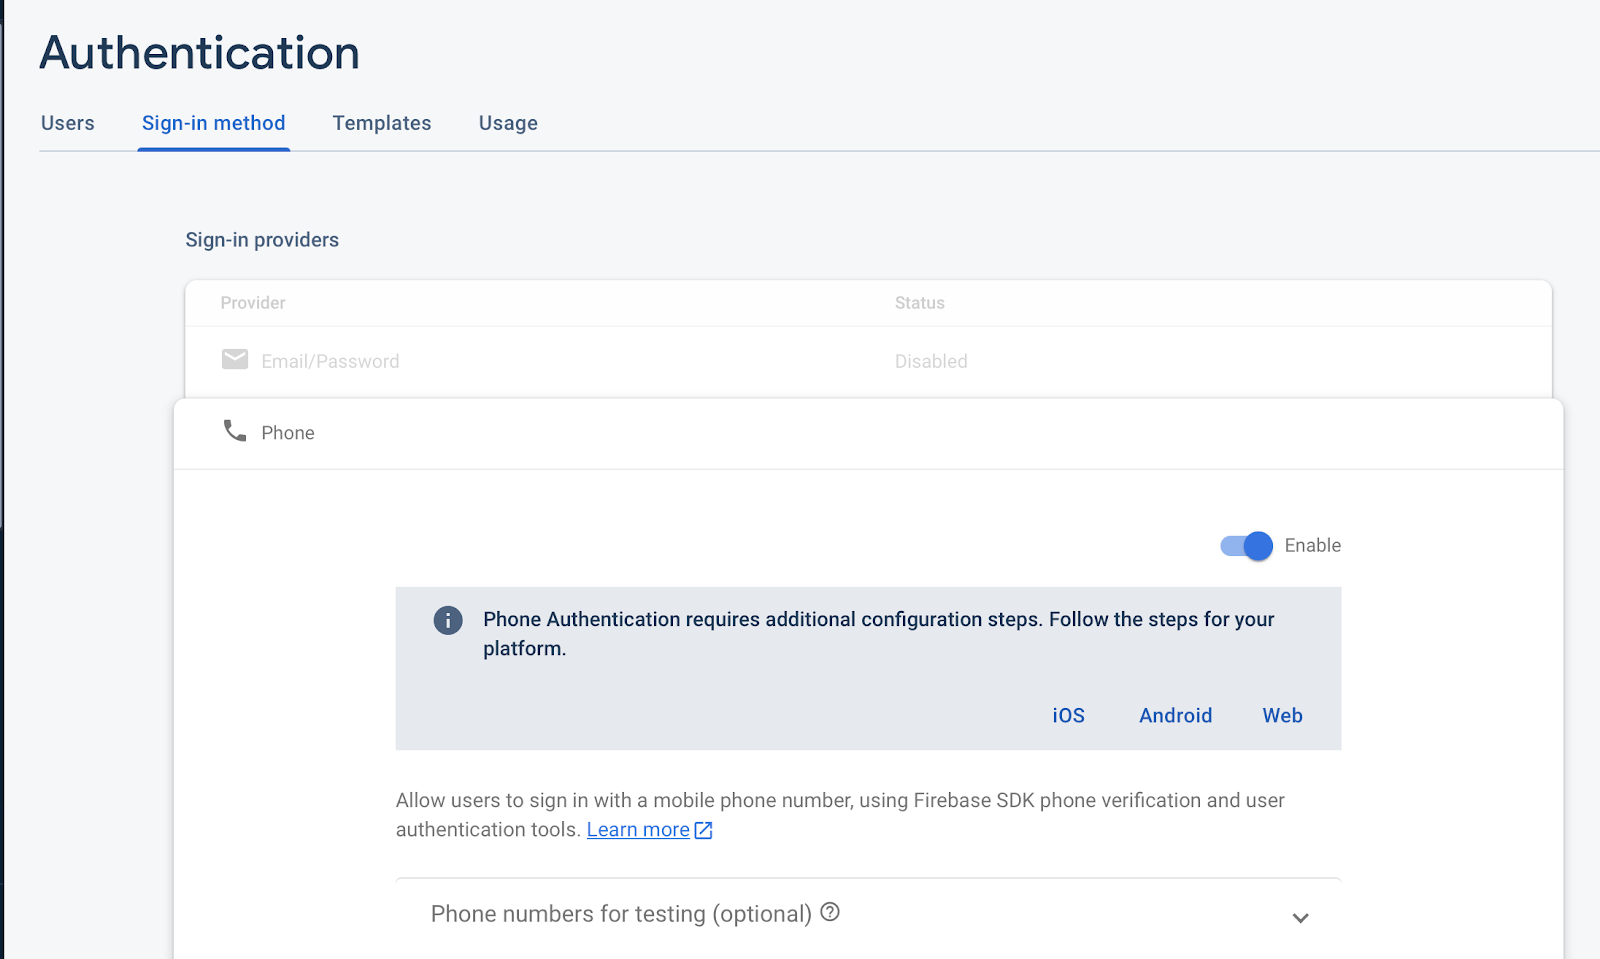
Our task now is to enable phone verification. For this, we need to go to the Firebase console and open the Authentication tab from the left panel. Once you’re there, simply click on the Setup Sign up and enable phone verification – as simple as that.
The final step of the Firebase setup is to open the pubspec.yaml file in the project root directory and add Firebase authentication, Firebase core, and Cloud Firestore plugins.

Step 2: Enabling Firebase user verification
Perfect! Now, it's time to work on enabling user verification via a phone number. How do we do this?
We start by making a Future inside the PhoneScreen class. This is what we will use to verify the user. It looks like this:
Future<void> verifyPhone(phoneNumber) async {
   final PhoneVerificationCompleted verified = (AuthCredential authResult) {
     AuthService().signIn(context, authResult);
   };

   final PhoneVerificationFailed verificationfailed =
       (AuthException authException) {
     print('${authException.message}');
   };

   final PhoneCodeSent smsSent = (String verId, [int forceResend]) {
     this.verificationId = verId;

     Navigator.of(context)
         .pushNamed(Routers.sms, arguments: this.verificationId);
   };

   final PhoneCodeAutoRetrievalTimeout autoTimeout = (String verId) {
     this.verificationId = verId;
   };

   await FirebaseAuth.instance.verifyPhoneNumber(
       phoneNumber: phoneNumber,
       timeout: const Duration(seconds: 5),
       verificationCompleted: verified,
       verificationFailed: verificationfailed,
       codeSent: smsSent,
       codeAutoRetrievalTimeout: autoTimeout);
 }
Okay, quite a few things are going on here. Let’s review each one:
- phoneNumber is the mobile number that we will use to verify the user.
- timeout is the time after which the OTP expires.
- verificationCompleted is the callback identifying the successful verification.
- verificationFailed is the opposite: it gets called if the verification failed due to an incorrect phone number or code.
- codeSent gets called when the OTP is sent to the device.
- codeAutoRetrievalTimeout identifies the time needed for the code’s auto retrieval.
For the AuthCredential, we need the verification ID generated by Firebase for every code; you can retrieve this in the codeSent. You will also need the OTP that the user has just received. Basically, what’s happening here is the user is entering the received code. This is how it looks:
signInWithOTP(BuildContext context, smsCode, verId) {
   AuthCredential authCreds = PhoneAuthProvider.getCredential(
       verificationId: verId, smsCode: smsCode);
   signIn(context, authCreds);
 }
verificationCompleted gives you the authCredential object for signing in. You just need to use signInWithCredential Future provided by Firebase Authentication.
signIn(BuildContext context, AuthCredential authCreds) async {
   AuthResult result =
       await FirebaseAuth.instance.signInWithCredential(authCreds);

   if (result.user != null) {
     Navigator.of(context)
         .pushNamedAndRemoveUntil(Routers.home, (route) => false);
   } else {
     print("Error");
   }
 }
After signing in with signInWithCredential, you can pass the user instance returned by Firebase authentication and finally arrive at the home screen.
Step 3: Setting up Firebase Cloud Firestore
The last thing we need to do with Firebase is set up Cloud Firestore. It’s a NoSQL and a document-oriented database. In our database, we are going to have collections of rooms, which have documents in them. A document has fields with data necessary for our app. So let’s begin arranging all of this!
- Turn Firestore on in the Firebase Console. Open it and go to the Database tab: click Create Database and select Start in testing mode.
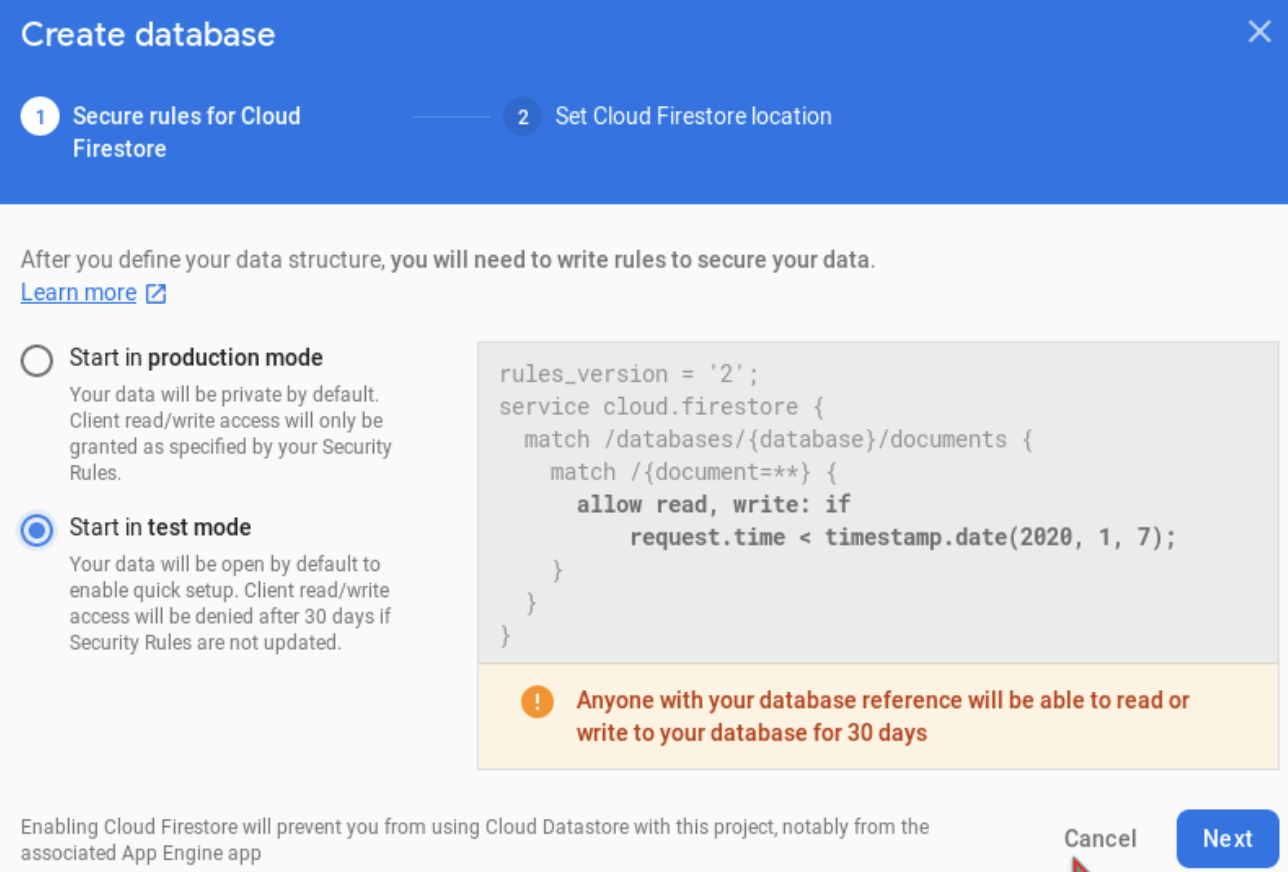
2. In Cloud Firestore Rules, change the line to the following: allow read, write: if true.
By adding this, we will be able to read and write data in Firestore.

3. With the database in place, it is time to write code. We will first work on the Start a room button by adding data on creating a new room when the user selects its type.
  HomeBottomSheet(
             onButtonTap: () async {
               await Firestore.instance.collection('rooms').add(
                 {
                   'title': '${myProfile.name}\'s Room',
                   'users': [profileData],
                   'speakerCount': 1
                 },
               );
             },
           ),
4. We should now be able to see the list of rooms on our screen. Next, we are going to work on the RoomsList to fetch data from Firestore.
StreamBuilder<QuerySnapshot>(
         stream: collection.snapshots(),
         builder:
             (BuildContext context, AsyncSnapshot<QuerySnapshot> snapshot) {
           if (snapshot.hasError) return Text('Error: ${snapshot.error}');

           return snapshot.hasData
               ? SmartRefresher(
                   enablePullDown: true,
                   controller: _refreshController,
                   onRefresh: _onRefresh,
                   onLoading: _onLoading,
                   child: ListView(
                     children: snapshot.data.documents
                         .map((DocumentSnapshot document) {
                       return buildRoomCard(
                         Room.fromJson(document),
                       );
                     }).toList(),
                   ),
                 )
               : Center(
                   child: CircularProgressIndicator(),
                 );
         },
       ),
5. We must also allow our users to delete rooms from Firestore by swiping left or right.
return Dismissible(
key: ObjectKey(document.data.keys),
onDismissed: (direction) {
collection.document(document.documentID).delete();
},
child: buildRoomCard(
Room.fromJson(document),
),
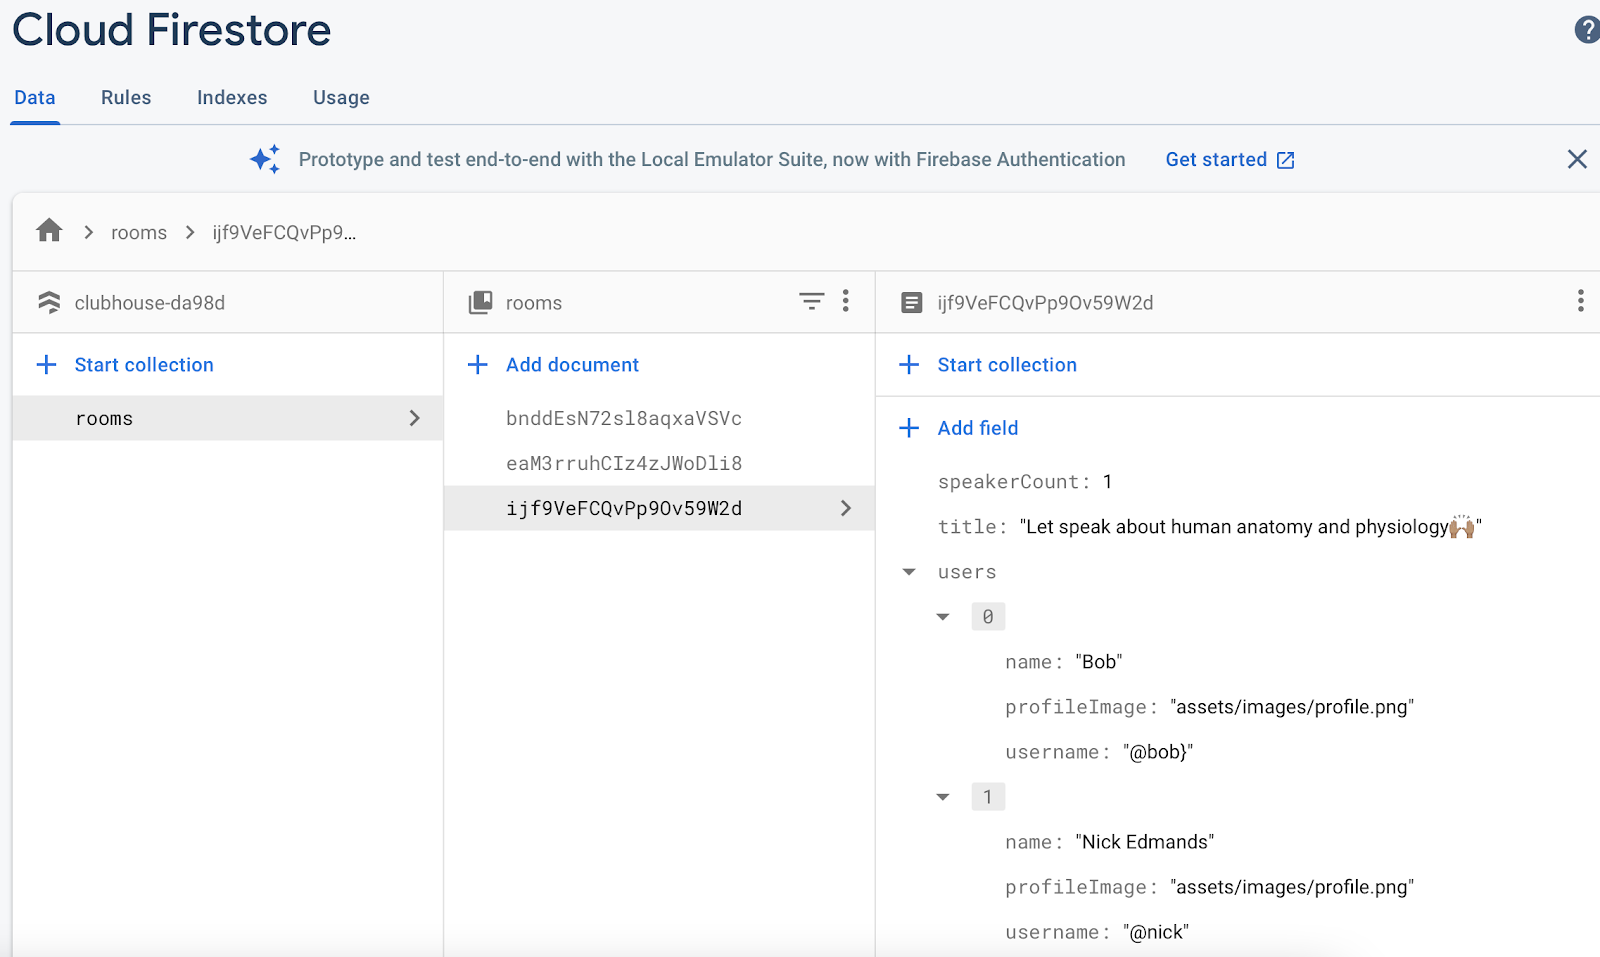
);6. As a result, you can see all this data on Cloud Firestore and change any of the fields as needed.
All done!
That’s it for today! You have completed each step of our Flutter app tutorial part two – from adding a new Firebase project to working on the Cloud Firestore database. It’s time to chill a bit and enjoy the results of your work. But not for long; Agora is waiting!
We will discuss adding voice calls to your Flutter app via Agora in part three of this tutorial. As for now, stay tuned and check out the entire project on Github.
If you have any questions about our app or want to discuss how our team can help you, contact us anytime.