Hello again, and welcome back to Perpetio’s Clubhouse clone app tutorial! In parts one and two, we showed you how to create an app from scratch in Flutter, as well as integrate Firebase authentication and Firestore database. Now, it’s time to focus on adding voice calling functionality into our app via Agora.
Agora is the platform behind all the magic in Clubhouse. It is a set of voice and video call SDKs that allows you to add these features to any app. Just like in the actual Clubhouse app, we are going to use Agora to add a voice chat function.
Step 1: Creating an Agora account
Setting up Agora is pretty simple. But still – let’s go through it step by step:
- Clearly, you start with creating an Agora account.
- After completing a simple registration process, you will find yourself on the dashboard page.

3. Now, you have to choose Navigate to Projects > Project List from the board on your left.
4. Enter your app ID in the required field and give your project a cool name – or any name.

Step 2: Incorporating Agora into the app
Now, the fun begins. It’s time to incorporate Agora into the very app. No worries, though, it's not too complicated.
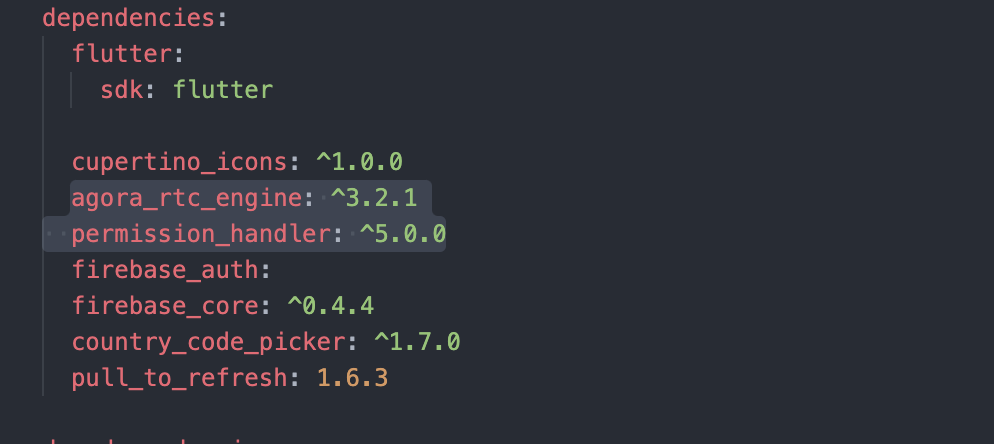
We will use Agora to make a voice call via the agora_rtc_engine and permission_handler packages to request user permissions and check their statuses.
- First, you need to add dependencies to your pubspec. yaml file. Just to remind you, this file can be found on the left panel of the Visual Studio Code.
2. Then, complete all the imports. Here’s a little hint on how it should look:
- import 'package:agora_rtc_engine/rtc_engine.dart';
- import 'package:permission_handler/permission_handler.dart';
3. Next, you need to run the flutter packages get in the terminal of the app’s root directory.
4. And, finally, set up the device permission. Otherwise, nothing will work – but we’re guessing you know that.
Step 3: Setting up Agora for Android and iOS
Depending on which platform you chose, be it Android, iOS, or both, the setup process varies. Let’s review how to complete each for these two systems.
If you need an Android app
With an Android app setup, you simply need to open the AndroidManifest.xml file via <project>/android/app/src/main and add the required device permissions.
<uses-permission android:name="android.permission.READ_PHONE_STATE"/>
        <uses-permission android:name="android.permission.INTERNET" />
        <uses-permission android:name="android.permission.RECORD_AUDIO" />
        <uses-permission android:name="android.permission.MODIFY_AUDIO_SETTINGS" />
        <uses-permission android:name="android.permission.ACCESS_NETWORK_STATE" />
        <uses-permission android:name="android.permission.BLUETOOTH" />
If you need an iOS app
For iOS, the process is even simpler. You just open the info. plist in the Xcode project and add these two points:
- Privacy — Microphone Usage Description and a note in the Value column.
- Privacy — Camera Usage Description and a note in the Value column.
Step 4: Making everything work!
It’s time to implement the code into your app. How? By following these steps:
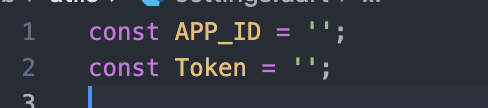
1. Find your app ID on the Agora dashboard and copy it to your clipboard. Next, generate a temporary token from the Agora console page.

In some cases, you’ll have to use the primary certificate key to copy and paste the token.
Replace the const in the settings.dart file in the <project>/lid/core folder.
2. Now, we need to create an Agora SDK instance in the RoomScreen (room_screen.dart).
Future<void> initialize() async {
   await _initAgoraRtcEngine();
   _addAgoraEventHandlers();
   await _engine.joinChannel(Token, widget.channelName, null, 0);
 }

 Future<void> _initAgoraRtcEngine() async {
   _engine = await RtcEngine.create(APP_ID);
   await _engine.enableAudio();
   await _engine.setChannelProfile(ChannelProfile.LiveBroadcasting);
   await _engine.setClientRole(widget.role);
 }
3. Then, we add Agora event handlers to our RoomScreen.
void _addAgoraEventHandlers() {
   _engine.setEventHandler(RtcEngineEventHandler(
     error: (code) {
       setState(() {
         print('onError: $code');
       });
     },
     joinChannelSuccess: (channel, uid, elapsed) {
       print('onJoinChannel: $channel, uid: $uid');
     },
     leaveChannel: (stats) {
       setState(() {
         print('onLeaveChannel');
         _users.clear();
       });
     },
     userJoined: (uid, elapsed) {
       print('userJoined: $uid');
       setState(() {
         _users.add(uid);
       });
     },
   ));
 }
Here you can observe three main event types happening in our app:
- joinChannelSuccess: notifies us when a current user joins the channel.
- leaveChannel: notifies us when a current user left the channel.
- userJoined: notifies us when a remote user joins the channel.
4. In the initState() of the RoomScreen widget, we run initialize() to initialize the Agora RtcEngine. Contrary to this, in dispose() we can deactivate the Agora RtcEngine, clear the users, and leave the channel.
@override
 void initState() {
   super.initState();
   initialize();
 }

 @override
 void dispose() {
   _users.clear();
   _engine.leaveChannel();
   _engine.destroy();
   super.dispose();
 }
5. We will now open the RoomScreen and add microphone permission for our user. After that, pass the user’s role to the widget so it can be utilized in AgoraEngine.
await Permission.microphone.request();
       openRoom(
         room: room,
         role: ClientRole.Audience,
       );
This is what the openRoom() function looks like:
openRoom({Room room, ClientRole role}) {
   showModalBottomSheet(
     isScrollControlled: true,
     context: context,
     builder: (context) {
       return RoomScreen(
         room: room,
         role: role,
       );
     },
   );
 }
6. When you decide to open your room for more users, the ClientRole.Audience is passed among them. This allows any user to become a listener in the room. If the user wants to speak, they can click on the hand button to select the ClientRole.Broadcaster. When you create the room, you get ClientRole.Broadcaster by default.
RoundedButton(
           onPressed: () {
             Navigator.of(context).pop();
             showModalBottomSheet(
               isScrollControlled: true,
               context: context,
               builder: (context) {
                 return RoomScreen(
                   room: widget.room,
                   role: ClientRole.Broadcaster,
                 );
               },
             );
           },
           color: AppColor.LightGrey,
           isCircle: true,
           child: Icon(Icons.thumb_up, size: 15, color: Colors.black),
         ),
7. When you open the RoomScreen and initialize Agora RtcEngine, you will transfer the channel name for joining a voice call. Enter the specific channel name you used in the Agora account when generating a temporary token and initialize it in settings.dart <project>/src/core.
8. After this step, another device running the same application might join the channel by initializing its name. It’s a great way to try out voice calling and see if you can conduct a voice call smoothly with different users.
If everything is working perfectly, congrats – your app is finished! How cool is that?
What makes Flutter a top choice for clone apps and MVPs?
Our team had fun recreating Clubhouse, and we hope you did too. There was no better choice than Flutter for this task as it is a cross-platform solution, allowing us to get a clone app or an MVP both for iOS and Android in the shortest amount of time.
Feel free to contact us to pose any questions on this tutorial or discuss how Flutter can be flattering to your project. Yeah, that was a pun but we simply couldn’t stop ourselves.
You can also view this project on our Github.