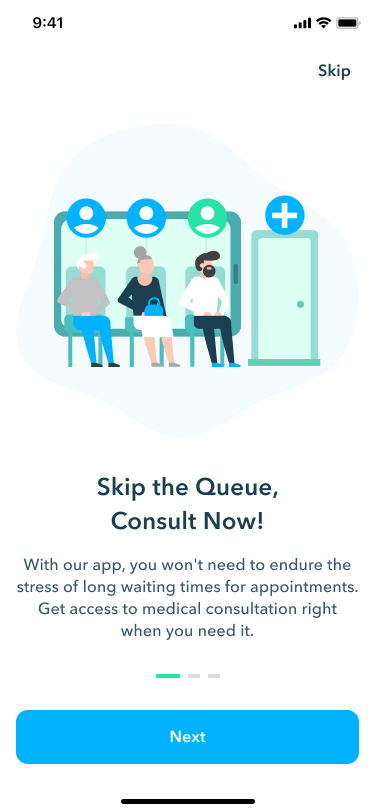
In the post-pandemic environment, getting a medical consultation doesn’t mean going to a hospital anymore. Doctors can now consult patients online via a video call, saving time for a hospital commute and making medical services more accessible for those who can’t get an offline appointment.
A mobile app is the most convenient way to get questions answered and concerns addressed by a medical professional online. Users can get video or audio consultations, pose questions in a chat, and get a digital copy of their conclusion and medicine prescription — all in one app.
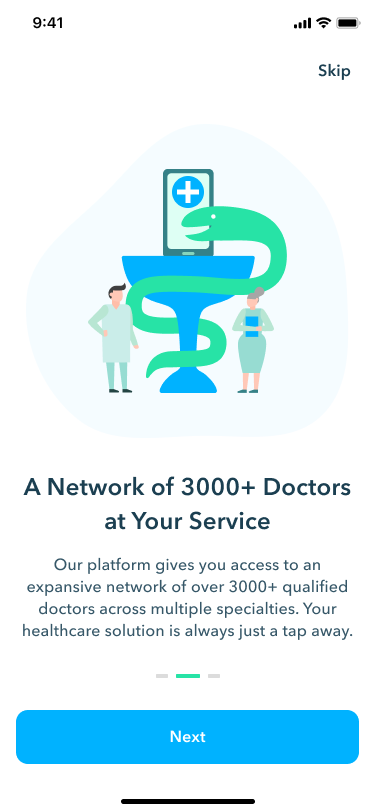
Recently, Perpetio completed a telehealth application that boasts a set of useful features for both patients and doctors. Let us share which features to include in a telemedicine app, which integrated services are must-haves for a successful product, and how to build a telehealth app step-by-step with React Native.
Top Features for a Telemedicine App
Combining all the offline appointment interactions in one mobile app is a challenging yet quite doable task. To make sure both patients and doctors can communicate the same way they would offline, we suggest dividing the application into two separate use cases: patient side and doctor side. From setting up an appointment for a certain day to sending prescriptions, a well-developed telemedicine app should cover all the stages of patient-doctor interaction.
Based on our telemedicine app, we are sharing top features for a medical application.
Patient side
Let’s begin with a must-have feature set for a patient user.
Home screen
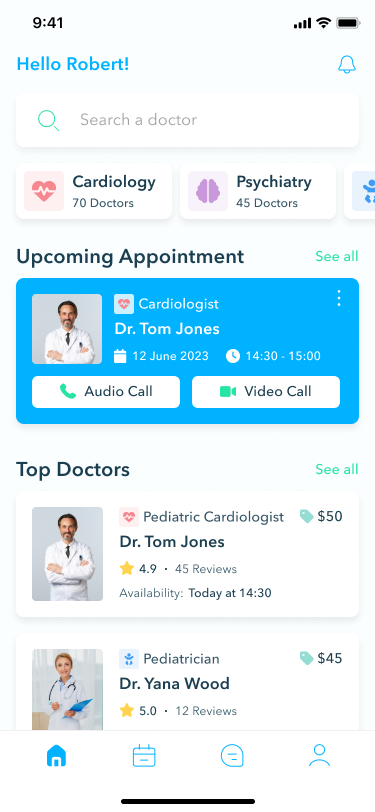
Any navigation path in the app starts with a home screen. Here, users can perform a set of actions that will take them to the corresponding screens:
- Search for a medical specialty or doctor’s name
- View upcoming appointments
- See top doctors
- Select a medical department (cardiology, psychiatry, etc)
By tapping on any of these sections, users can move forward to a dedicated screen, like viewing the details about their upcoming appointment.
Notifications

A notification system allows users to get timely updates about changes in their appointments. Plus, let’s be honest, it’s easy to forget about an appointment in our fast-paced world, so getting a reminder about the upcoming online consultation is useful too.
Users should also receive notifications about payment statuses and new messages from their doctor.
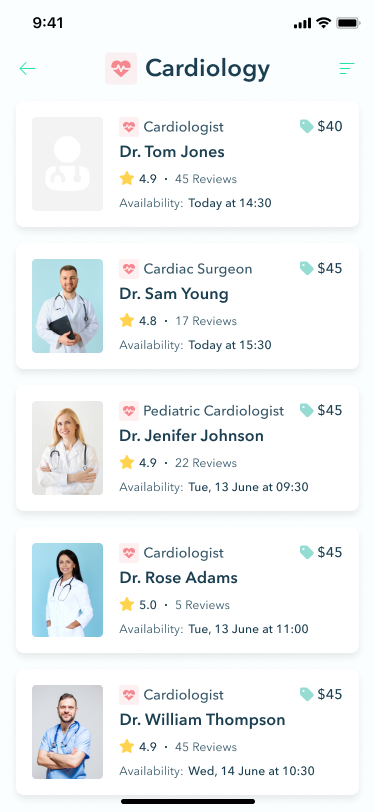
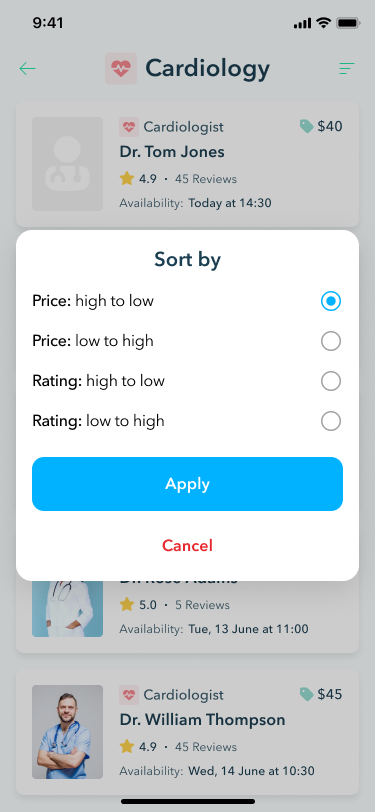
Category search
If a user has a particular medical issue they want to discuss, they might want to browse the available specialists in a chosen medical department, like cardiology. It’s best if users can sort doctors by price from high to low or vice versa, as well as their rating from high to low and vice versa, to find a specialist that matches their budget and expectations.
Doctor’s profile
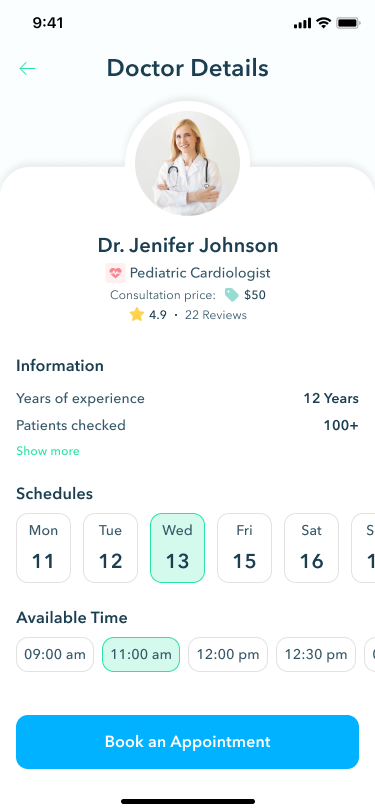
Patient users will want to view a doctor’s profile to learn more about their experience. The information on the profile can include
- Doctor’s specialization
- Consultation price
- Patient reviews
- Years of experience and patient count
- Available appointment time slots
Plus, users should be able to book an appointment right on the doctor’s profile.
Booking an appointment
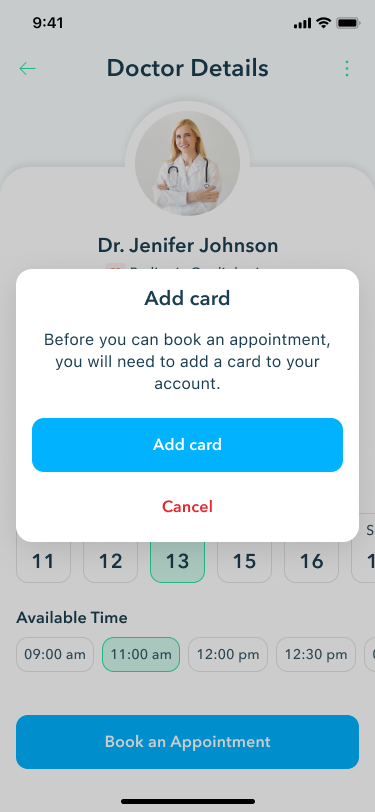
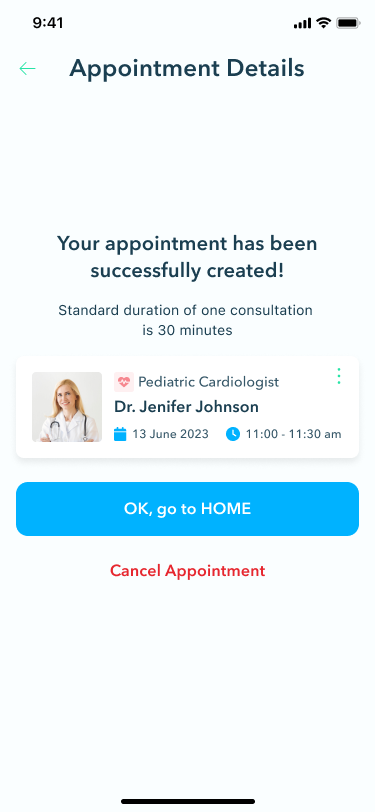
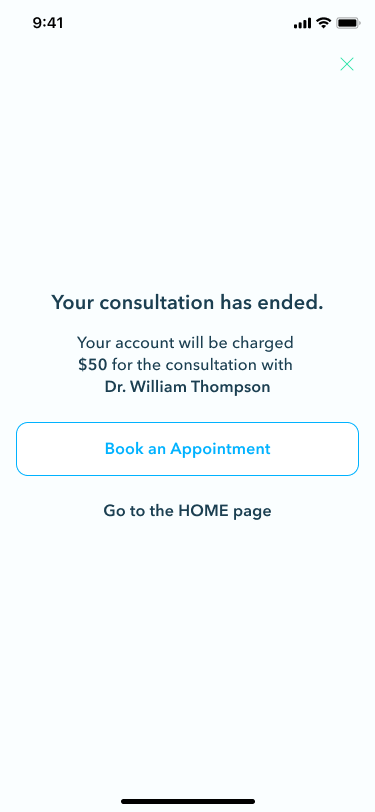
To book an appointment with a chosen doctor, users have to select an available date and time slot. Additionally, a telehealth app needs a payment system integration to process the appointment fee. For Perpetio’s telehealth app, we decided to add a pop-up screen with information about a payment request.
It’s important that patients can cancel their appointments if their plans change.
Your appointments
After a user creates an appointment, all the information about it is available in the Your Appointments section. It contains all the upcoming and past appointment information, like date, time, and doctor’s name.
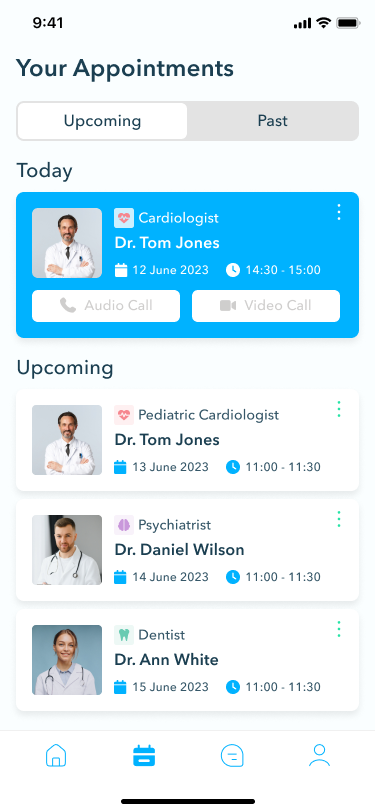
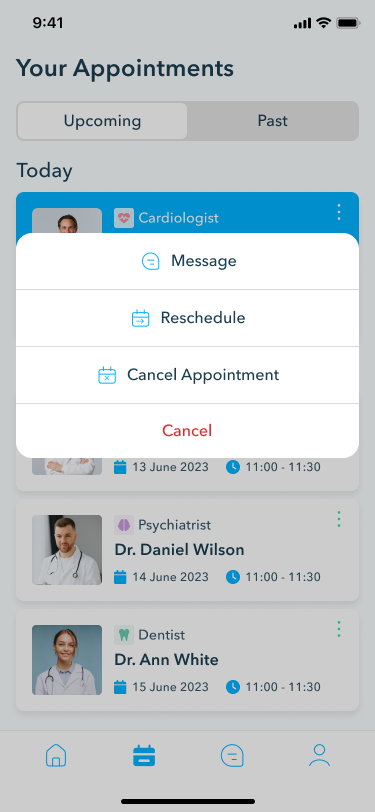
Plus, canceling an appointment, rescheduling it, and sending the doctor a message are important functions that give users control over the upcoming appointment.
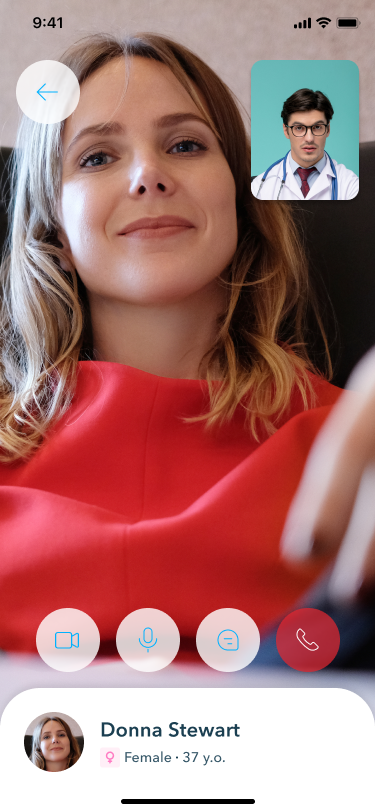
Audio and video call functionality
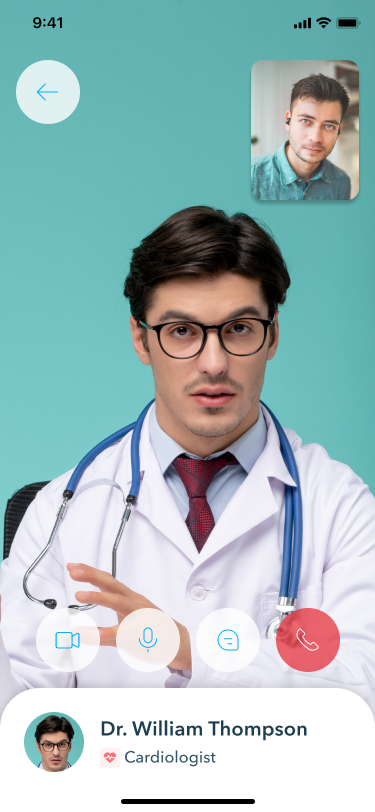
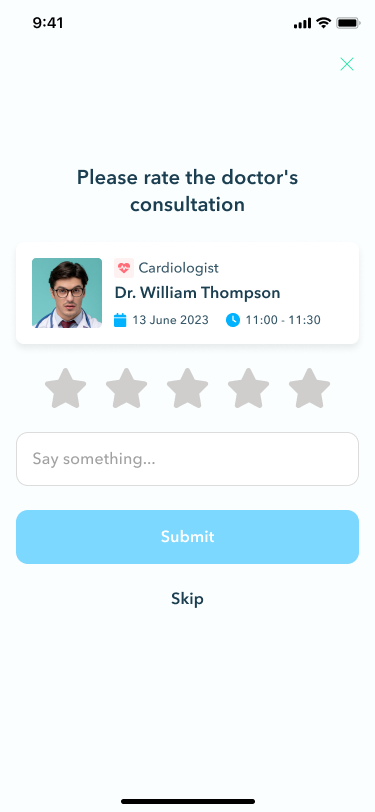
Audio and video calls are must-haves for a telehealth app. You can choose one of the services to integrate this functionality, for example, Agora.
Additionally, users should be able to rate the consultation post-call and leave reviews. An automatic payment pop-up ensures seamless transactions, providing users with a hassle-free and secure experience during and after consultations.
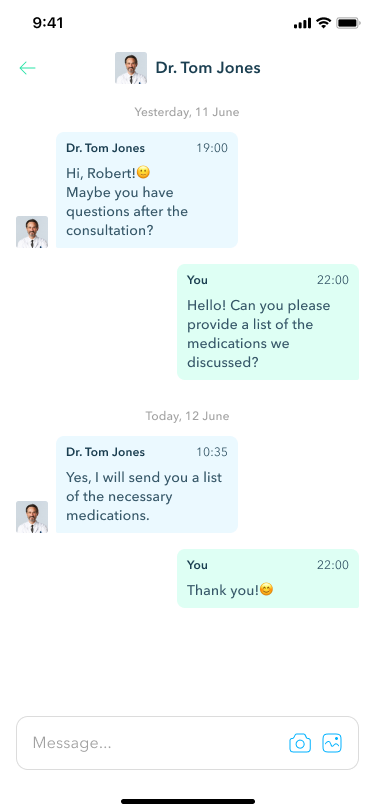
Messages
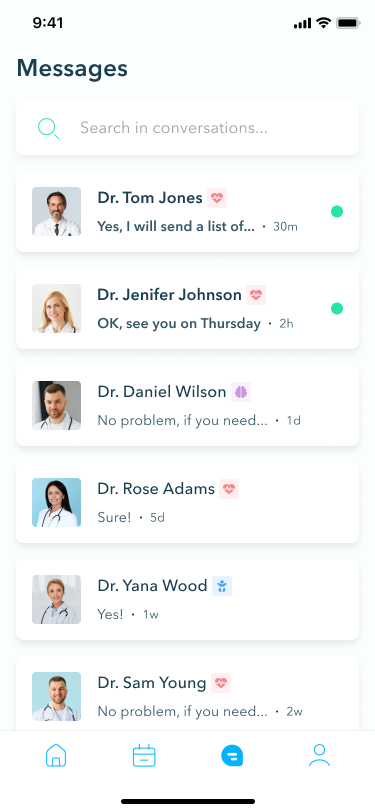
Facilitating effective communication, the messages feature allows users to pose follow-up questions, send documents, and receive prescription information and treatment plans. This ensures a continuous and accessible channel of communication between patients and healthcare providers, enhancing the overall patient experience.
Personal profile
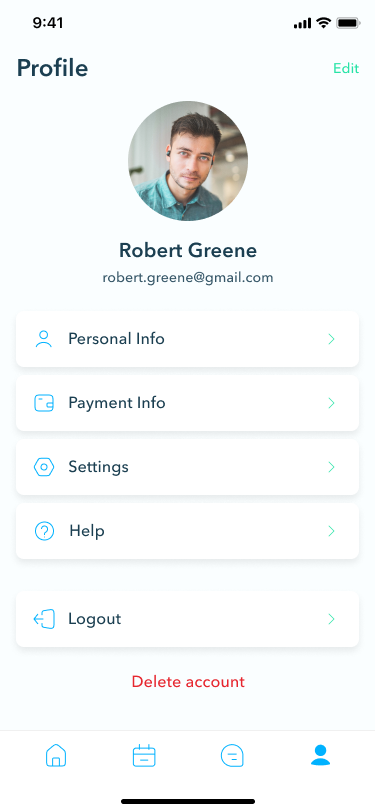
Prioritizing user information and preferences, the personal profile section includes essential parameters such as personal and payment information. Users can easily manage settings, access help resources, and log out or delete their accounts.
My anamnesis
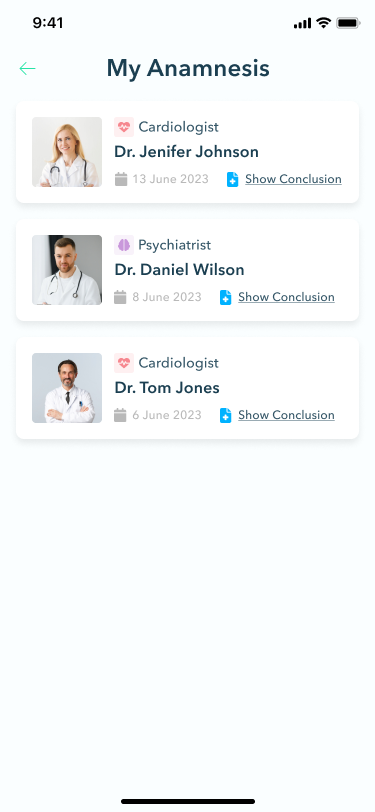
The My Anamnesis section provides users with a comprehensive overview of results and conclusions from previous consultations. This feature ensures that users have vital medical information at their fingertips, promoting continuity of care and informed decision-making.
Doctor’s side
Another user type that will use a telehealth app is health providers, like doctors, who will conduct online consultations. Let’s take a look at what features they will need.
Home screen
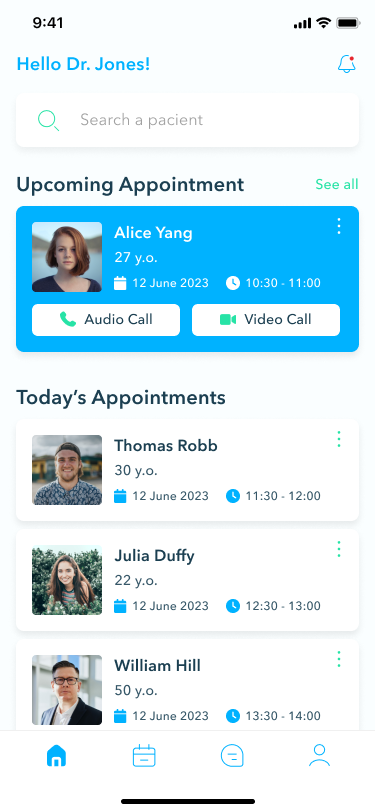
The home screen for healthcare providers displays upcoming appointments and appointments scheduled for the day. This quick overview ensures doctors are well-prepared for their upcoming telemedicine sessions.
Appointments
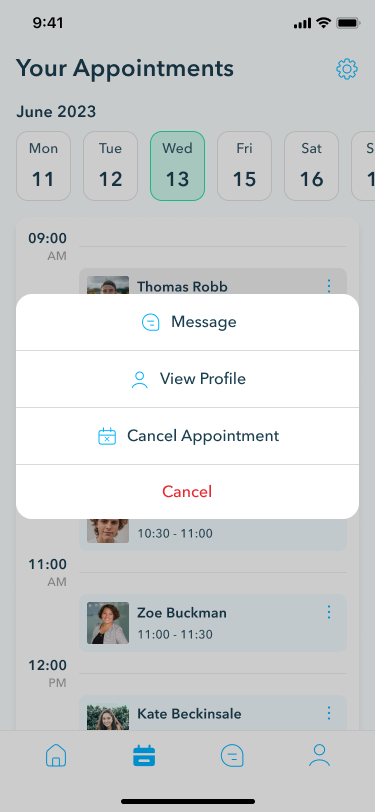
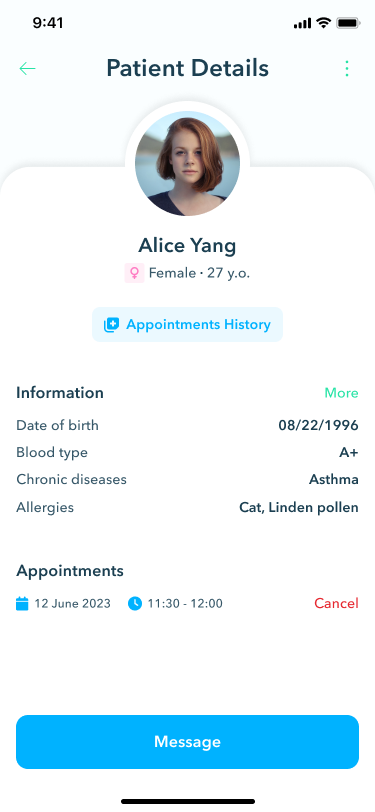
Within the appointments section, doctors can access crucial details such as the date and time of each appointment. This feature also allows doctors to cancel appointments, exchange messages with patients, and view essential patient information, including blood type, chronic diseases, and allergies.
Appointment history
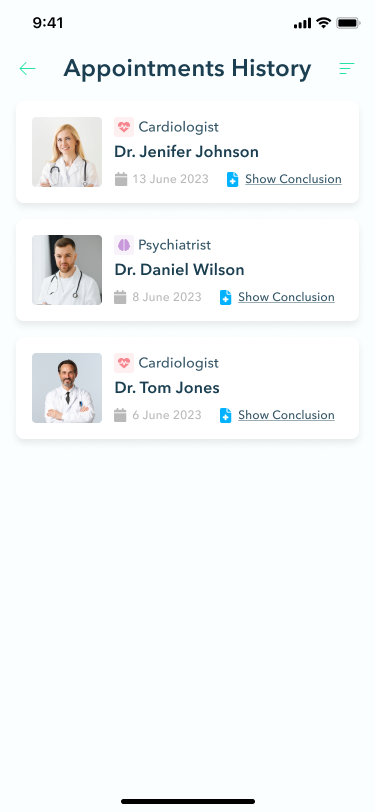
To maintain thorough records, doctors can access the appointment history section. Here, they can add details such as the reason for the appointment, conclusions drawn during the consultation, and prescribed medications. This feature aids in comprehensive patient management and efficient record-keeping.
Patient conclusion
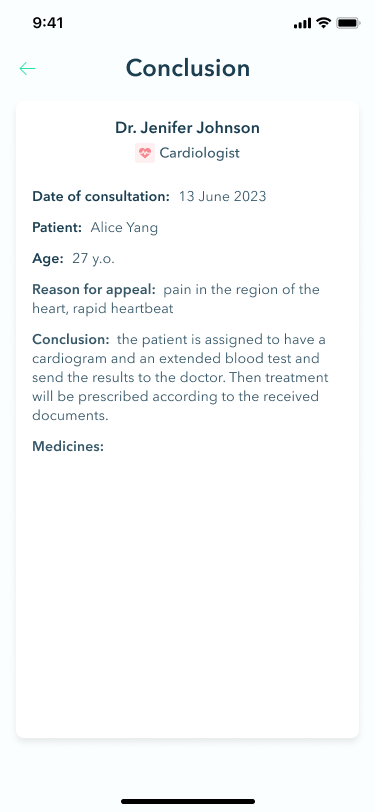
After completing a consultation, doctors can input essential information in the patient conclusion section. This includes documenting the reason for the appointment, summarizing the consultation's findings, and prescribing necessary medications.
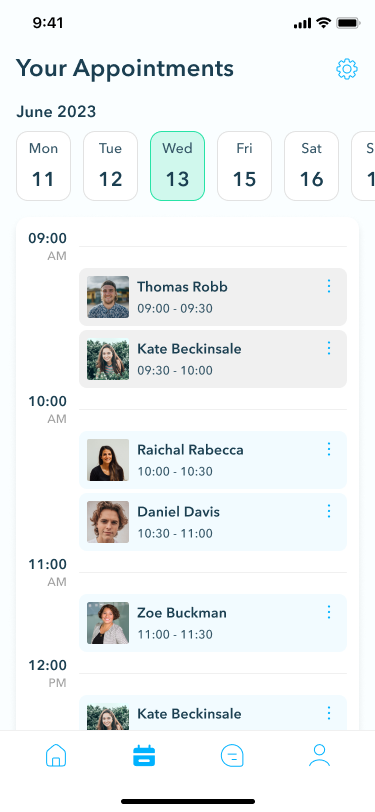
Work schedule
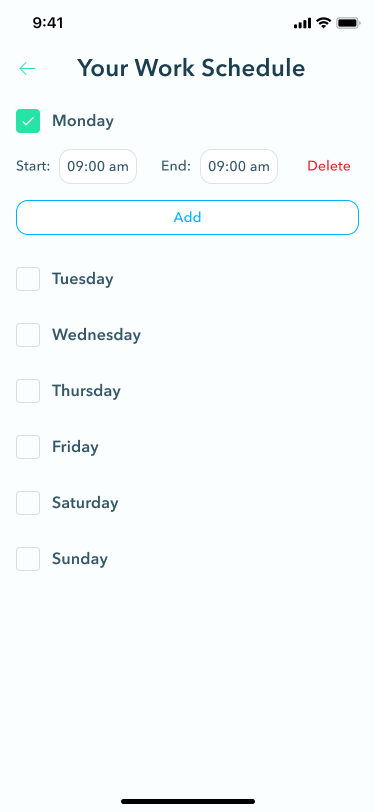
The work schedule feature allows doctors to manage their availability by searching for appointments on specific days. This functionality streamlines the scheduling process, enabling doctors to optimize their time and provide telehealth services more efficiently.
Video and audio call functionality
Same as patients, doctors will definitely need audio and video calls to conduct consultations online.
Messages
Facilitating communication between doctors and patients, the messages feature allows doctors to exchange information, address patient queries, and provide guidance.
Perpetio’s Telemedicine App Case
Perpetio team has recently presented a functional and all-encompassing telehealth solution, utilizing React Native to provide a consistent experience across both iOS and Android platforms. The app incorporates key features to cater to the practical needs of both patients and healthcare providers.

Based on the feature list we discussed above, we implemented all the necessary functionality to make online medical consultations easy and convenient. The key outcomes of our telehealth app work include:
- Cross-platform adaptability: Developed with React Native, our telemedicine app runs on both iOS and Android
- Real-time communication: Integrating Agora's technology facilitates clear audio and video calls
- Secure payment processing: The app seamlessly incorporates Stripe for secure and efficient transactions post-consultation, prioritizing a hassle-free payment process
- User-friendly interface: The app offers patients easy appointment management, access to doctor profiles, and seamless retrieval of medical history
- Comprehensive doctor tools: Healthcare providers can efficiently manage appointments, access patient details, document consultations, and maintain a streamlined work schedule
- Secure messaging system: The messaging feature ensures real-time communication before and after the appointment
All these features resulted in an all-around application that satisfies users on both sides of the screen.
Must-have Integrations for a Telemedicine Application
In crafting a telemedicine app, certain integrations play a crucial role in ensuring a seamless and user-friendly experience for both patients and healthcare providers. At Perpetio, we recommend two key integrations to enhance the functionality and reliability of your telemedicine application.
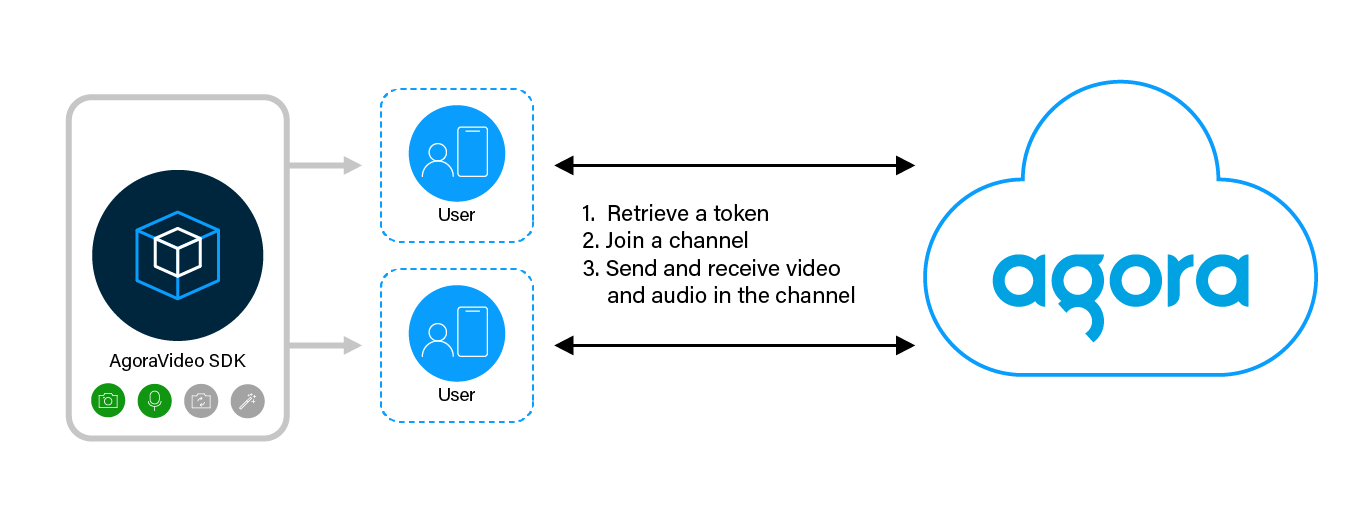
- Agora for audio and video calls:
- Agora integration facilitates high-quality audio and video calls, ensuring patients and doctors can communicate seamlessly during remote consultations.
- Patients can engage in face-to-face consultations with healthcare providers, fostering a sense of connection and trust in virtual appointments.
- The messaging feature ensures real-time communication, allowing patients and doctors to exchange crucial information securely.
- Stripe for payments:
- Patients can conveniently settle consultation fees through various payment methods, enhancing accessibility and convenience.
- The use of Stripe adds an extra layer of security, instilling confidence in patients regarding the safety of their financial transactions.

By incorporating Agora for audio and video calls and messaging, along with Stripe for payments, your telemedicine app can provide a reliable, user-friendly, and secure platform for remote healthcare services.
How to Build a Telemedicine App Step By Step
Let’s now look closer at the development process behind a telemedicine app. Our development team shared the steps they took to build our telemedicine application. Using this example, you can better grasp the tech stack it takes to create a similar solution.
1. Setup Development Environment
Let’s start making the telehealth app by setting up the development environment. Follow these instructions to set up the development environment. It's a React Native CLI project.
2. Clone BitBucked Repository
You should have git installed on your computer, and a BitBucked account with access to the project repository.
Get the Repository URL
- Open your web browser and navigate to Bitbucket
- Locate the repository you wish to clone
- Click on the 'Clone' button, usually found on the top right of the repository page
- A small dropdown will appear, showing the repository's URL. Copy this URL
Clone the Repository
- Open your terminal or command prompt
- Navigate to the directory where you want the cloned repository to be placed
- Run the following command, replacing REPOSITORY_URL with the URL you copied in the previous step: git clone REPOSITORY_URL
All done!
3. Create Firebase, Agora, and Stripe apps
Let’s now take care of all the service integrations and create dedicated apps for them.
Firebase
We will provide the essential steps of setting up Firebase, while you can find more detailed instructions on the Firebase website.
Create a Firebase Project
- Navigate to the Firebase Console
- Click on the "Add project" button
- Follow the prompts to name and configure your project
Add Firebase config to the app
For iOS
- In the Firebase Console, click on "Add App" and select the iOS icon
- Register your app by providing the iOS bundle ID
- Download the GoogleService-Info.plist file
- In Xcode, add this file to the root of your project using "Add Files to telemedicine”
For Android
- In the Firebase Console, click on "Add App" and select the Android icon.
- Register your app by providing the Android package name.
- Download the google-services.json file.
- Place this file in the android/app directory of your React Native project
Use Google sign-in
To use Google Sign In and Sign Up, you also need to generate and add the SHA key to the Firebase console.
Navigate to your project's root directory and execute the following command:
cd android/app
keytool -genkey -v -keystore debug.keystore -storepass android -alias androiddebugkey -keypass android -keyalg RSA -keysize 2048 -validity 10000
This will generate a new debug.keystore file in the android/app directory. You can then copy it to the .android directory:cp debug.keystore ~/.android/
Once you've successfully moved the debug.keystore to the ~/.android/ directory, you can retrieve the SHA-1 fingerprint by using the keytool command:
keytool -list -v -keystore ~/.android/debug.keystore -alias androiddebugkey -storepass android -keypass android
After running the command, look for the line that starts with SHA1. That line will display the SHA-1 fingerprint for your debug keystore, which you can then add to the Firebase Console.
Agora
Same as with Firebase setup, we provide the basic instructions, while you can find more details on chat and video call setup in Agora's documentation.
Create an Agora Project
- Register/sign in to the Agora Console
- Click on the "New Project" button
- Name your project and select the desired authentication mechanism (usually "App ID without a certificate" for testing purposes)
- Note down the App ID—you'll need this later
All done. Let’s now move on to integrating Stripe.
Stripe
You can find detailed documentation for setting up Stripe with React Native on Stripe’s Github.
Create a Stripe Account
- Sign up or sign in to the Stripe Dashboard
- Navigate to the Developers section and click on "API keys"
- Take note of your "Publishable key" for integration
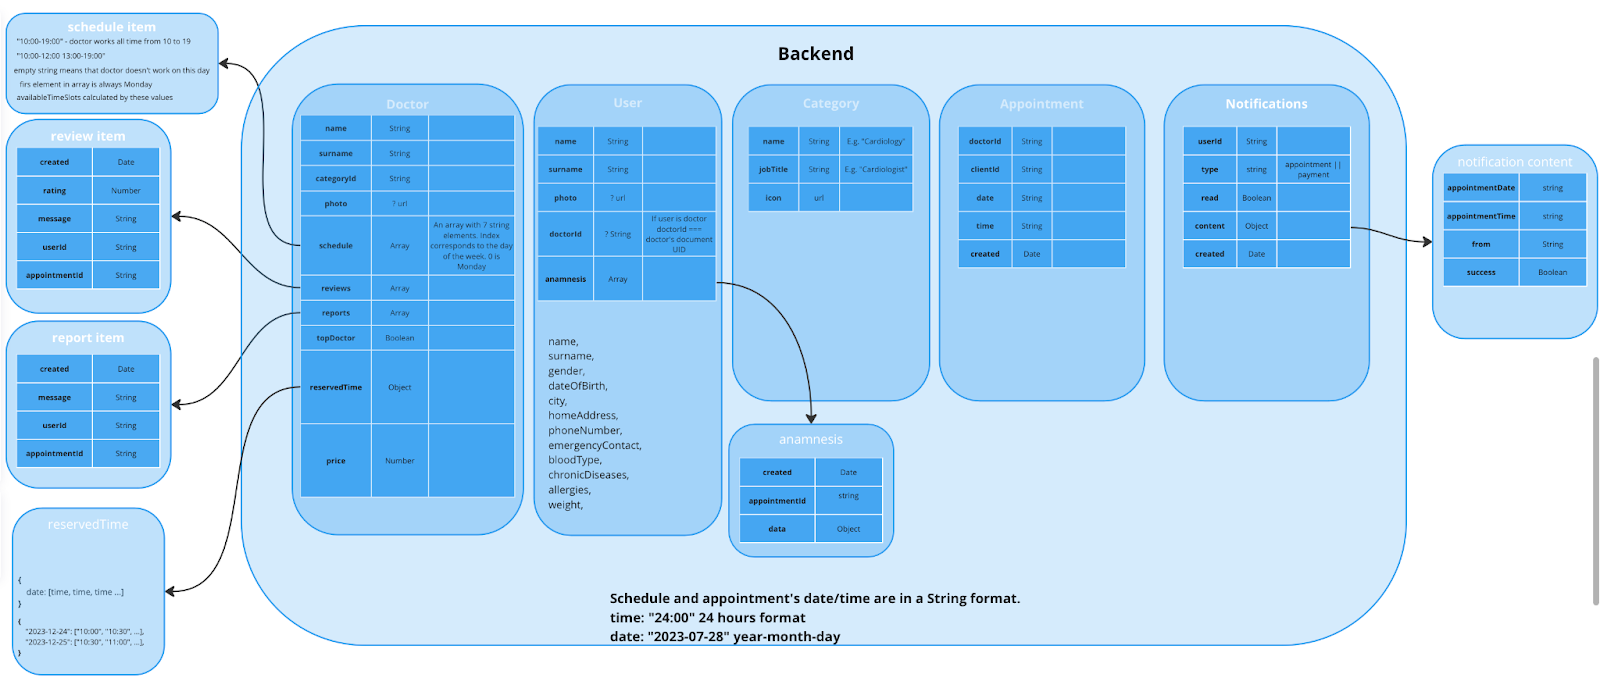
4. Setup Backend Agora and Stripe services
Backend services code is in the same repository. In the folder backend you can find two folders we will need:
- agora-token-server is a backend server for Agora. We use it for generating Agora app and accessToken
- stripe-server is a backend server for Stripe. We use it to create customers, add and delete payment methods, and set a default payment method
In each folder, there are 3 files:
- index.js is a code of a Node.js server
- package.json is the default node js file with dependencies
- .env.example is a file with required environment variables
We will provide our own .env variables, which might not work after some time. You can use them for testing purposes only.
An example of backend .env files
Stripe
Agora
Open https://console.agora.io/ and select the project.
You can now deploy these codes to your hosting. We used the Rainway.app for testing purposes, as it has a free plan.
4. Add environment variables
We will now add the environment variables for each of the services.
Setup
Create a .env file in the root repository of the app (the same level as a package.json file).
Now, add the required environment variables.
Here’s a list of required environment variables (you can find the same list in the .env.example file) :
AGORA_APP_ID
FIREBASE_WEB_CLIENT_ID
AGORA_TOKEN_SERVER
AGORA_API
AGORA_ORG_NAME
AGORA_APP_NAME
AGORA_APP_KEY
STRIPE_PUBLISHABLE_KEY
STRIPE_SERVER_URL
FIREBASE_MESSAGING_SENDER_ID
FIREBASE_SERVER_KEY
Where to get these variables
Let us share where to find each of the variables.
Agora
Open https://console.agora.io/ and select the project.
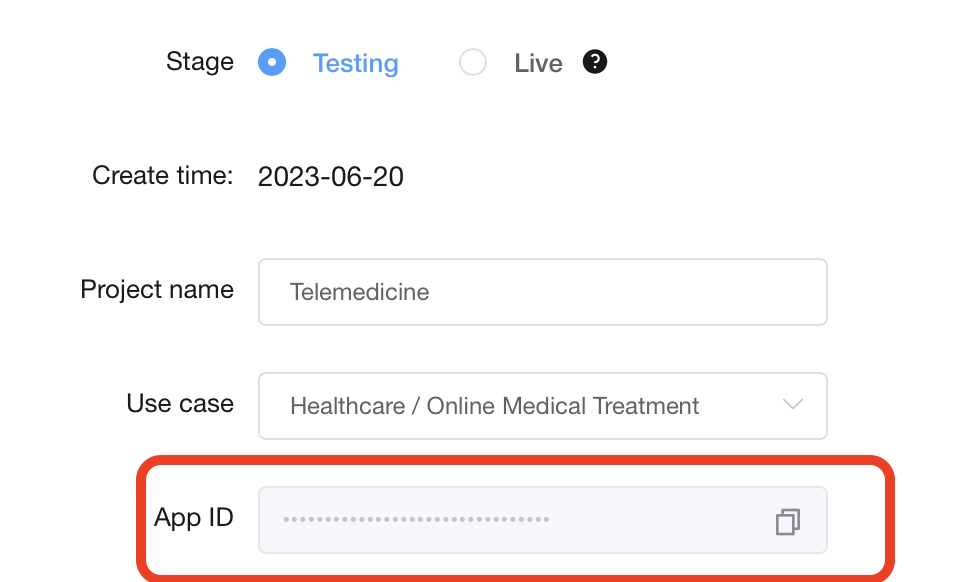
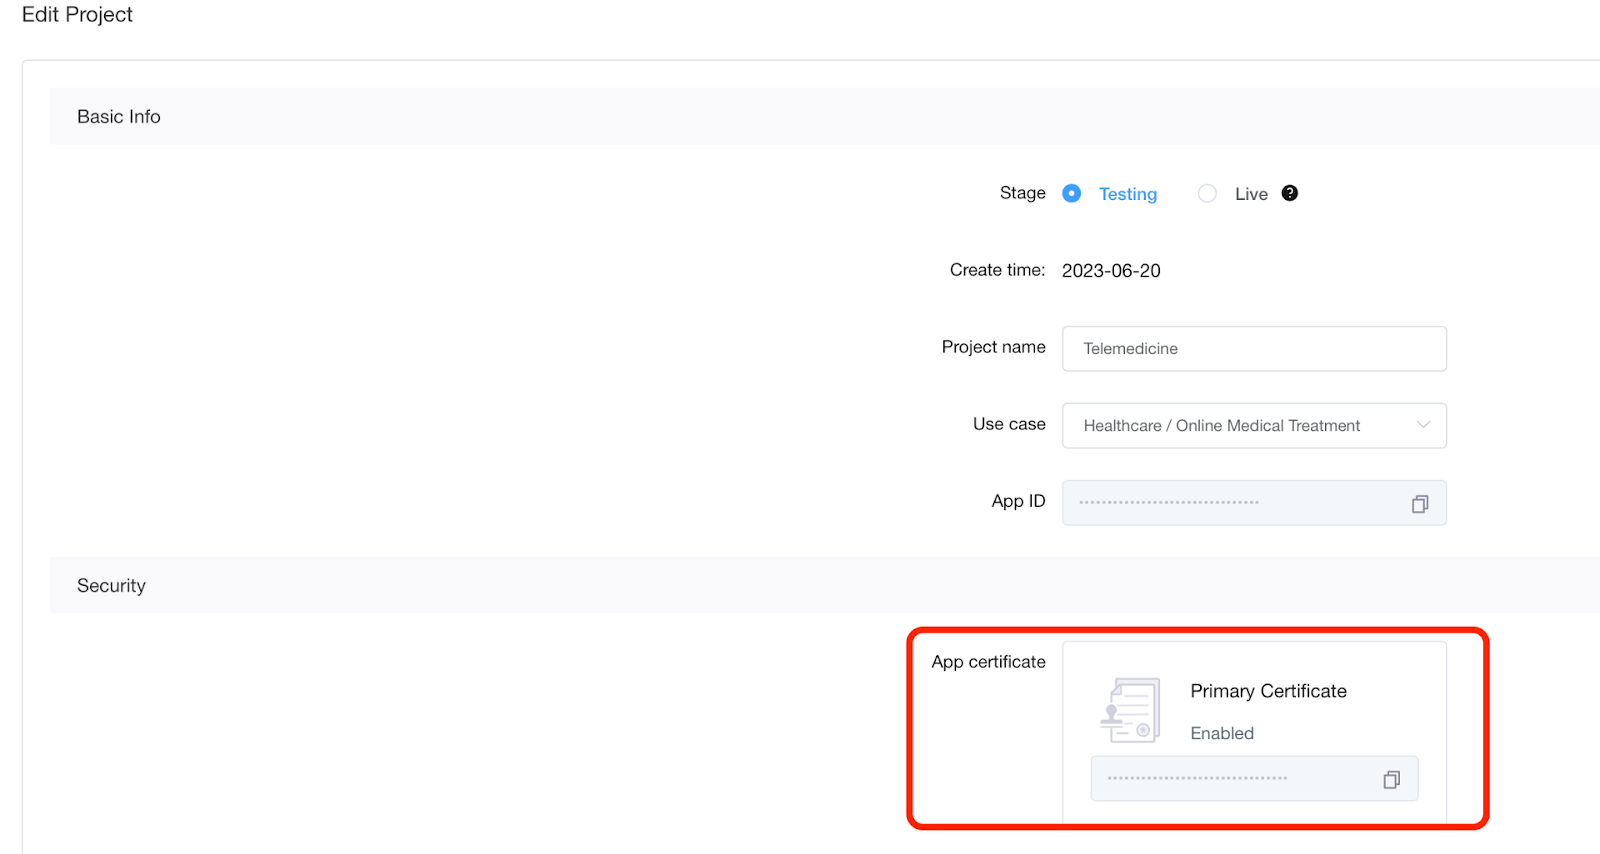
AGORA_APP_ID
You can find it on the main page of the Agora project.
AGORA_TOKEN_SERVER
This is the URL of the server where your Agora Token Server hosts
AGORA_API
This is the Agora REST API URL. You can find it in the Project Details => Chat Section.
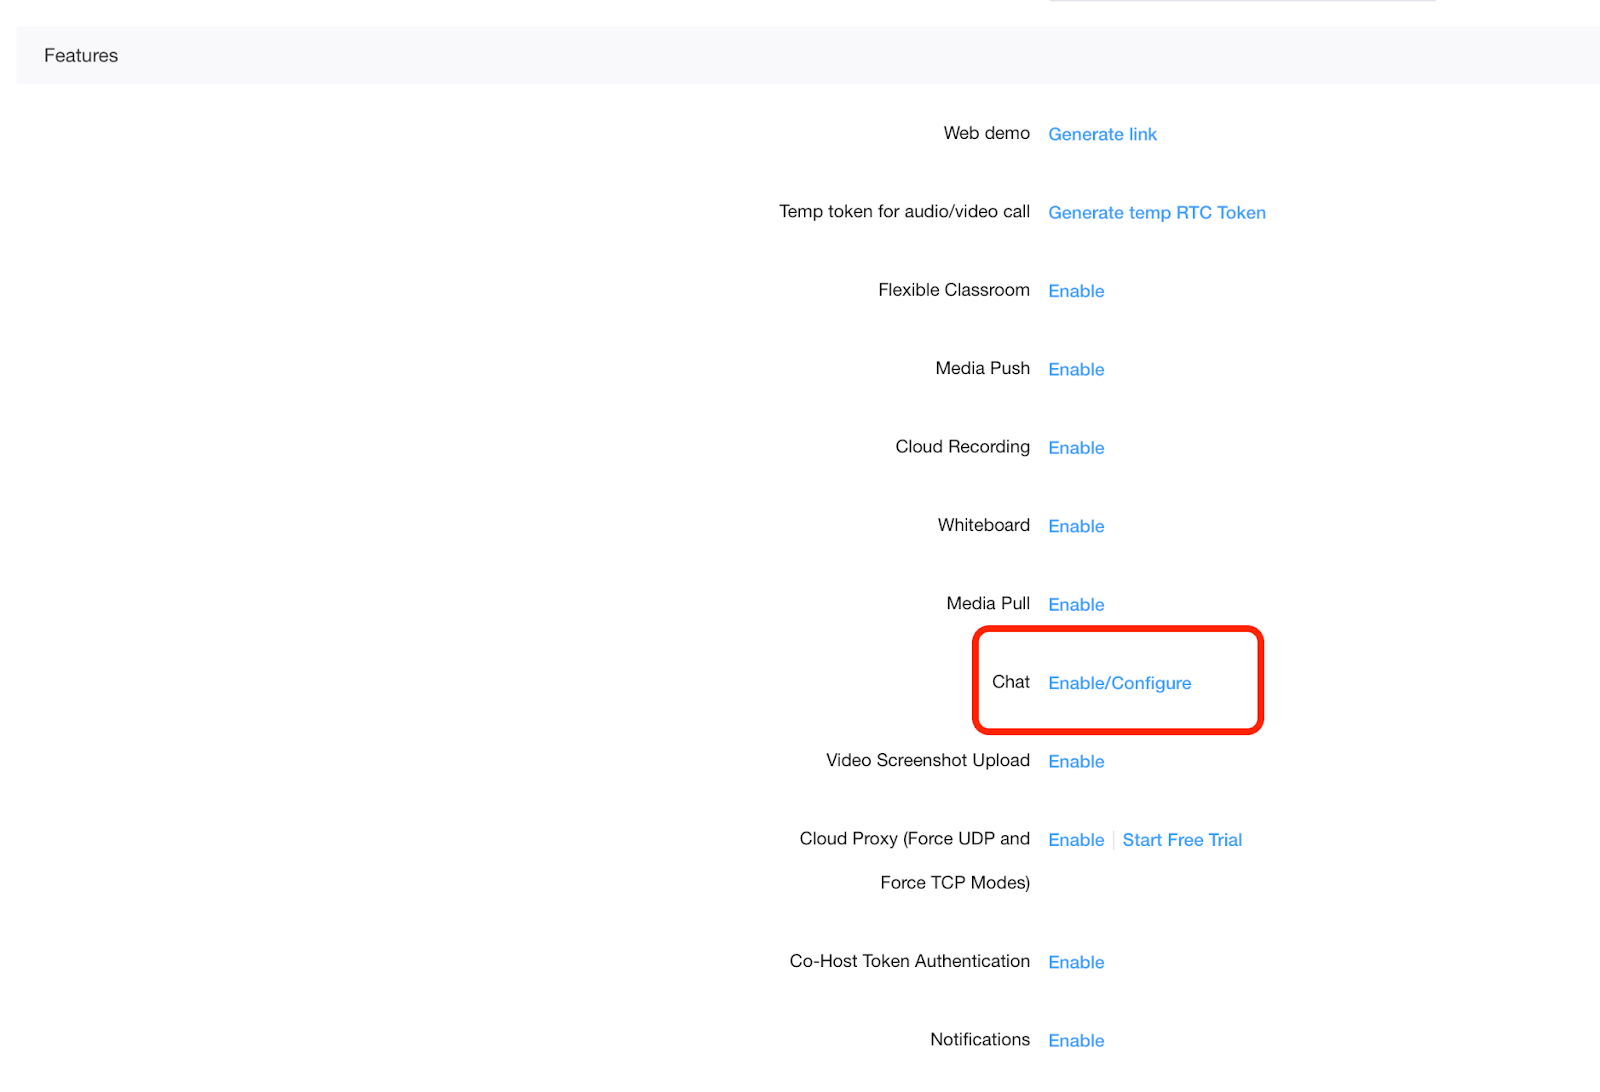
AGORA_ORG_NAME
This variable can be found on the same page as the AGORA_API. This value is in the Chat Service Status section under the OrgName property.
AGORA_APP_NAME
You can find this variable on the AGORA_API’s page too. This value is in the Chat Service Status section under the AppName property.
AGORA_APP_KEY
On the same page as the AGORA_API. This value is in the Chat Service Status section under the AppKey property.
Firebase
Now, let’s focus on Firebase variables.
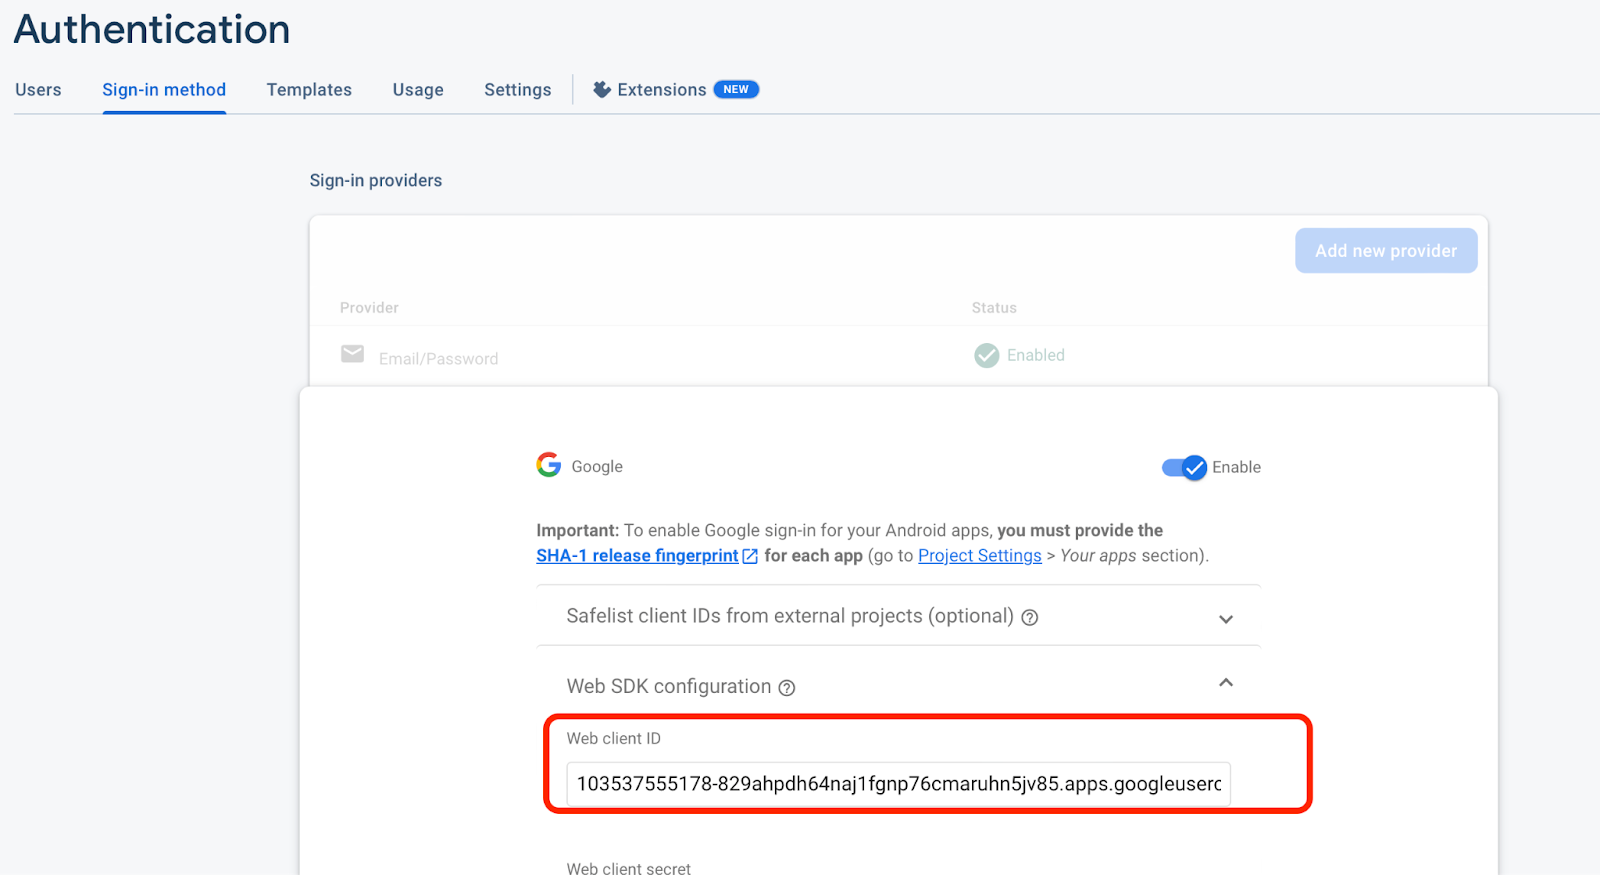
FIREBASE_WEB_CLIENT_ID
In the left-hand sidebar, go to Authentication. Then click on the Sign-in method tab. Here, find and click on Google in the list of sign-in providers. In the form that appears, the Web client ID is your FIREBASE_WEB_CLIENT_ID.
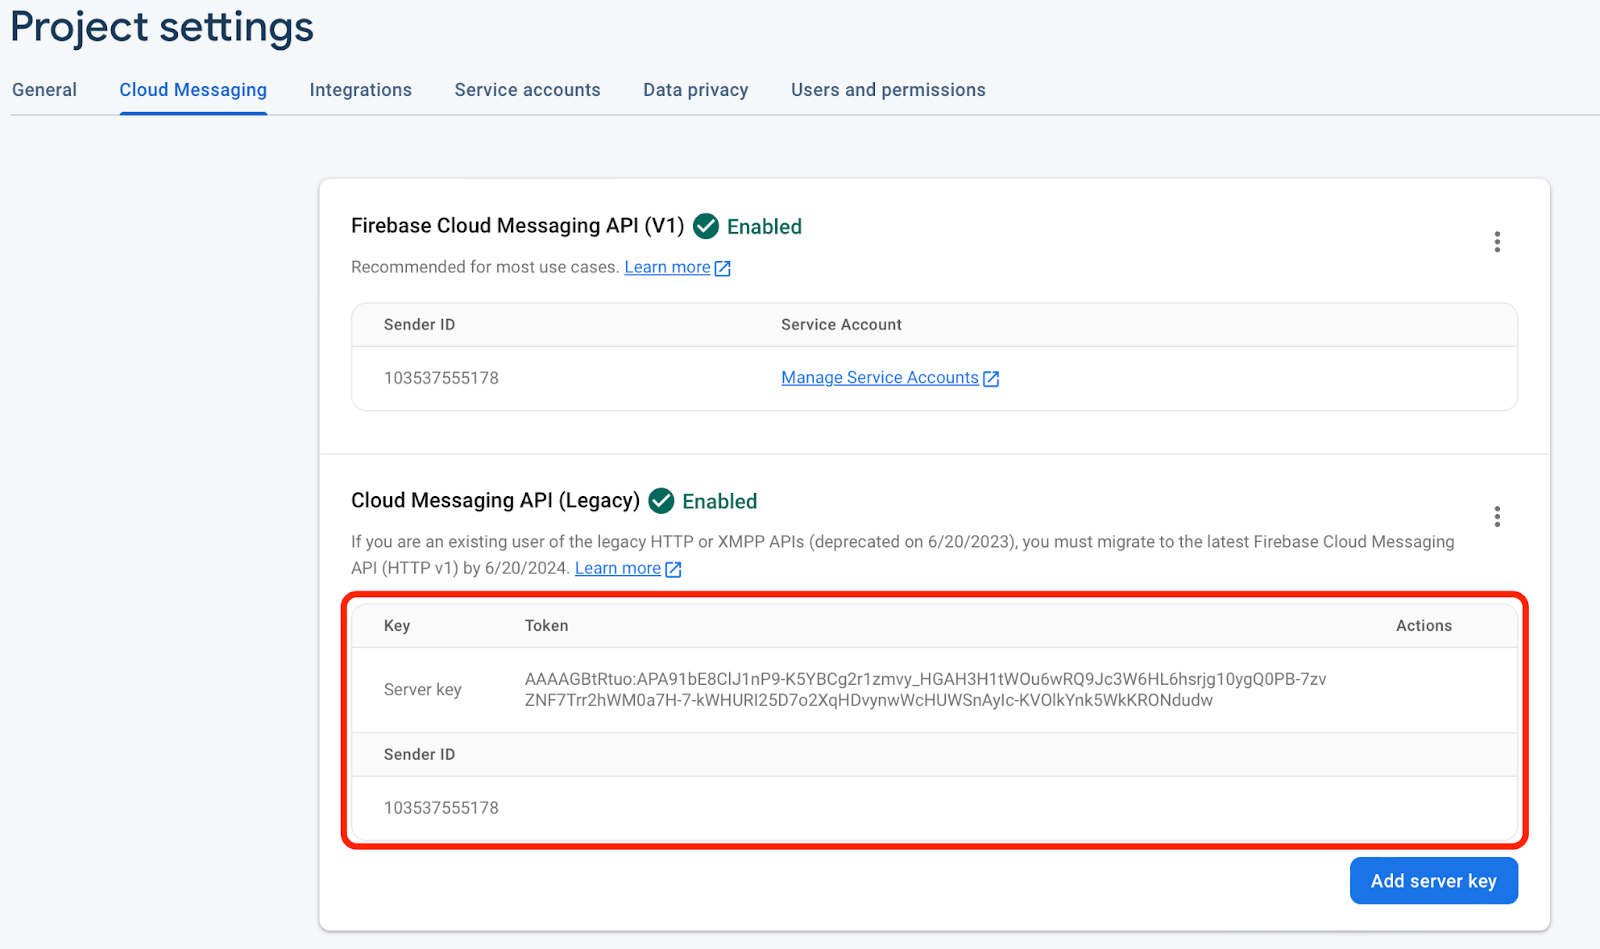
FIREBASE_MESSAGING_SENDER_ID
In the left-hand sidebar, click on the gear icon (⚙️) next to Project Overview and then select Project Settings. Go to the Cloud Messaging tab. Here, you'll see a Sender ID value. This is your FIREBASE_MESSAGING_SENDER_ID.
FIREBASE_SERVER_KEY
the left-hand sidebar, click on the gear icon (⚙️) next to Project Overview and then select Project settings. Go to the Cloud Messaging tab. Here, you'll see a Server key value. This is your FIREBASE_SERVER_KEY.
Stripe
Our last task with environment variables is setting up the Stripe ones.
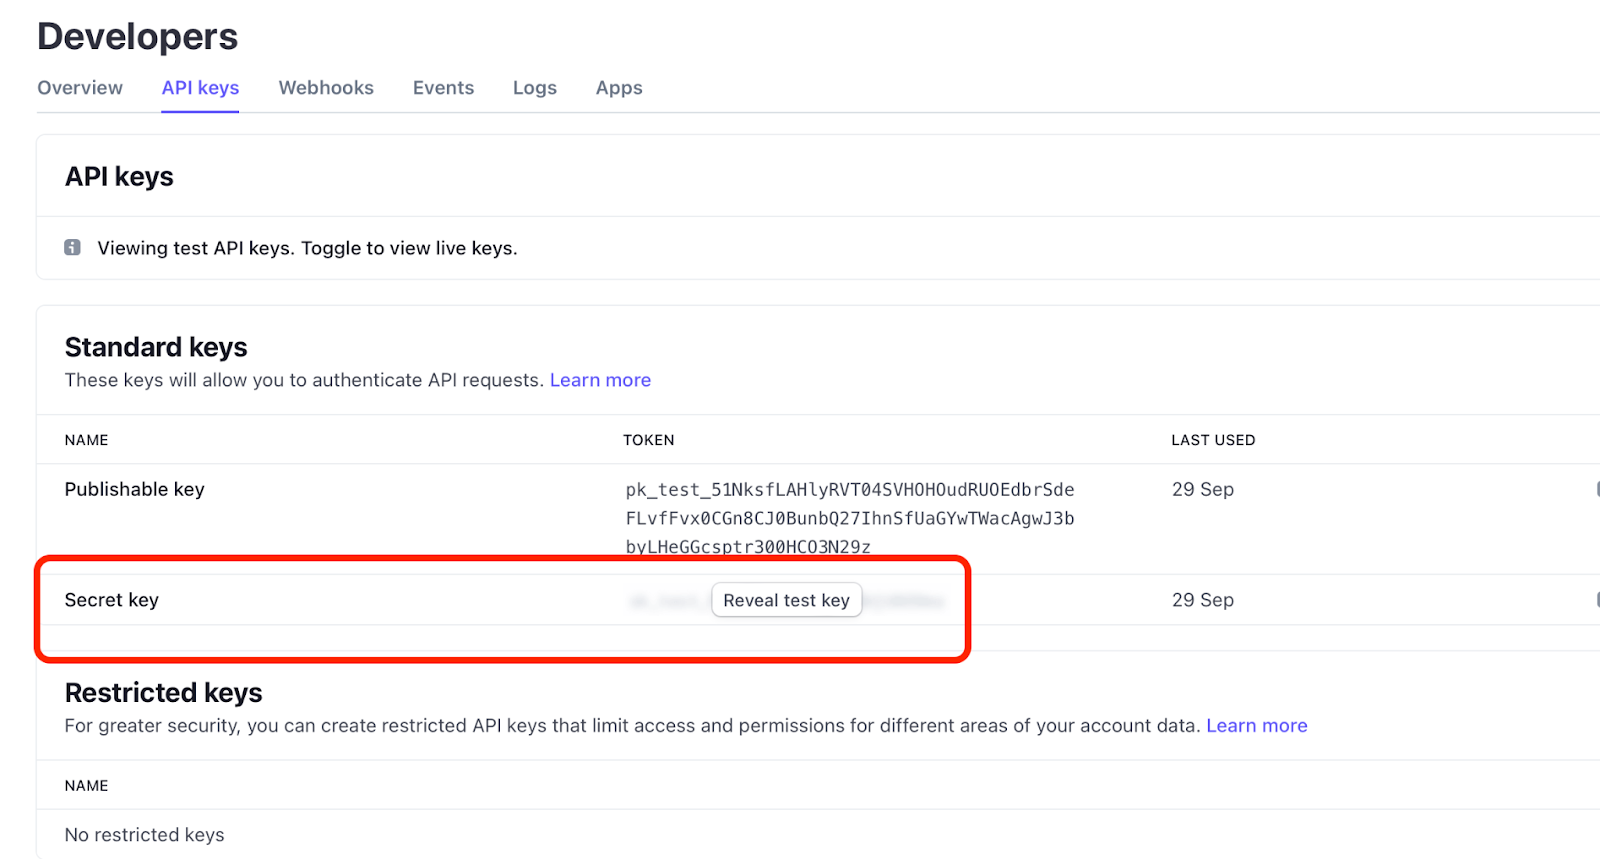
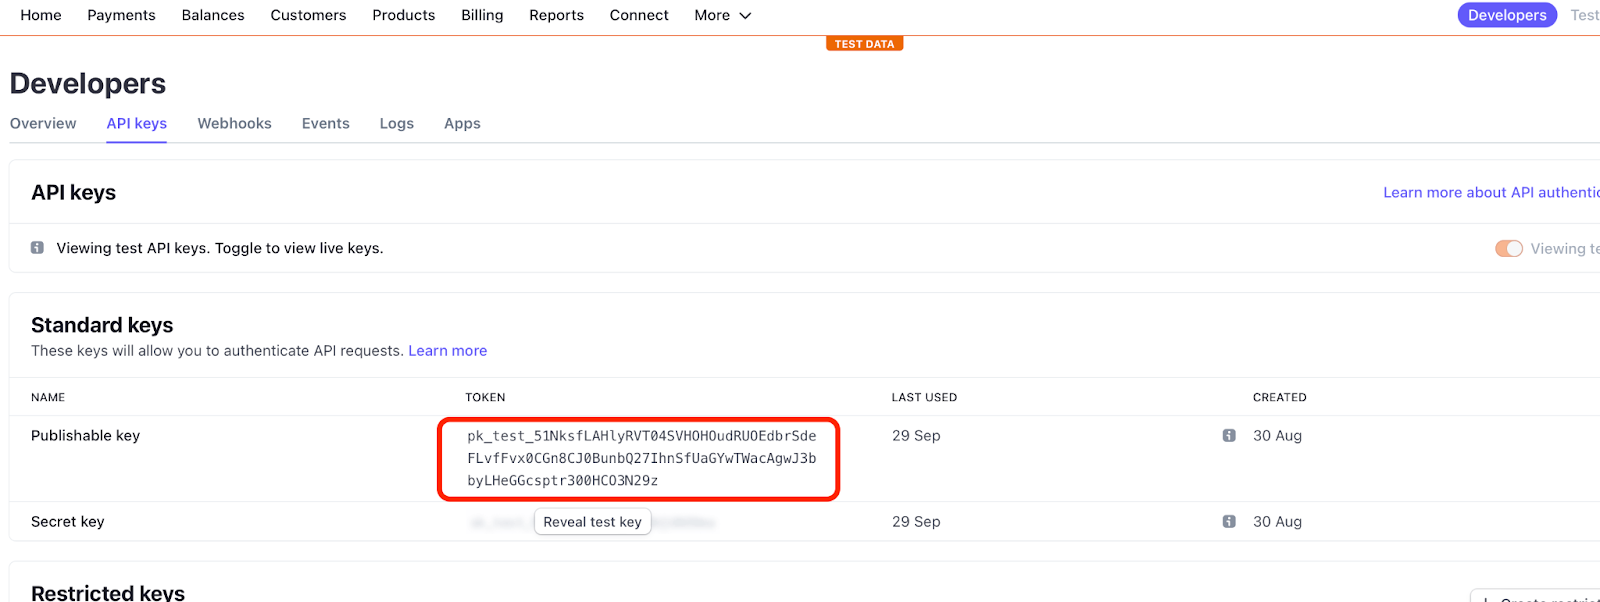
STRIPE_PUBLISHABLE_KEY
Login to your Stripe Dashboard. In the left sidebar, click on "Developers." Then, select "API keys." Here, you'll see two keys for your account: the Publishable key and the Secret key. The Publishable key is your STRIPE_PUBLISHABLE_KEY.
STRIPE_SERVER_URL
This is the URL of the server where your Stripe server hosts are.
5. Install React Native Dependencies
After all the previous steps, you can install project dependencies. You can do it in the root folder of the repository, just run the npm install command in a terminal. This command will install npm dependencies.
After this, go to the ios folder using the cd ios command.
You are in the ios folder of the project. Run the pod install command to install the pod dependencies.
Done. Dependencies installed, you can back to the main folder now and run the app.
6. Run iOS and Android application
Let’s now run the iOS and Android application simulators to check their work.
Running an iOS simulator
Before running the simulator, ensure you have Xcode installed, as it provides the iOS Simulator.
There are a few options for running the iOS simulator. You can run it right from the terminal, but you can face the issue that the terminal can’t find an IOS simulator, which sometimes happens on newer Macs with M1 and M2 cores. You can also run the app from Xcode.
To run the app from the terminal, run npx react-native run-ios in the project's root directory.
To run it using Xcode, open the telemedicine.xcworkspace file in Xcode. This file is placed in the IOS folder of the project.
In the terminal, run npm start to start a Metro server. It will connect your app to a development server and will help to update it after each change.
After you run the Metro, start the app from Xcode.
Running on an Android simulator
Same as with IOS, you can run it directly from a terminal or from Android Studio. You can use npx react-native run-android to run an Android emulator from the terminal.
Alternatively, you can open the Android folder of the project in the Android Studio and wait for Gradle sync.
Now, run npm start in a terminal and then run the app in the Android Studio.
7. Build the app to publish it on the markets Apple Store and Google Play
In this step, we will prepare our iOS and Android apps for the
For iOS (App Store)
Prepare for the App Store
- Ensure you have an Apple Developer Program membership
- Set up an App ID and provisioning profile in the Apple Developer Center
- Create an app listing in App Store Connect
Open the iOS project in Xcode
- Navigate to your React Native project's iOS directory and open the .xcworkspace file
Archive the app
- Select the "Product" menu in Xcode and then "Archive"
- Once archiving is complete, the Organizer window will open
Distribute the app
- In the Organizer, select the most recent archive, then click "Distribute App"
- Choose "iOS App Store" and follow the prompts to sign and upload your app
Submit for Review
- Once your app is uploaded, go back to App Store Connect to finalize details and submit your app for review
Just like that, our iOS telehealth app is now submitted for publishing on the App Store.
For Android (Google Play Store)
You can refer to the Android’s official instructions for more details on each app submission step. We are providing a short explanation of the process.
Prepare the Key Store
- Android requires you to sign your app with a private key before uploading to the Play Store. If you don't already have a key store, generate one using the keytool command:
keytool -genkeypair -v -keystore my-release-key.keystore -alias my-key-alias -keyalg RSA -keysize 2048 -validity 10000
Configure Gradle to Sign the App
- In your React Native project's Android folder, edit the gradle.properties file to include your key store and alias information:
MYAPP_RELEASE_STORE_FILE=my-release-key.keystore
MYAPP_RELEASE_KEY_ALIAS=my-key-alias
MYAPP_RELEASE_STORE_PASSWORD=your_store_password
MYAPP_RELEASE_KEY_PASSWORD=your_key_password
Build the Release APK
- You can generate apk from a terminal or generate a bundle from Android Studio
- To generate an apk from a terminal, navigate to your React Native project's android directory in the terminal and run ./gradlew assembleRelease. This will generate a signed APK at the following location: android/app/build/outputs/apk/release/app-release.apk
- To generate a bundle file from the Android Studio, open Build/Generate Signed Bundle / Apk and click Next
Prepare for the Play Store
- Ensure you have a Google Play Developer account
- Create a new app listing in the Google Play Console
Upload the APK
- In the Google Play Console, go to your app's listing and navigate to the "Release management" section. From there, you can upload your APK and fill out any required information
Submit for Review
Once everything is set up and your APK is uploaded, you can submit your app for review.
After the Android team evaluates your app, it will be published on the Play Store.
8. Create a Doctor account
Before presenting our app to the audience, a separate account for doctors should be created. As you remember, we separated the app’s functionality into patient and doctor sides.
To create a Doctor account, you need to register as a regular user first. Then, add a doctor's document to the doctor's collection in the Firestore. Fill in the required fields only, such as name, surname, price, and category.
After you create a doctor user, copy the UID of the document and add it to the created user document under the doctorID property. Done! The next time the user logs in, the app will log the user in as a doctor.
How Much Does it Cost to Make a Telemedicine App
When it comes to building a telemedicine app, it's not a one-size-fits-all situation. The features you want, like basic functions or more advanced things like instant chats and secure data, affect the price. How the app looks and whether it works on both iOS and Android also play a part in the budget.
A basic telemedicine app with essential features as we described above might be around $20,000 to $30,000. But, if you want custom designs and extra features, it might take more time and cost more.
At Perpetio, we're all about being clear about costs. We want to understand your project and give you an estimate that fits your goals. If you're curious about the cost of your telemedicine app, just reach out to us. We'll give you a free estimate to help you plan.
Consider Perpetio Your Trusted Partner
Creating a telemedicine app is a journey, and you need a buddy who knows the way. That's where Perpetio comes in. We're not just tech experts; we're here to be your partner who considers effective UI/UX design solutions, monetization strategies, promotion ideas, and scaling-up methods.
Every project is different, and we get that. Contact us, and let's create a telemedicine app that is equally convenient for patients and doctors.